How to Integrate Sliplane MCP Server with Codex
 Atakan Öztarak
Codex is a powerful agentic coding tool that lives in your terminal. It's fast, efficient, and now... it can deploy your apps.
By integrating the Sliplane MCP Server, you can turn Codex into a full-stack DevOps engineer. No more context switching to the browser to check logs or deployments. Just tell Codex what to do.
What You Can Do
With Sliplane and Codex, you can ship features and fix bugs without ever leaving your terminal.
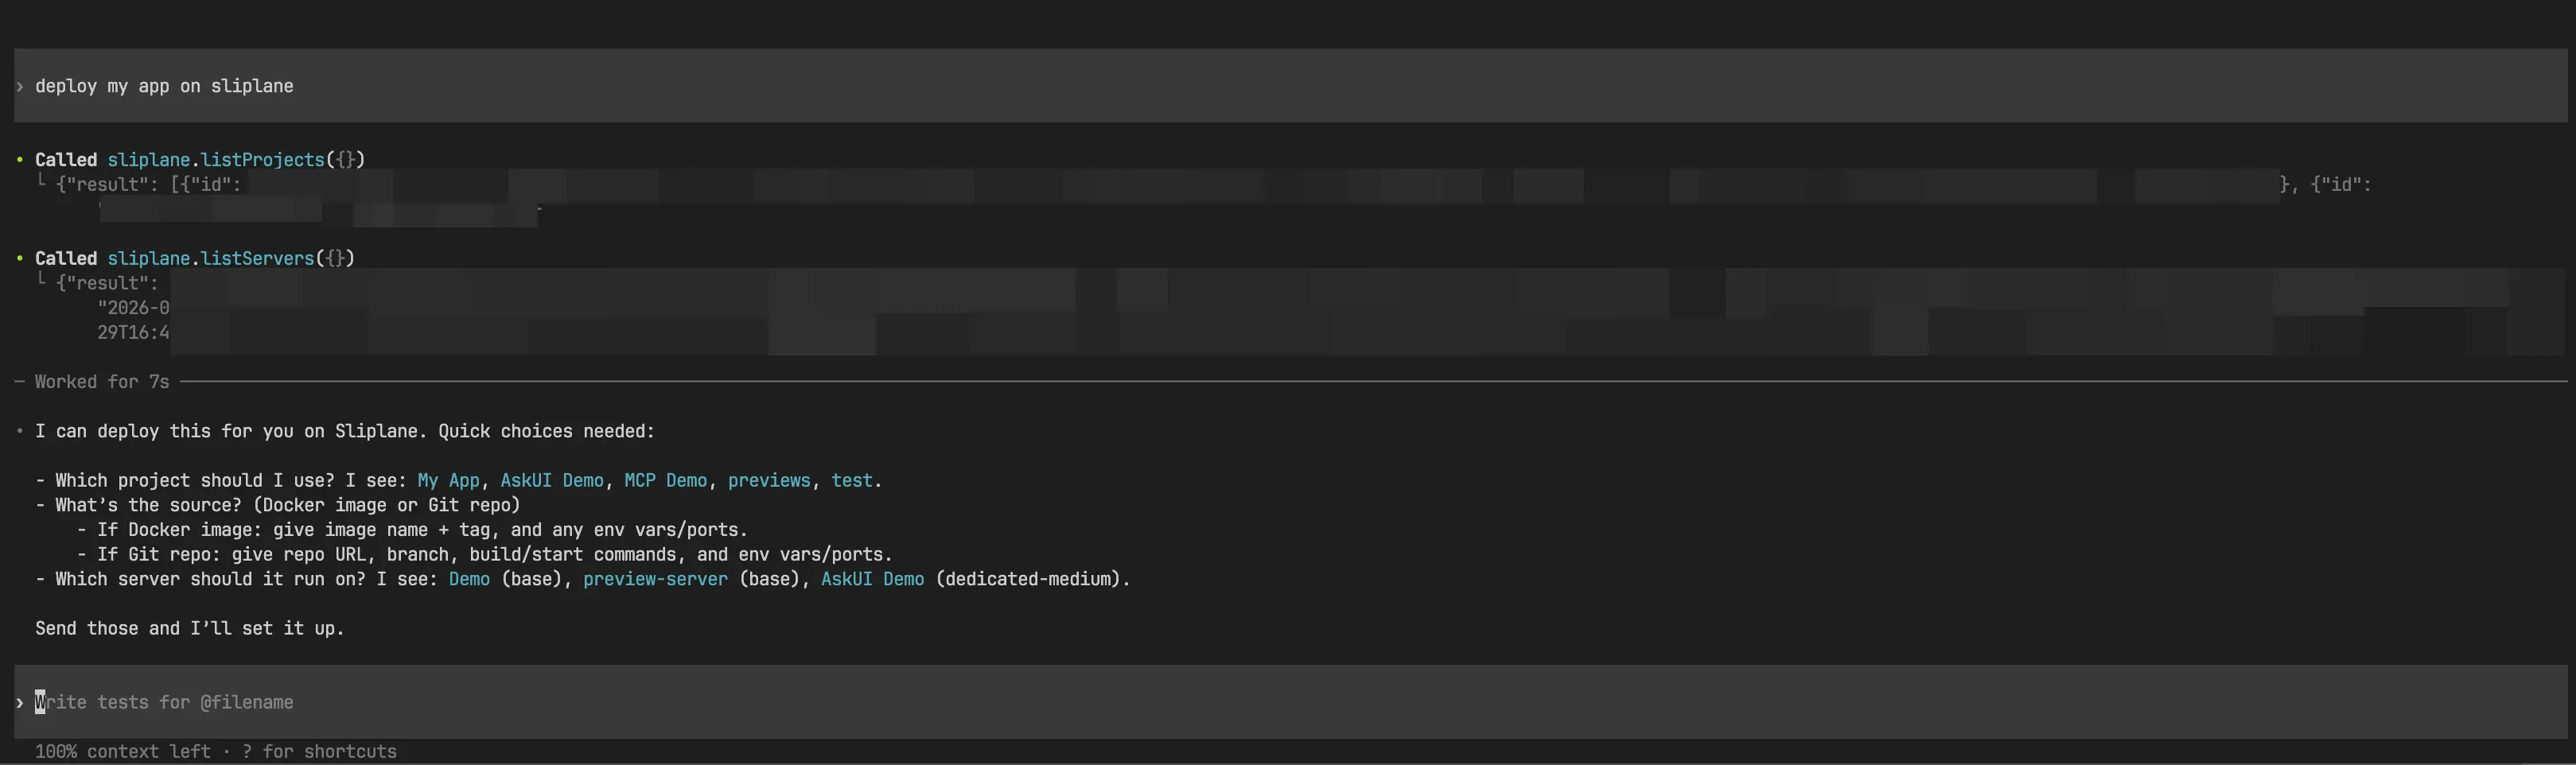
Deploy changes instantly: Just ask Codex to deploy the current directory, and it handles the rest.
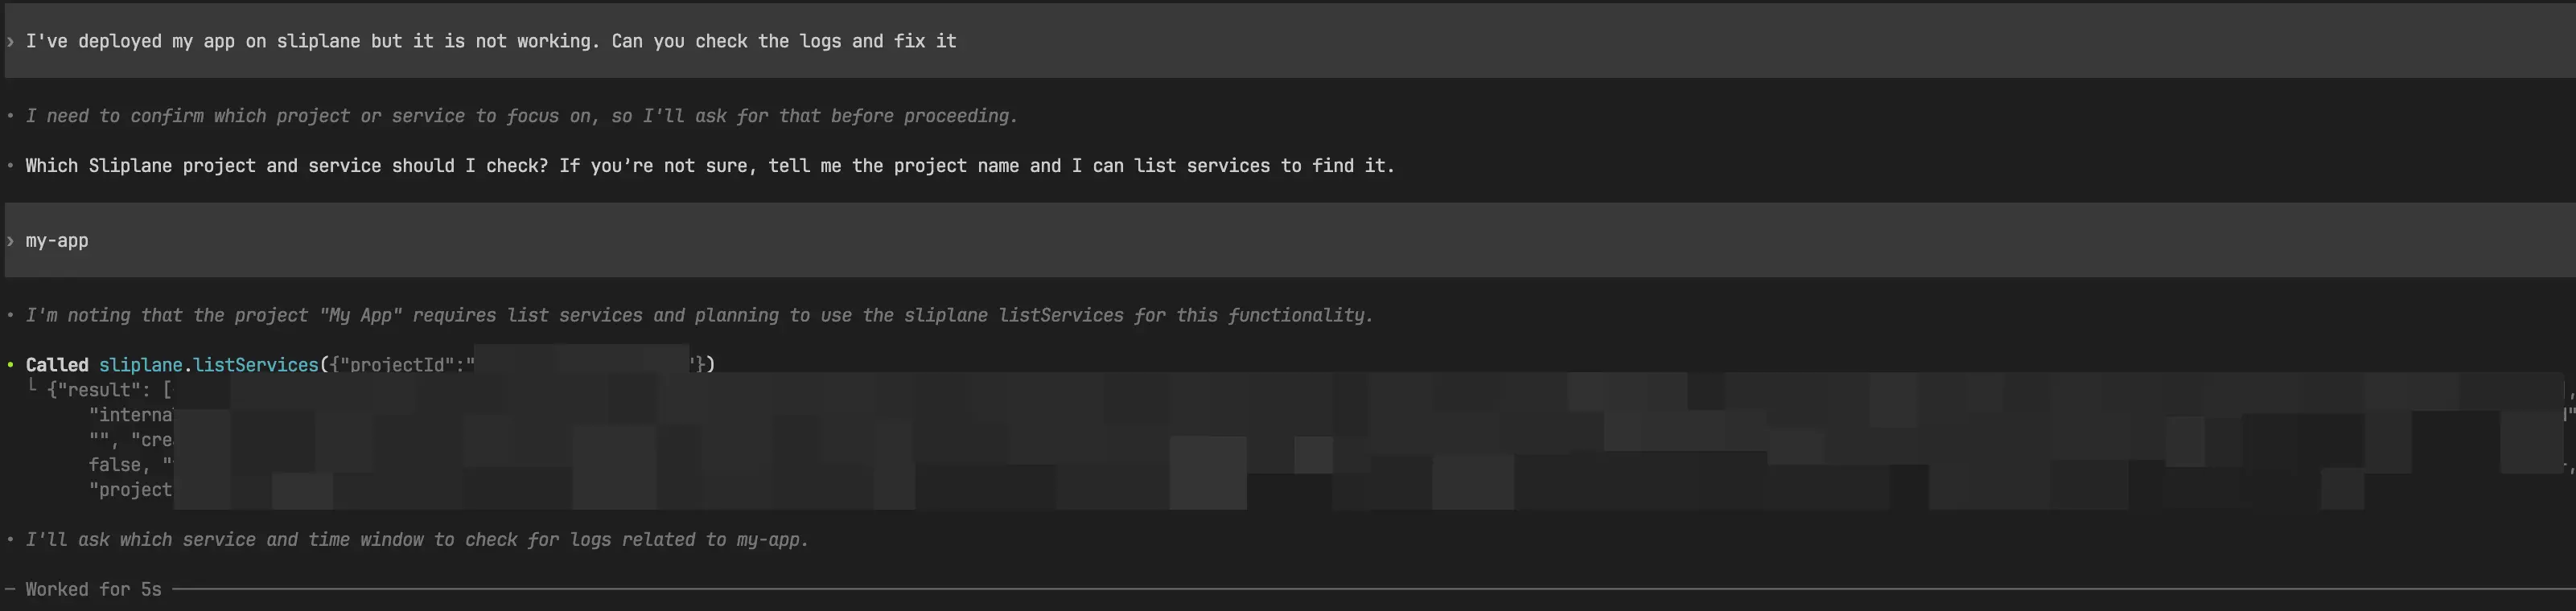
Debug live issues:
"My app is failing, check the logs on Sliplane and fix the bug."
The agent can read your production logs, identify the error, write the fix, and redeploy it. It's the ultimate vibecoding workflow.
Warning: LLMs can make mistakes. Always double-check what the agent is doing and verify the plan before approving any actions.
Step 1: Get Your API Key
To connect Codex to your Sliplane account, you need an API Key.
- Log in to your Sliplane dashboard.

- Navigate to your Team Settings. Then, click on Team in the left sidebar.

- Navigate to the API tab, then click on the Create API Key button.

- After you give a name to your API Key, click on the Create Api Key button.

- Copy the API Key. Make sure to save it safely, as you won't be able to see it again.
- Add the MCP server to Codex.
Step 2: Configure Codex
Now, you need to add the Sliplane MCP server to Codex. Since Codex runs in your terminal, we can configure it with a single command.
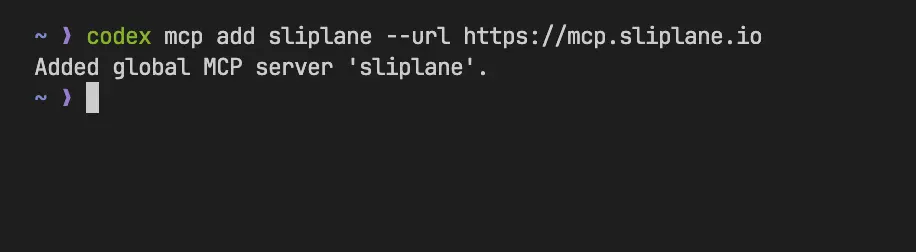
Run this command in your terminal:
codex mcp add sliplane --url https://mcp.sliplane.io
This will prompt you to enter your configuration. If you prefer or need to edit the configuration manually, you can open the config file:
nano ~/.codex/config.toml
Ensure your configuration includes your API Key header correctly.

Step 3: Verify Installation
After running the command, you can verify that the server was added successfully.
- Run
codex mcp listin your terminal to see all active MCP servers. - You can also check the status directly within a session. Type
/mcpin the session. You should see Sliplane listed as an active server.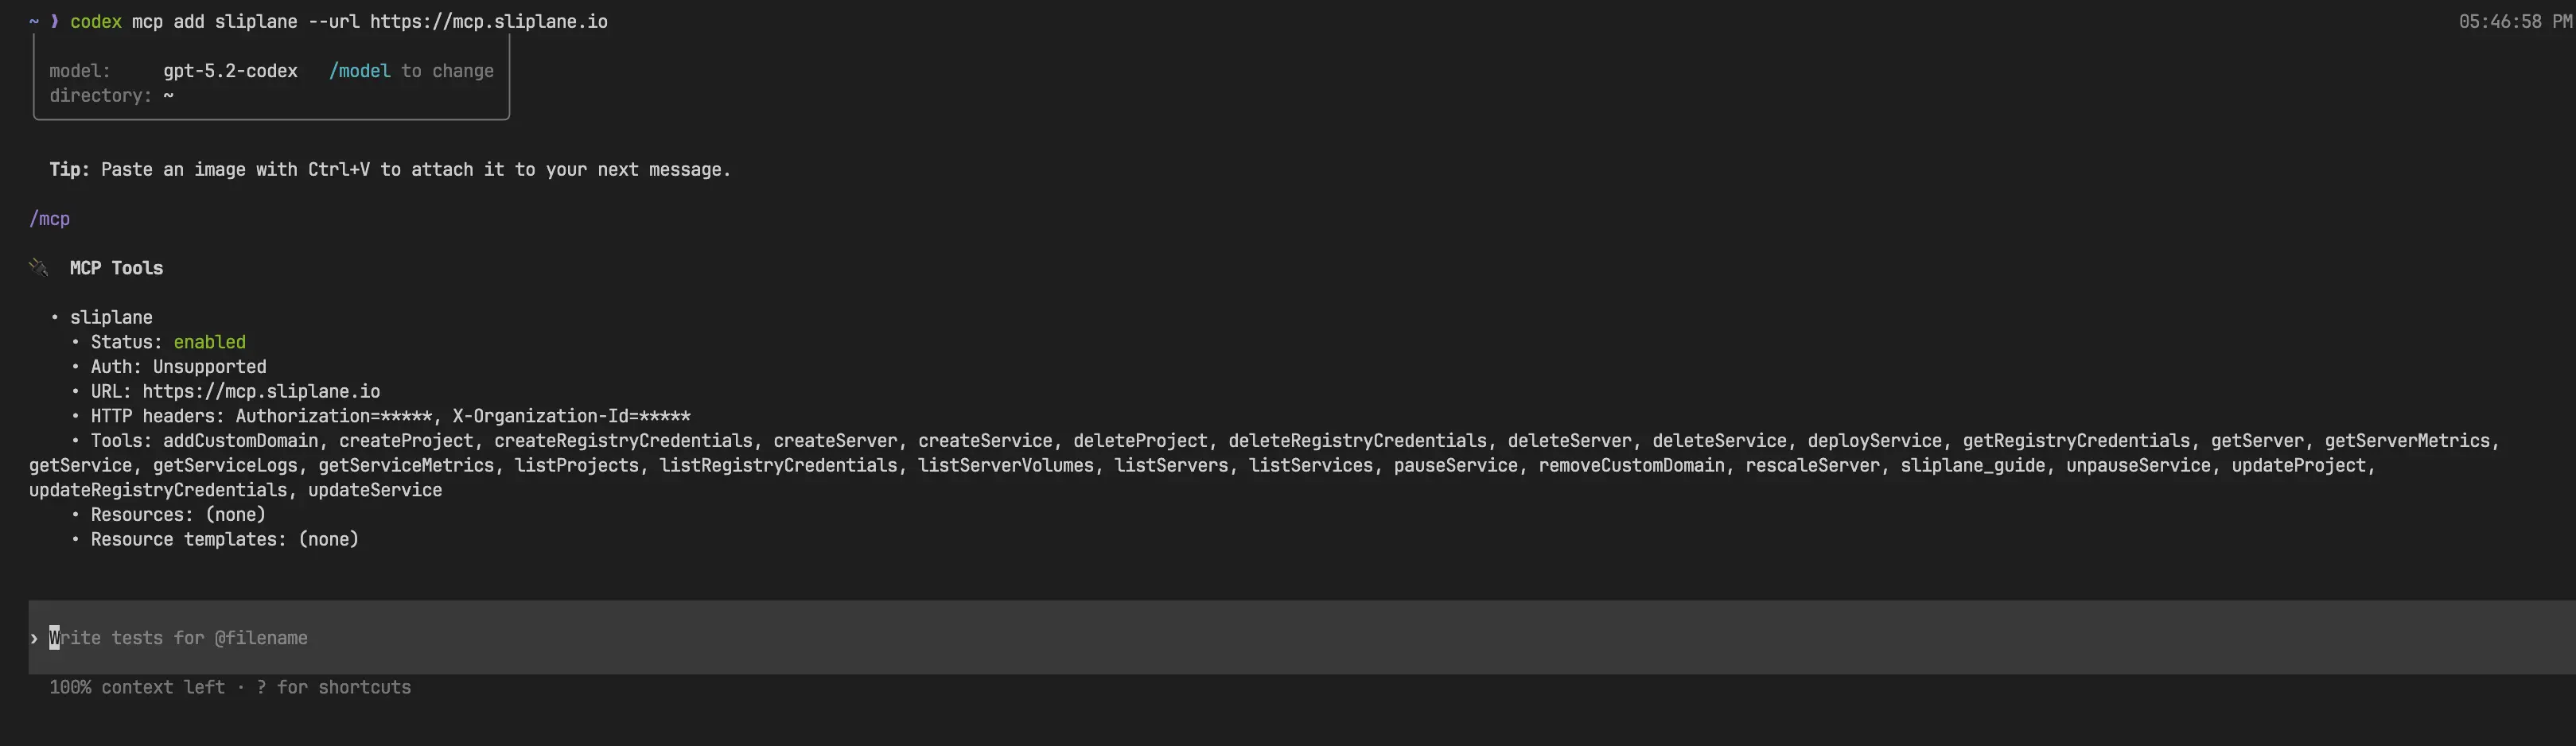
Step 4: Start Chatting
Once added, the tool is immediately available. You can verify it by asking:
"List my Sliplane tools"
Or just start deploying:
"Deploy this project to Sliplane"
Conclusion
You've just unlocked a powerful new workflow. With Codex and Sliplane, you can build, debug, and deploy faster than ever before.
Happy vibecoding!
Cheers,
Atakan