How to Integrate Sliplane MCP Server with Antigravity
 Atakan Öztarak
As AI agents become more powerful, Vibecoding is taking over. You just want to build cool apps and ship them, not spend hours wrestling with Dockerfiles, SSH keys, or server configs.
The Model Context Protocol (MCP) changes the game. It lets your AI agent (like Antigravity) talk directly to Sliplane to deploy your apps for you.
In this guide, I'll show you how to set up the Sliplane MCP Server so you can just tell your agent: "Here is my code, deploy it."
What You Can Do
Forget about manual deployments. With this integration, you can stay in your flow and let the agent handle the boring stuff.
Just "Vibe Code" your infrastructure: You don't need to know how to write a compose file. Just ask:
"Deploy this app for me"
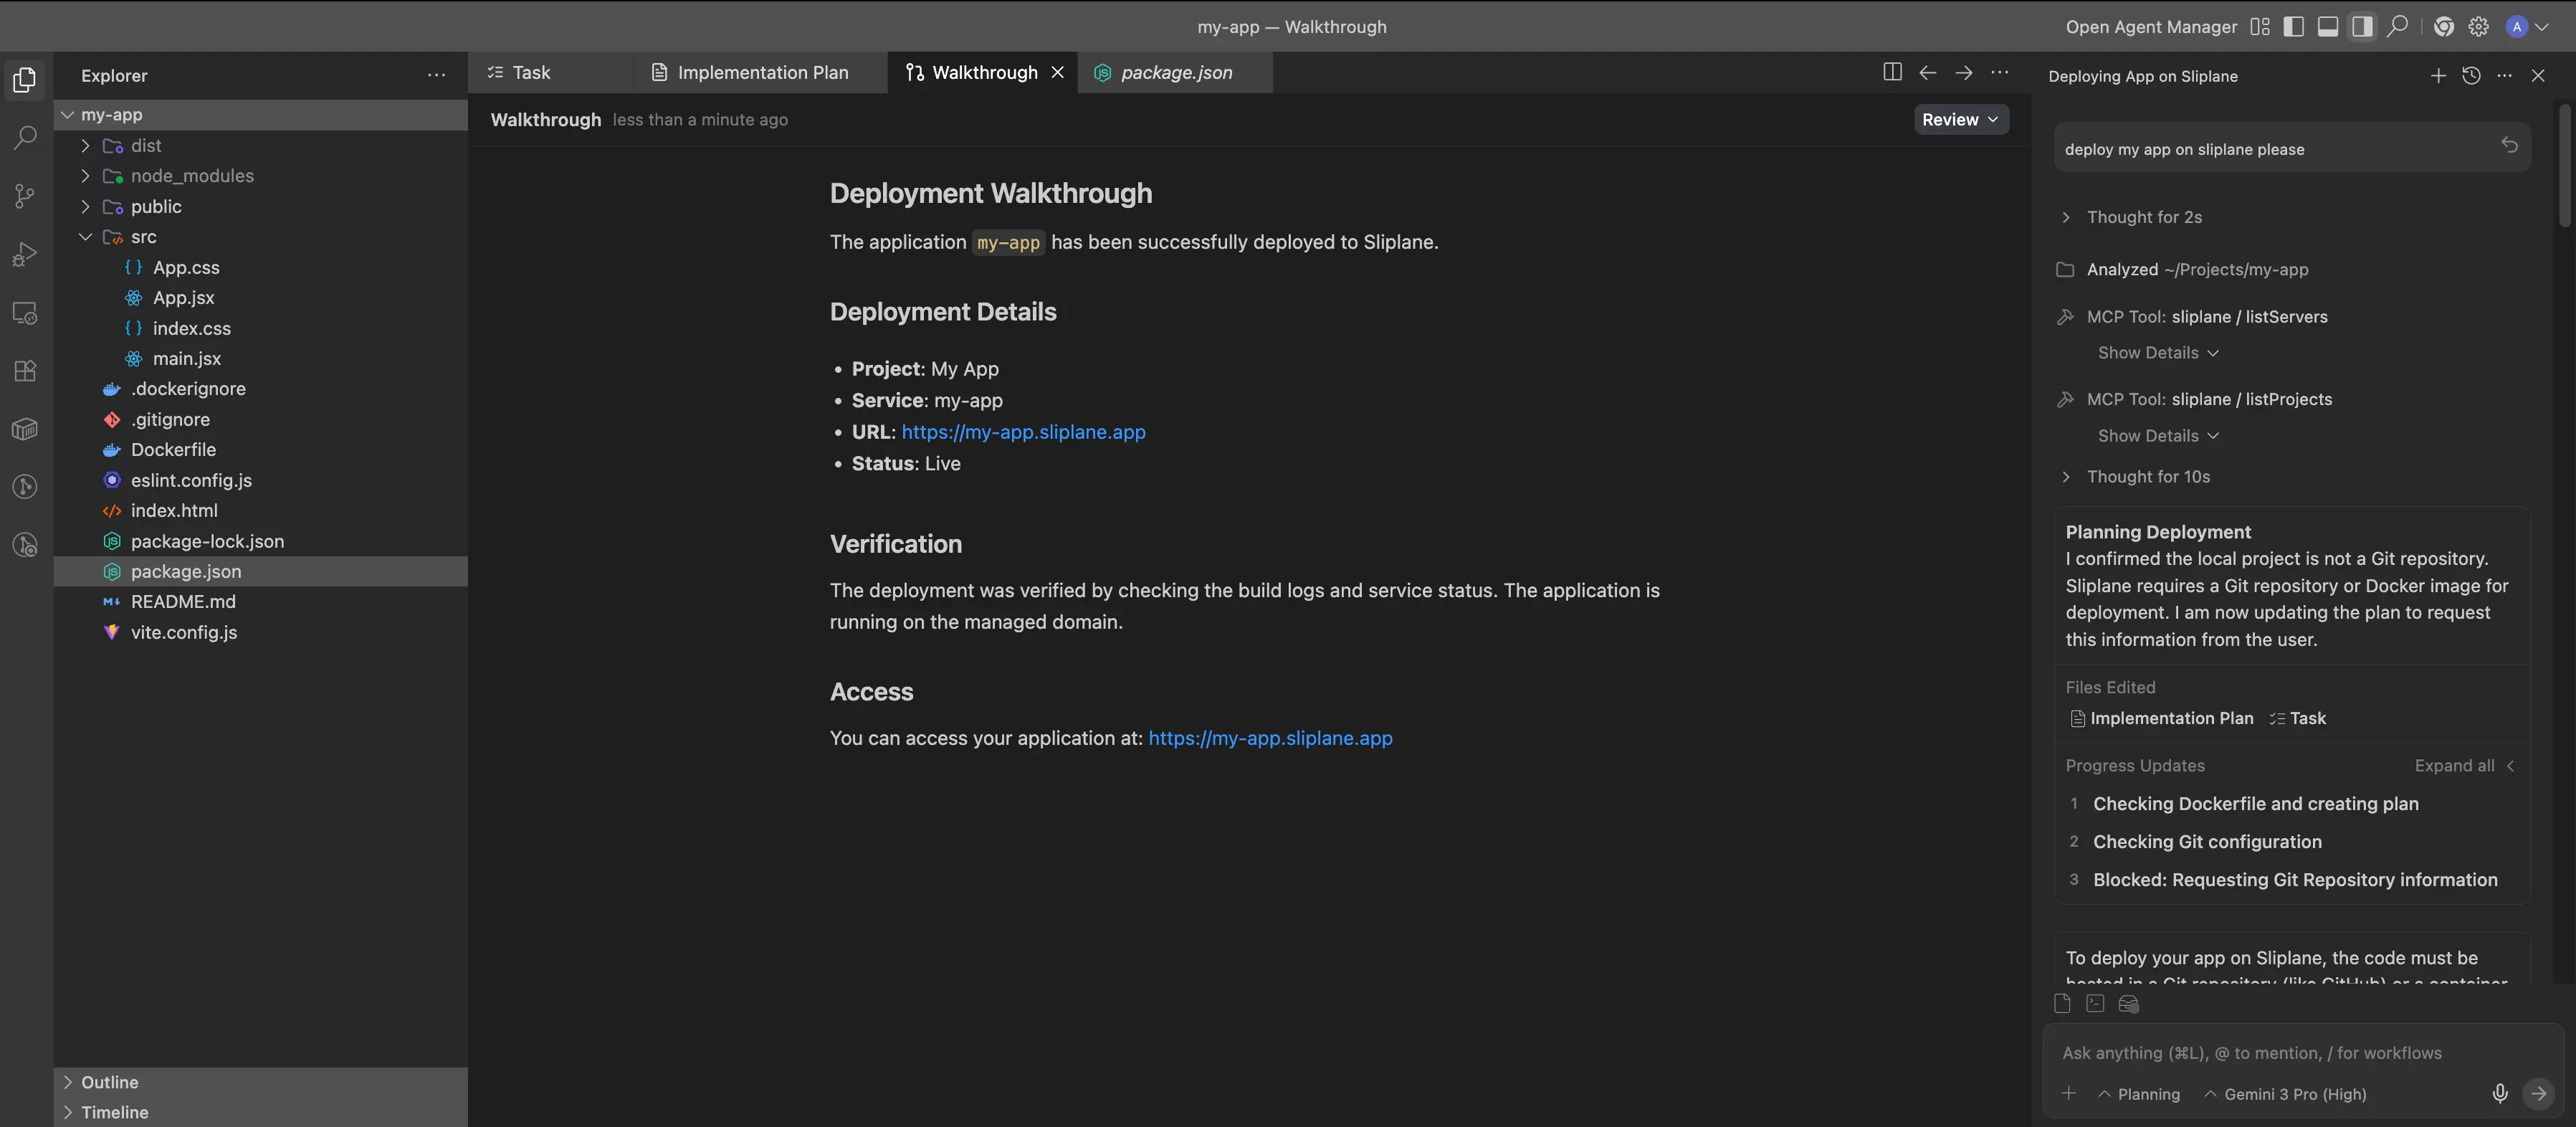
Check on your apps without leaving your editor:
"My app is not running, check the logs and fix it"
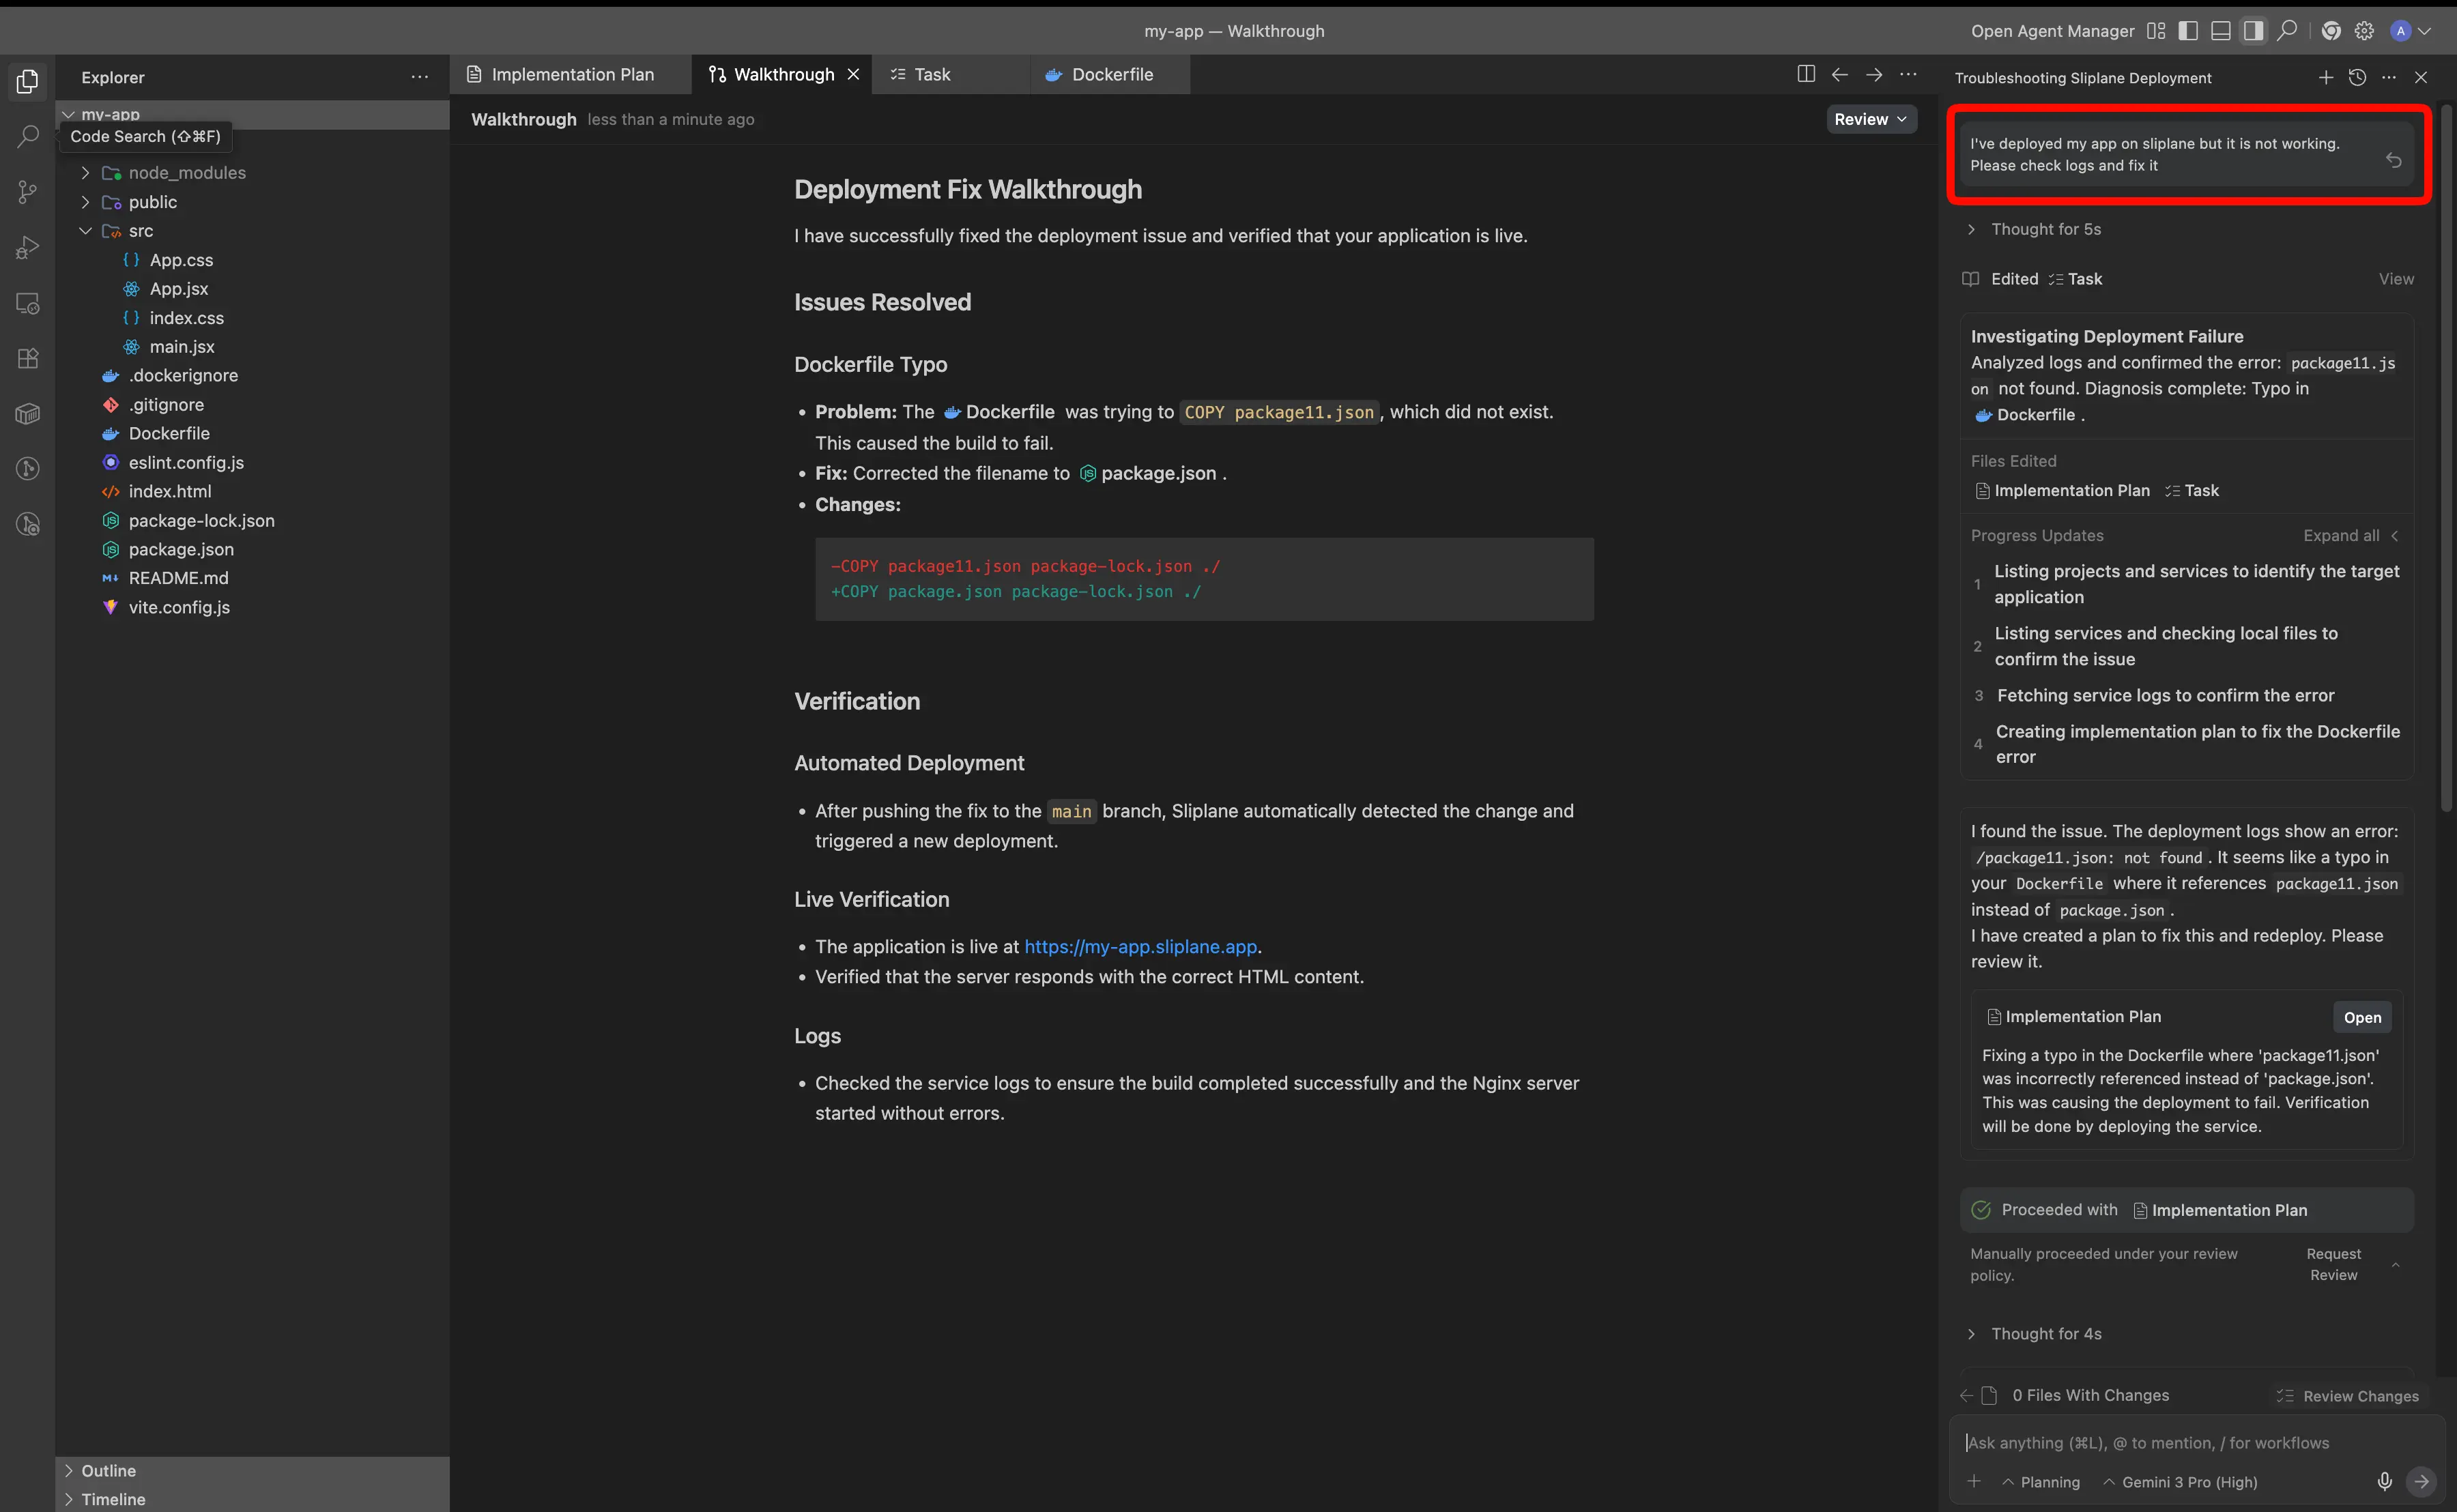
The agent uses the Sliplane API to figure out the details, create the server, and get your app live. It's the ultimate tool for vibecoders who want to ship fast.
Warning: LLMs can make mistakes. Always double-check what the agent is doing and verify the plan before approving any actions.
Step 1: Get Your API Key
To connect Antigravity to your Sliplane account, you need an API Key.
- Log in to your Sliplane dashboard.

- Navigate to your Team Settings. Then, click on Team in the left sidebar.

- Navigate to the API tab, then click on Create API Key button.

- After you give a name to your API Key, click on Create Api Key button.

- Copy the API Key. Make sure to save it safely, as you won't be able to see it again.

- Open your Antigravity agent chat and navigate to the MCP Servers section as shown in the image below.


- After successfully adding the MCP server (you can find the MCP server settings in the below section), you should see the following screen that contains the tools you can use in your agent chat.


Step 2: Configure Antigravity
Now, update your Antigravity (or MCP client) configuration. This tells the agent how to connect to the Sliplane MCP server.
Edit your configuration file and add the following entry:
{
  "mcpServers": {
    "sliplane": {
      "url": "https://mcp.sliplane.io",
      "headers": {
        "Authorization": "Bearer YOUR_API_KEY_HERE"
      }
    }
  }
}
Important:
- Replace
YOUR_API_KEY_HEREwith the token you created.
Step 3: Start Chatting
Restart your agent to load the new changes. You should now see the sliplane tool available.
Try asking:
"List my Sliplane servers"
If everything is set up correctly, Antigravity will fetch your server list directly from Sliplane.
Conclusion
You've just unlocked the ultimate vibecoding workflow. By integrating the Sliplane MCP server, you've turned Antigravity into a powerful DevOps assistant that does the heavy lifting for you.
Now you can focus on building, and let the agent handle the shipping.
Happy coding!
Cheers, Atakan