How to Deploy Seafile with Docker on Sliplane
 Lukas Mauser
Seafile is an open-source file sharing and collaboration platform that you can self-host. It offers file syncing, sharing, and team collaboration tools — think of it as your own private Dropbox or Google Drive. In this guide, you'll learn how to deploy Seafile on Sliplane using the compose parser, including optional extensions like the SeaDoc document server and Elasticsearch for full-text search.
Seafile comes in two editions:
- Community Edition — free and open source, perfect for personal use or small teams
- Pro Edition — adds features like full-text search, online office integration, and more (details)
We'll start with the Community Edition and then show you how to upgrade to Pro.
Step 1: Create a Project and Server
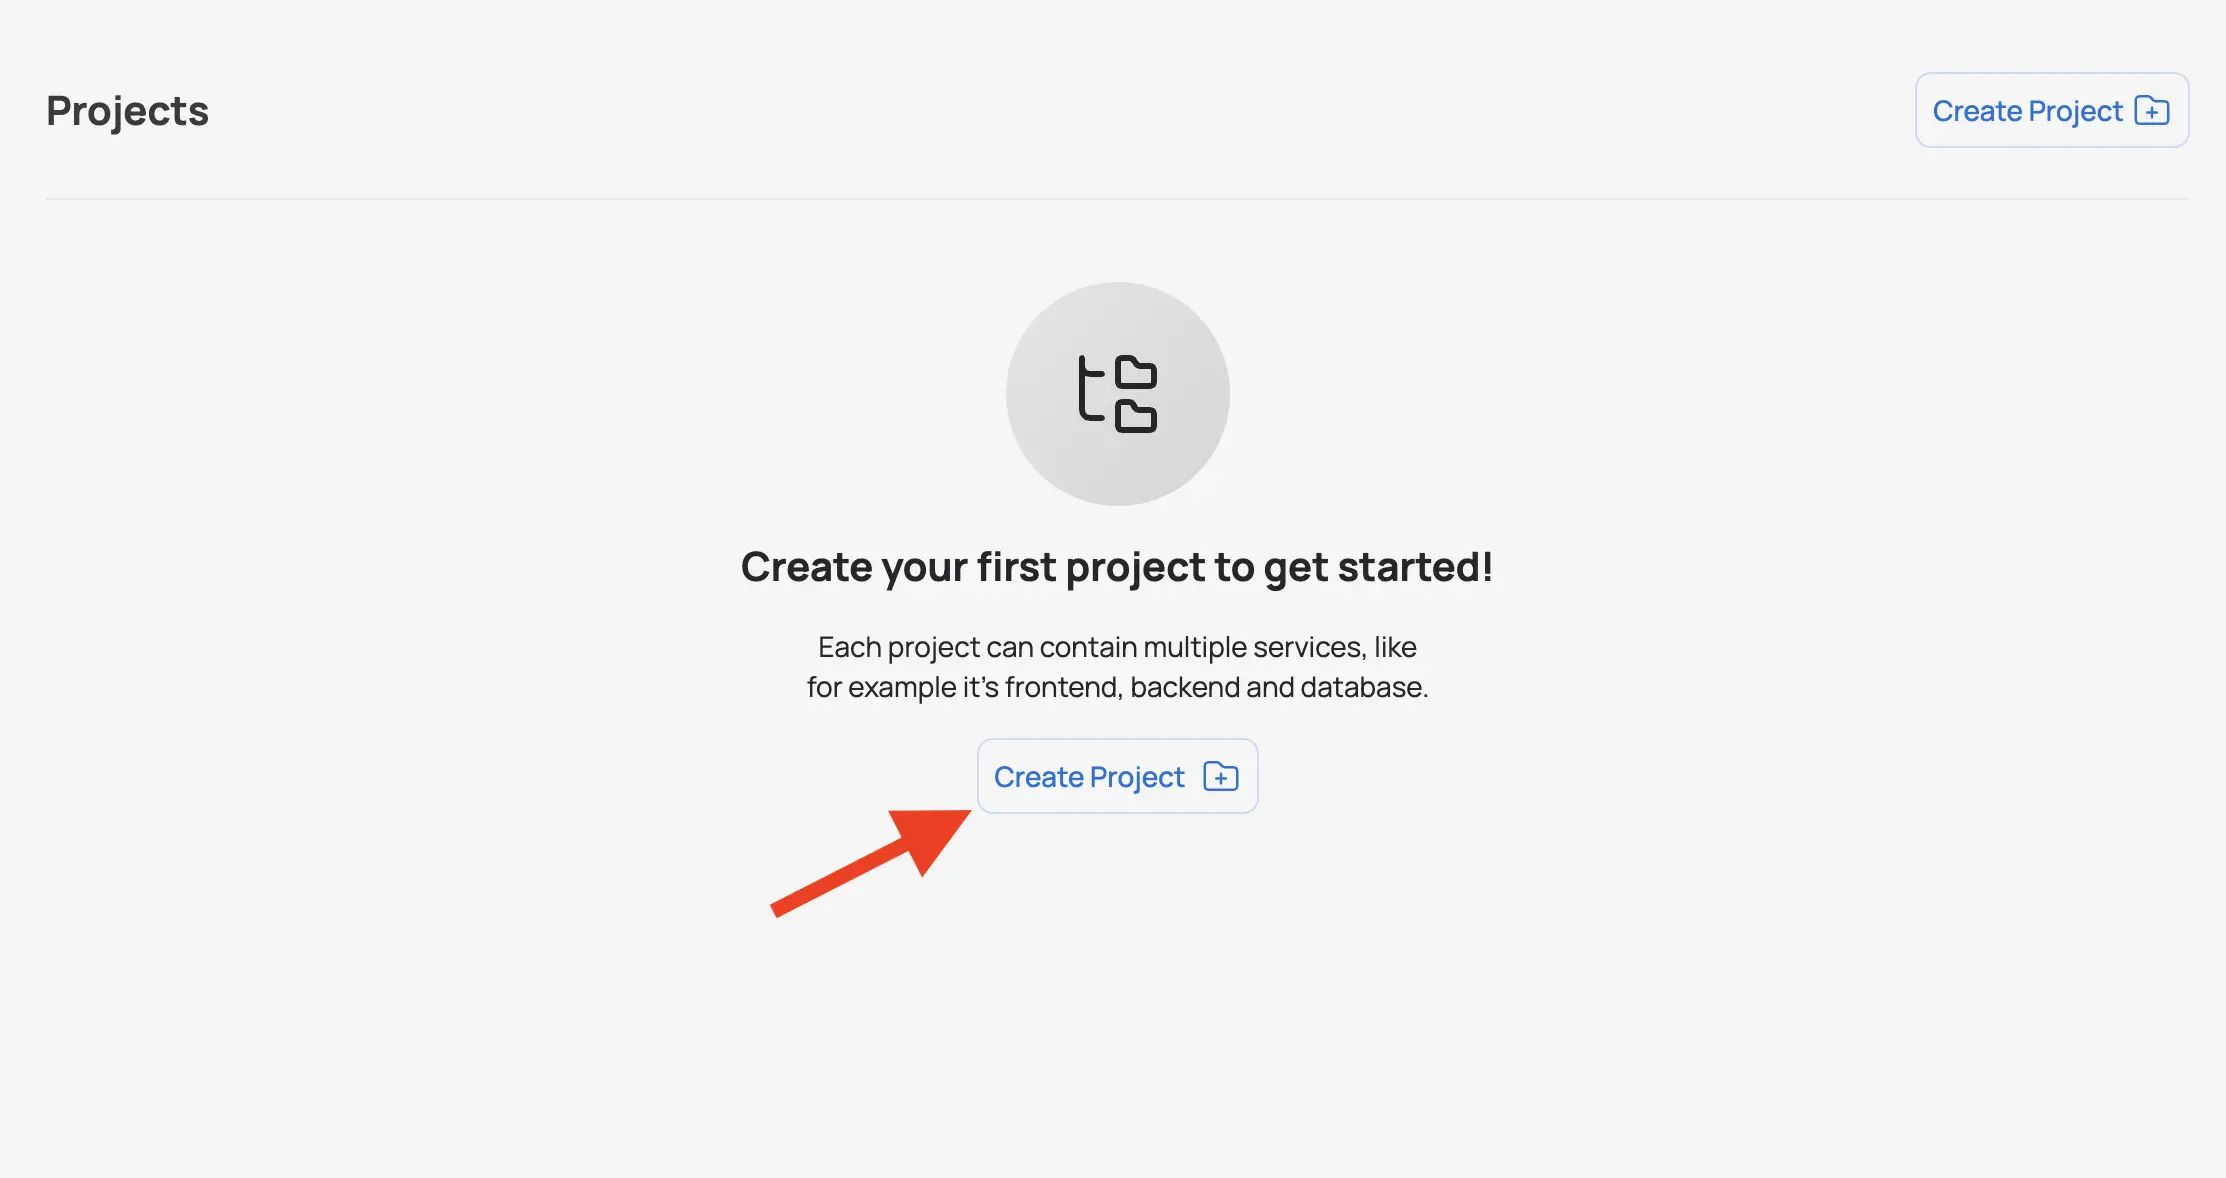
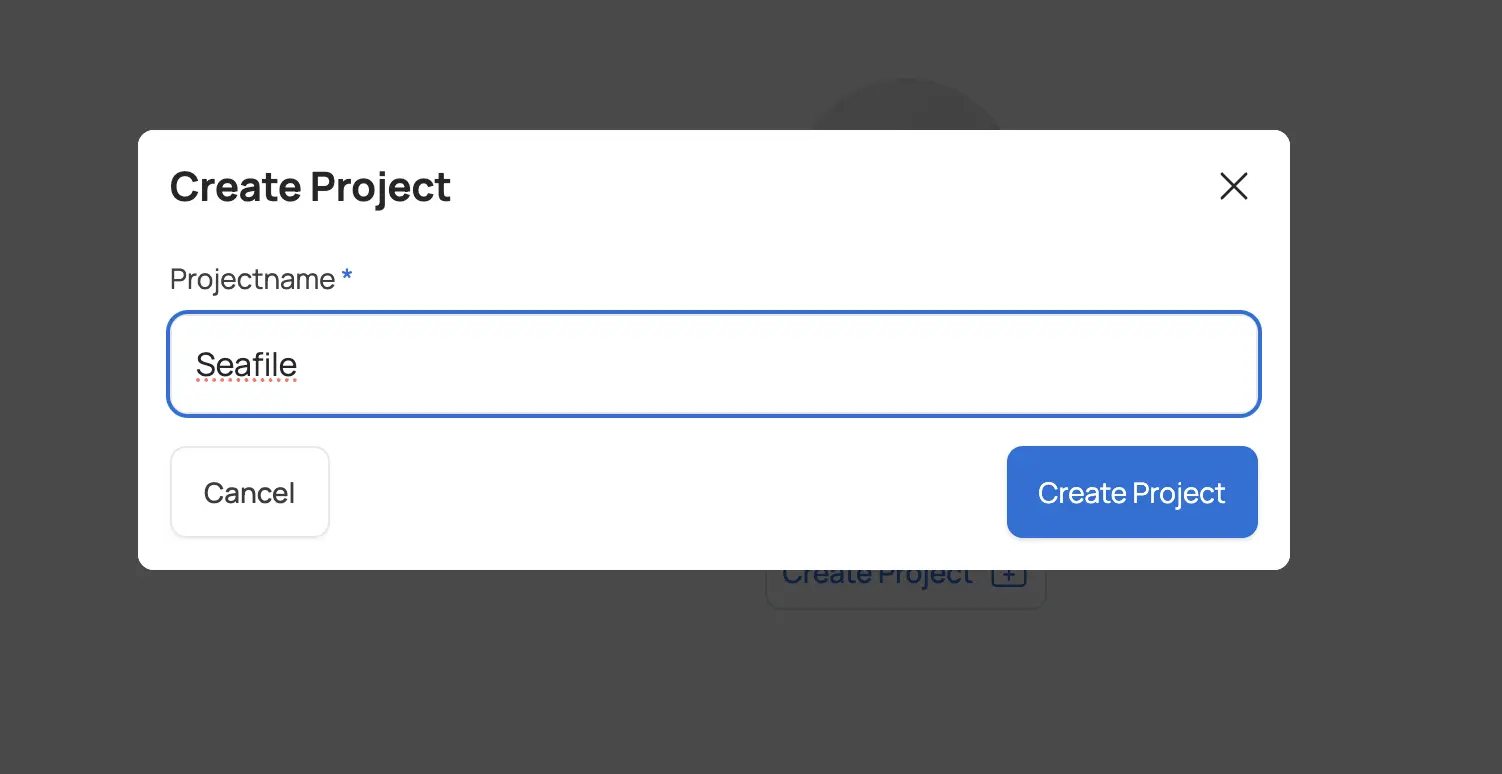
Log into Sliplane and create a new project.
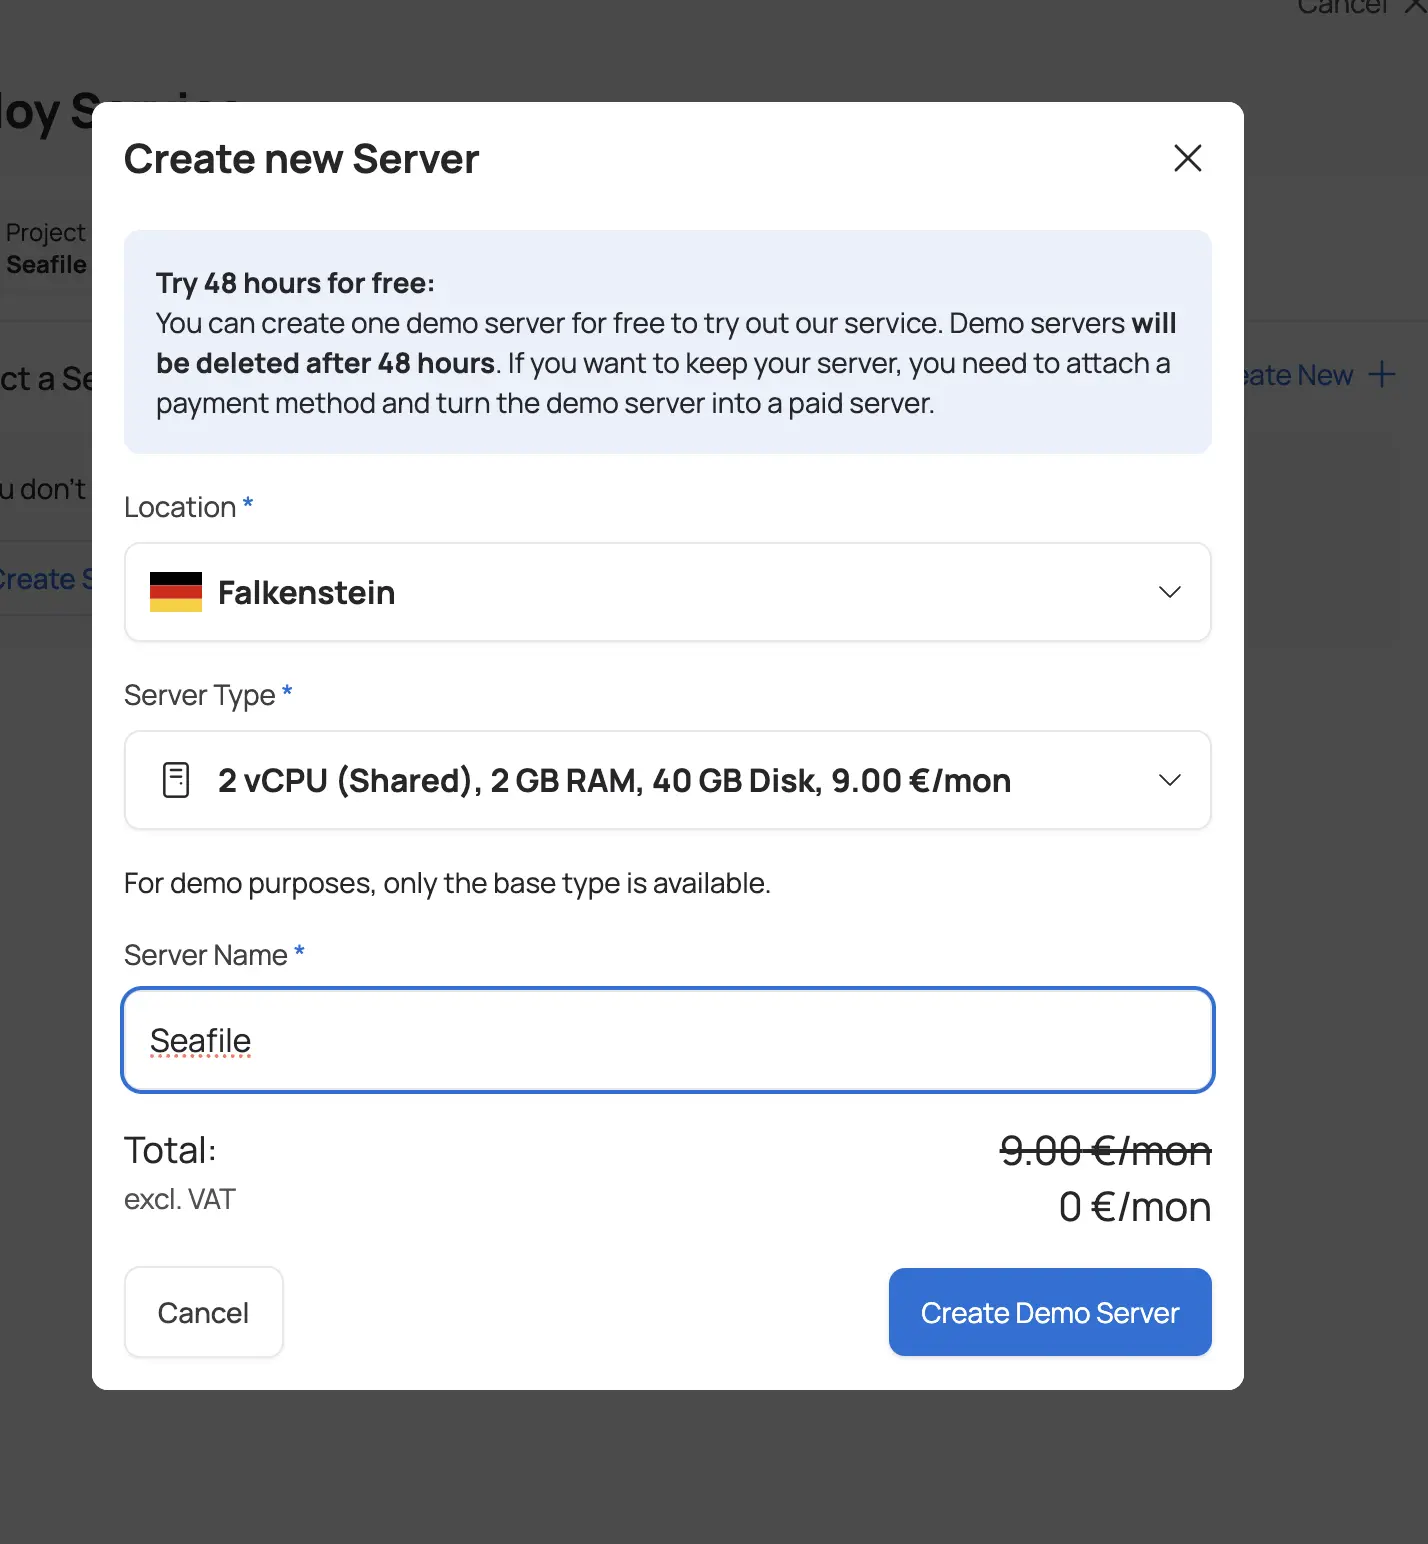
Next, click "Deploy Service" inside the project and add a server where Seafile will run. Seafile recommends at least 2 GB of RAM for the Community Edition (Base server on Sliplane) and 4 GB for the Pro Edition with Elasticsearch (Medium server). You can get started with a Base server for the Community Edition and upgrade later if needed.

Step 2: Open the Compose Parser
Select the server that you just created and click "Add Service".
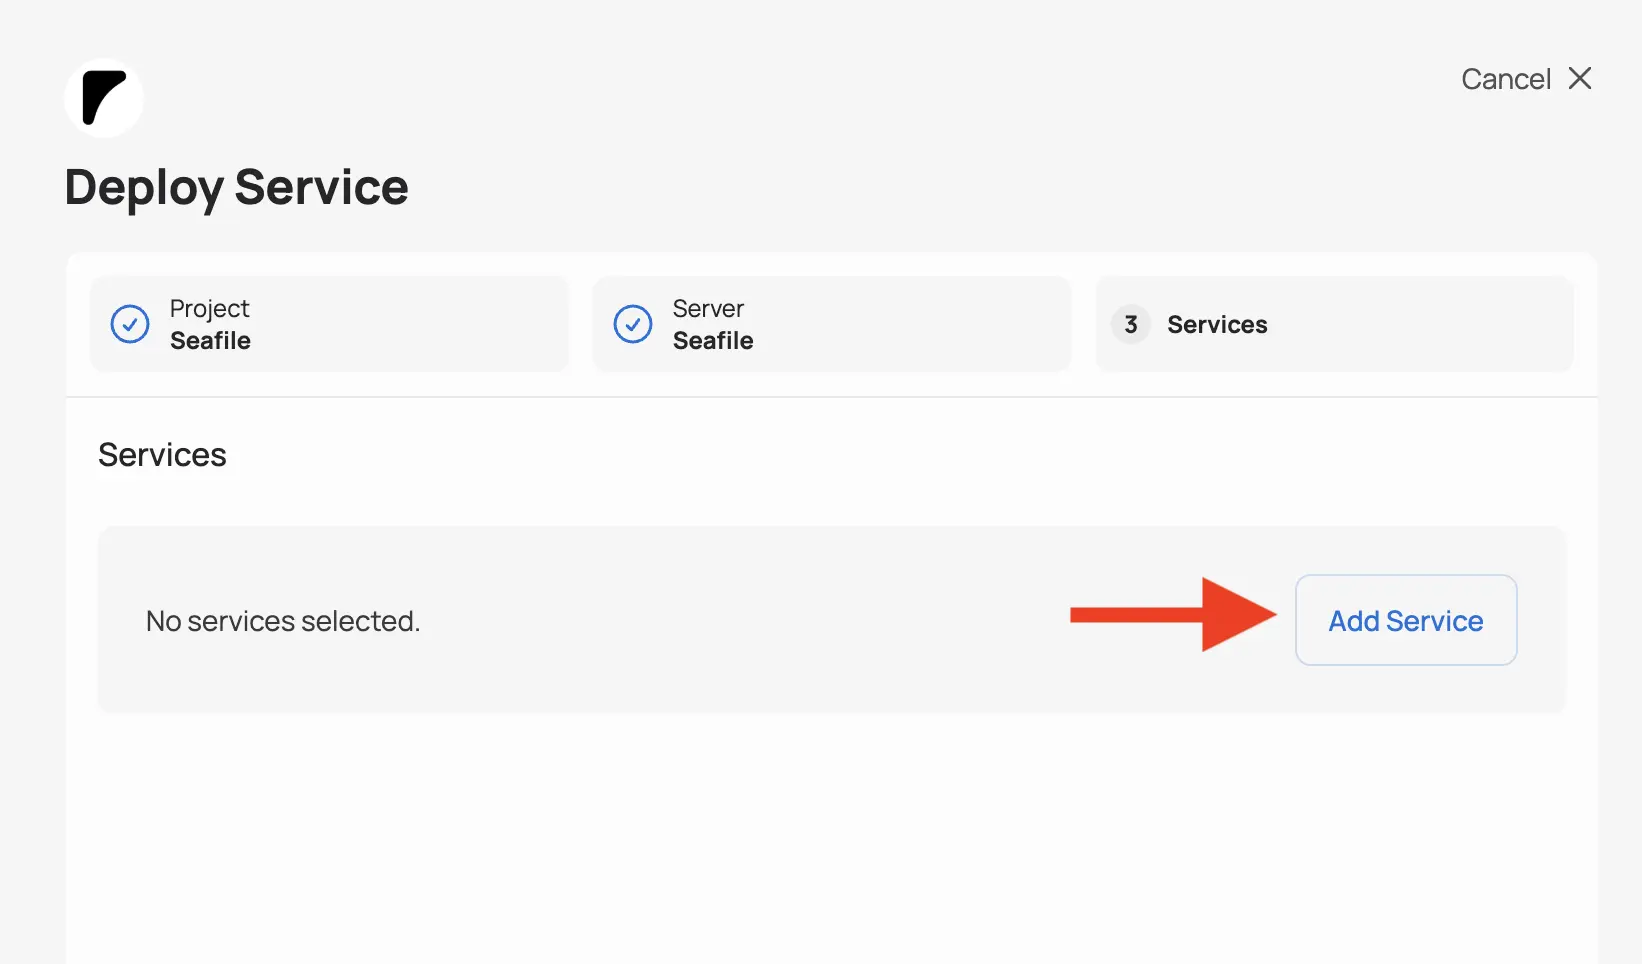
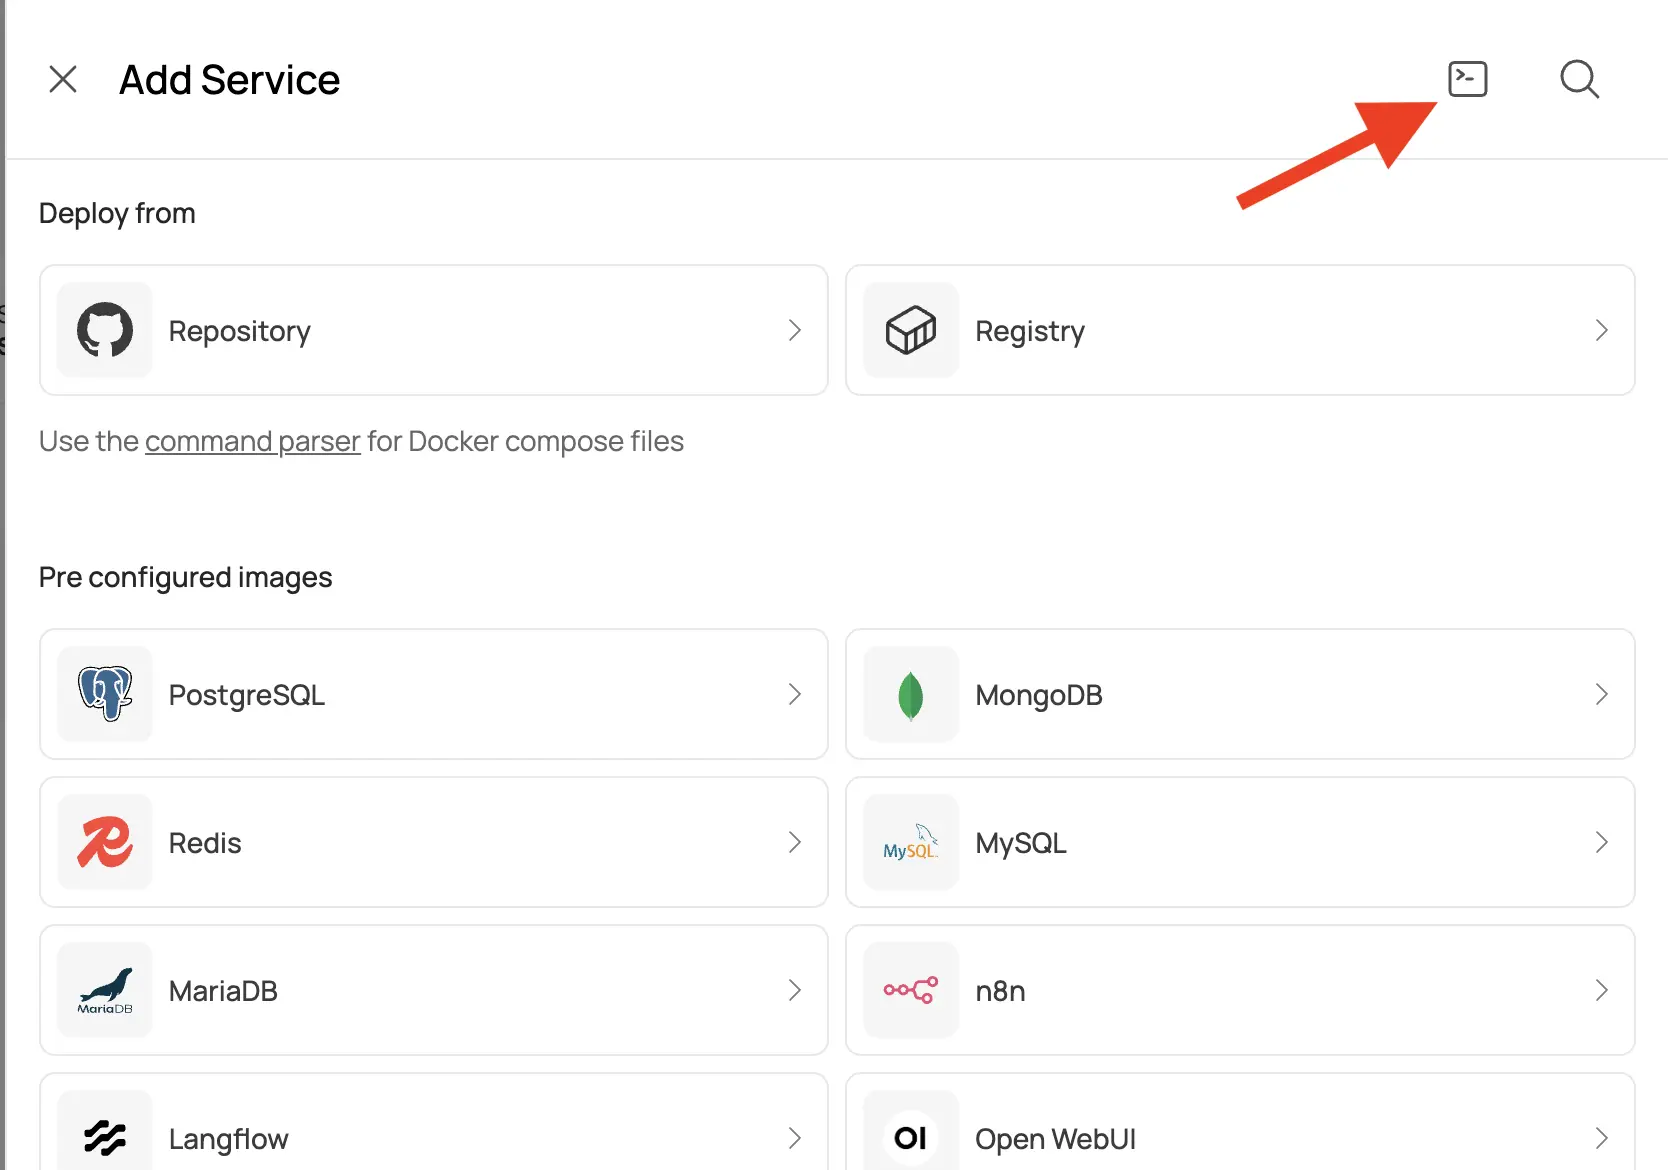
Click on the terminal icon that you can find in the top right corner of the drawer that opens. This will open the command parser where you can paste Docker Compose files to deploy multi-container applications with one click — Sliplane will parse the file and extract the service config.
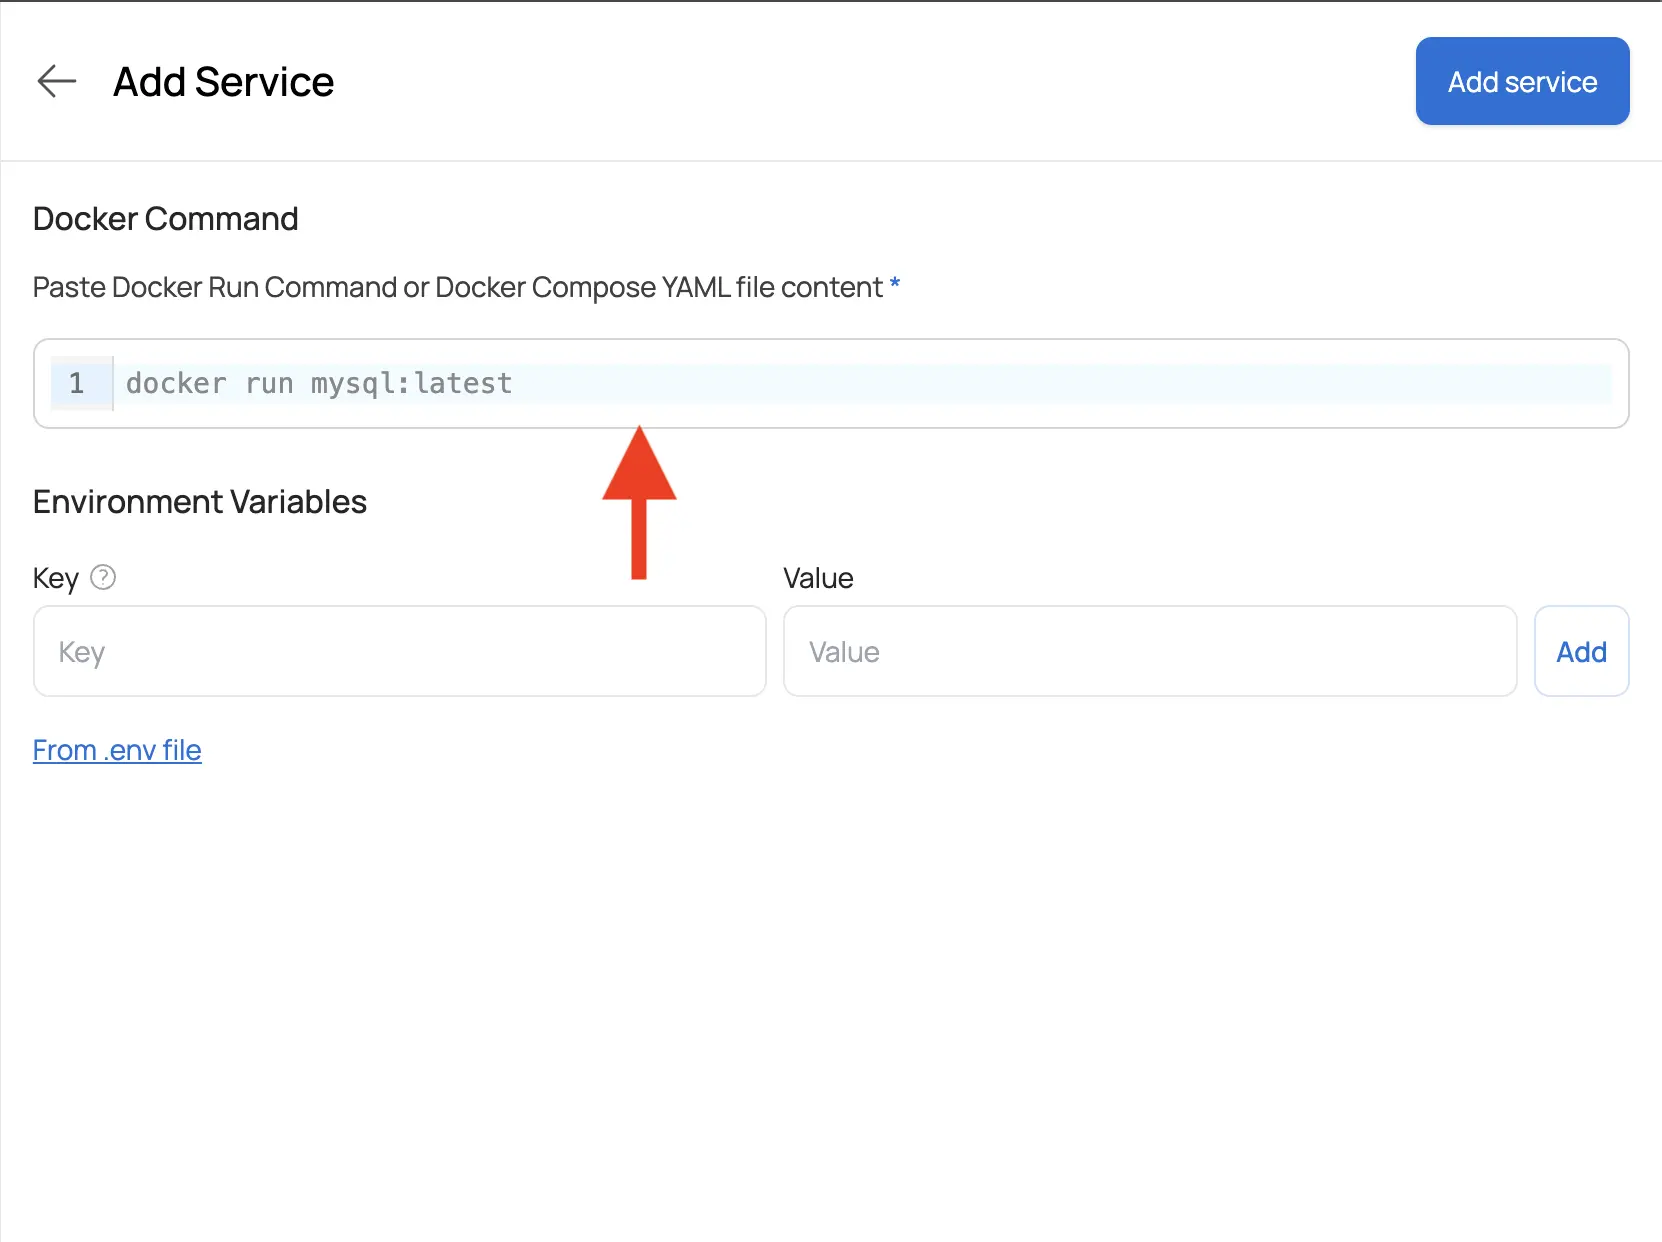
Step 3: Paste the Compose File
Paste the following compose file into the parser.
The compose file contains three services: MariaDB for the database, Redis for caching, and the main Seafile service. It's based on the official Seafile Community Docker compose file, slightly modified to work with Sliplane:
services:
  db:
    image: mariadb:10.11
    environment:
      MARIADB_AUTO_UPGRADE: "1"
      MYSQL_LOG_CONSOLE: "true"
      MYSQL_ROOT_PASSWORD: "${MYSQL_ROOT_PASSWORD}"
    volumes:
      - seafile-mysql-data:/var/lib/mysql

  redis:
    image: redis
    command: /bin/sh -lc 'exec redis-server --requirepass "$$REDIS_PASSWORD"'
    environment:
      REDIS_PASSWORD: "${REDIS_PASSWORD}"

  seafile:
    image: seafileltd/seafile-mc:13.0-latest
    ports:
      - "80:80"
    volumes:
      - seafile-shared-data:/shared
    environment:
      CACHE_PROVIDER: "redis"
      ENABLE_FACE_RECOGNITION: "false"
      ENABLE_GO_FILESERVER: "true"
      ENABLE_NOTIFICATION_SERVER: "false"
      ENABLE_SEADOC: "true"
      ENABLE_SEAFILE_AI: "false"
      INIT_SEAFILE_ADMIN_EMAIL: "${SEAFILE_ADMIN_EMAIL:-example@email.de}"
      INIT_SEAFILE_ADMIN_PASSWORD: "${SEAFILE_ADMIN_PASSWORD}"
      INIT_SEAFILE_MYSQL_ROOT_PASSWORD: "${MYSQL_ROOT_PASSWORD}"
      INNER_NOTIFICATION_SERVER_URL: "http://notification-server:8083"
      JWT_PRIVATE_KEY: "${JWT_PRIVATE_KEY}"
      MD_FILE_COUNT_LIMIT: "100000"
      MEMCACHED_HOST: "memcached"
      MEMCACHED_PORT: "11211"
      NON_ROOT: "false"
      NOTIFICATION_SERVER_URL: "http://sdoc-notifcation-host/notification"
      PORT: "80"
      REDIS_HOST: "redis"
      REDIS_PASSWORD: "$REDIS_PASSWORD"
      REDIS_PORT: "6379"
      SEADOC_SERVER_URL: "https://sdoc-server-host/sdoc-server"
      SEAFILE_AI_SECRET_KEY: "${JWT_PRIVATE_KEY}"
      SEAFILE_AI_SERVER_URL: "http://seafile-ai:8888"
      SEAFILE_LOG_TO_STDOUT: "false"
      SEAFILE_MYSQL_DB_CCNET_DB_NAME: "ccnet_db"
      SEAFILE_MYSQL_DB_HOST: "db"
      SEAFILE_MYSQL_DB_PASSWORD: "${SEAFILE_MYSQL_DB_PASSWORD}"
      SEAFILE_MYSQL_DB_PORT: "3306"
      SEAFILE_MYSQL_DB_SEAFILE_DB_NAME: "seafile_db"
      SEAFILE_MYSQL_DB_SEAHUB_DB_NAME: "seahub_db"
      SEAFILE_MYSQL_DB_USER: "seafile"
      SEAFILE_SERVER_HOSTNAME: "$$SLIPLANE_DOMAIN"
      SEAFILE_SERVER_PROTOCOL: "https"
      SITE_ROOT: "/"
      SLIPLANE_GRACE_PERIOD: "120"
      TIME_ZONE: "Etc/UTC"
    depends_on:
      db:
        condition: service_healthy
      redis:
        condition: service_started

volumes:
  seafile-mysql-data:
  seafile-shared-data:
After pasting, the parser will extract the following environment variables:
MYSQL_ROOT_PASSWORD=secure-mysql-root-password
REDIS_PASSWORD=secure-redis-password
JWT_PRIVATE_KEY=secure-jwt-key
SEAFILE_ADMIN_EMAIL=me@example.com
SEAFILE_ADMIN_PASSWORD=asecure-admin-password
SEAFILE_MYSQL_DB_PASSWORD=secure-db-password
SEAFILE_SERVER_HOSTNAME=$SLIPLANE_DOMAIN
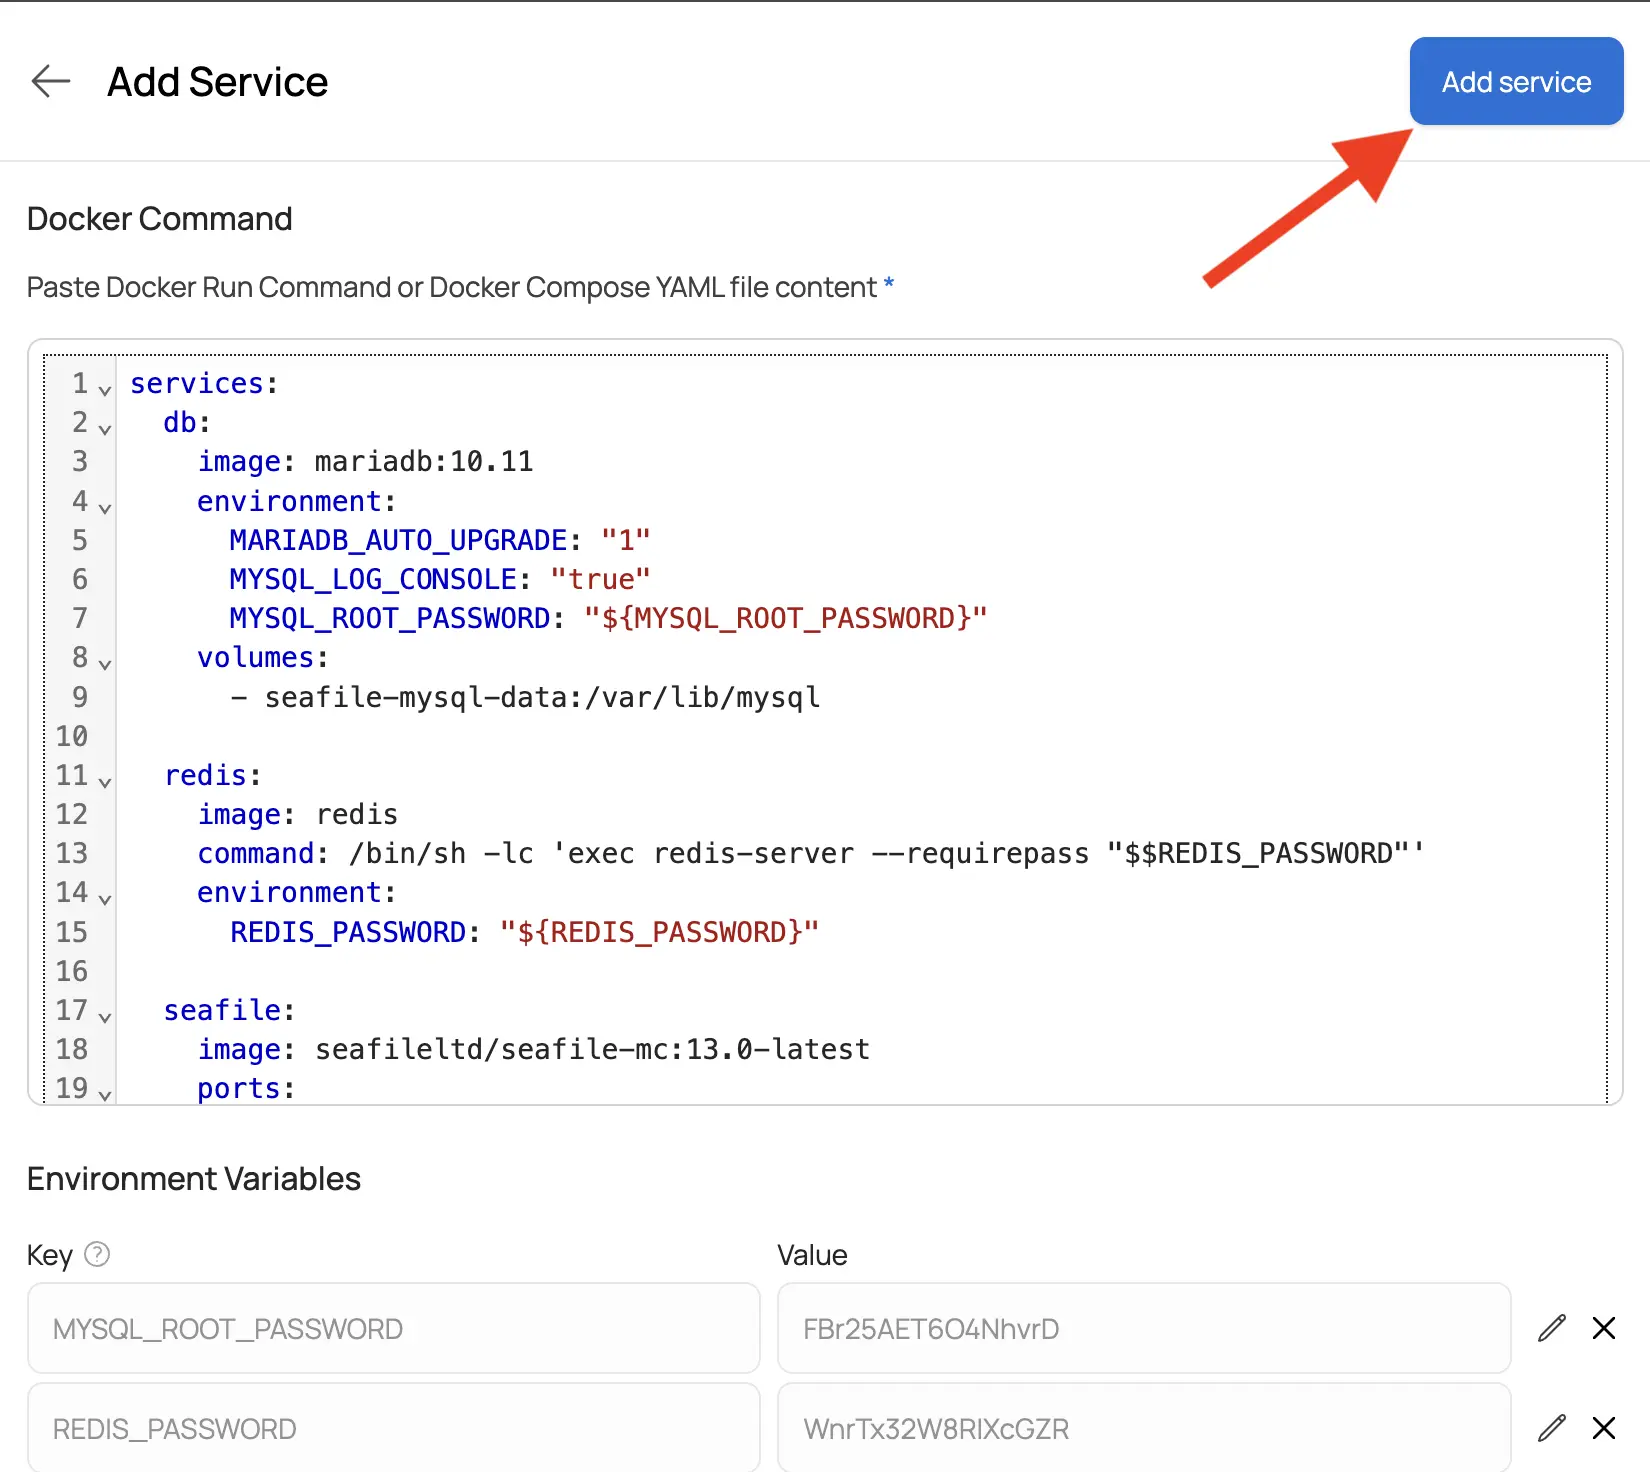
Passwords and secrets are randomly generated, but you can overwrite them with your own values if needed.
Step 4: Configure and Deploy
Click "Add Service" in the top right corner. Three services will be extracted: Redis, MariaDB, and Seafile.
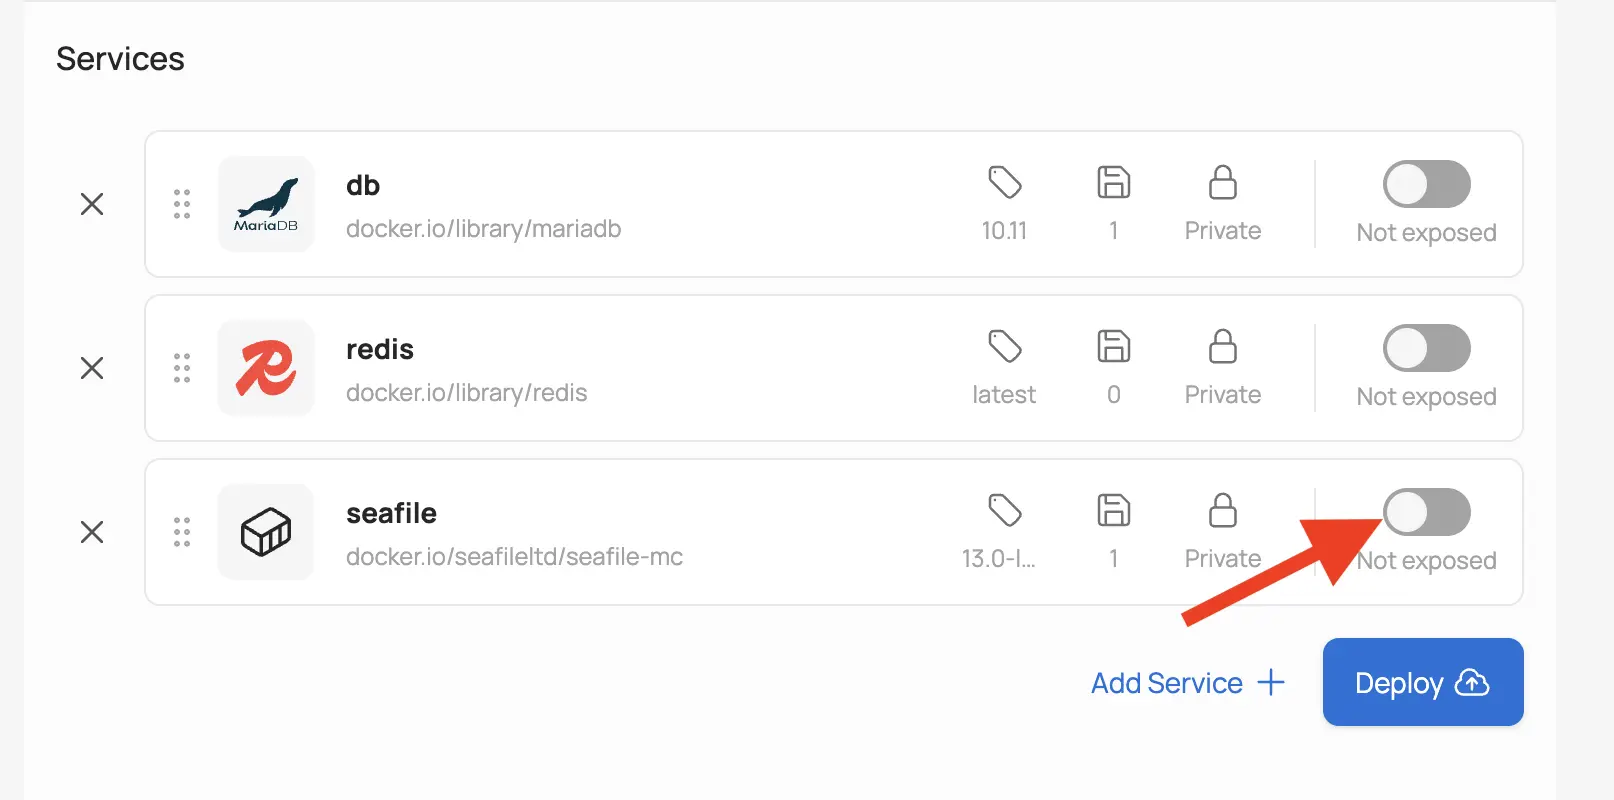
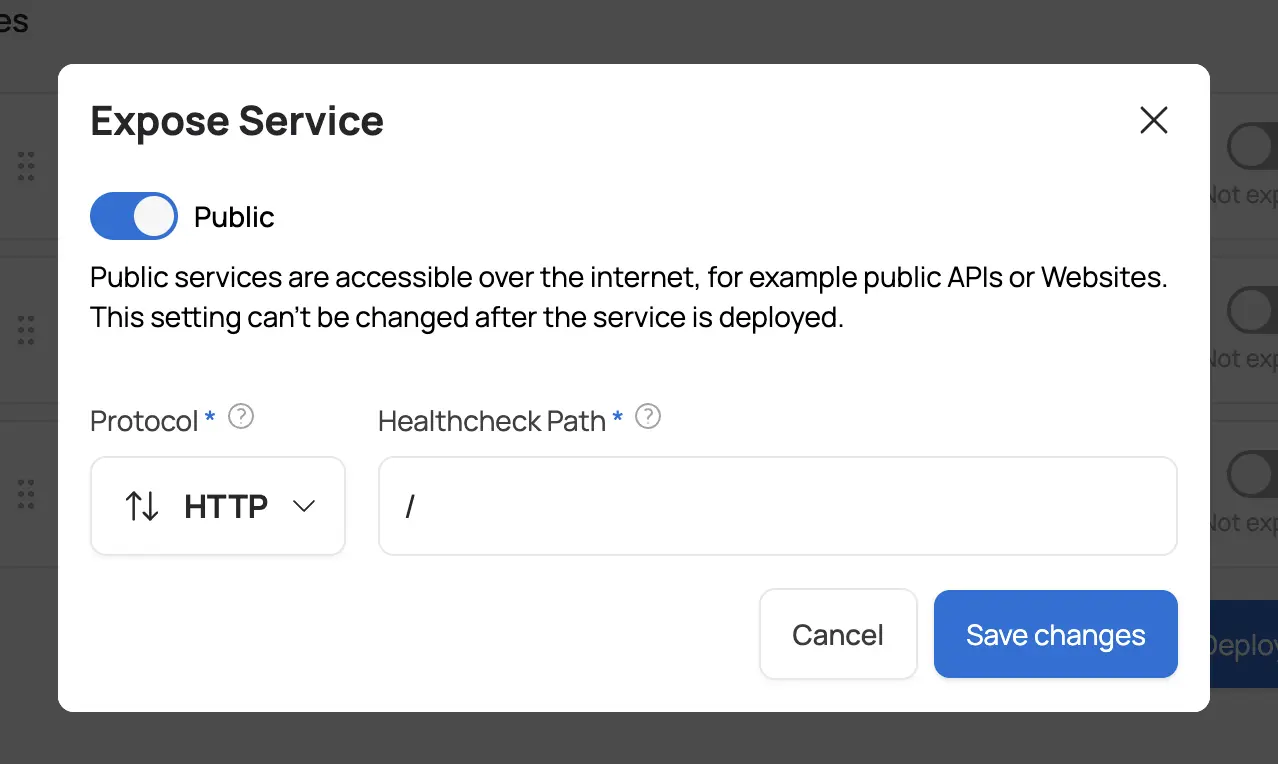
Make the Seafile service public by toggling the public switch - you can leave HTTP as the protocol and the default healthcheck settings. Redis and MariaDB should stay private.
Click Deploy and wait for the deployment to finish.
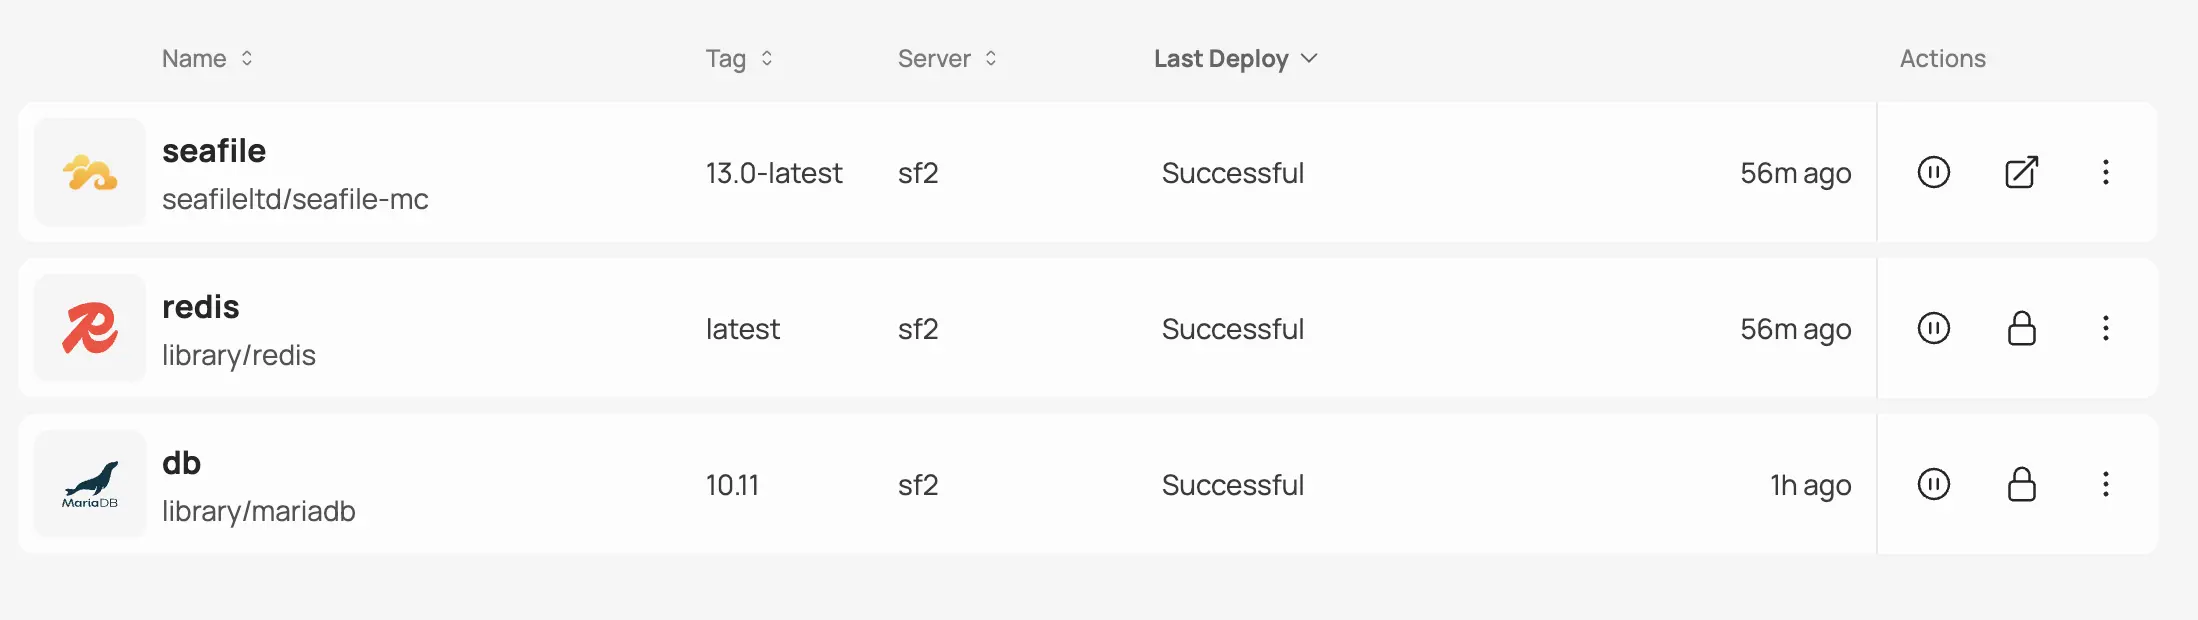
Step 5: Access Seafile
Once all services are deployed and running, you can access Seafile via the Sliplane domain found in the service settings. Log in with the admin email and password that you previously set as environment variables.

After logging in, you can start uploading and sharing files. You can also connect the Seafile desktop client to your instance by entering the same domain and credentials.
Add the SeaDoc Document Server
SeaDoc lets you preview and edit documents directly in Seafile's web interface. Since SeaDoc references Seafile's domain in its environment variables, we needed to deploy Seafile first.
Step 1: Open the Compose Parser Again
Navigate to your project, click "Deploy Service", select the same server, and open the compose parser.
Step 2: Paste the SeaDoc Compose File
services:
  seadoc:
    image: seafileltd/sdoc-server:2.0-latest
    environment:
      DB_HOST: "${DB_HOST}"
      DB_NAME: "seahub_db"
      DB_PASSWORD: "${DB_PASSWORD}"
      DB_PORT: "3306"
      DB_USER: "seafile"
      HOST: "0.0.0.0"
      JWT_PRIVATE_KEY: "${JWT_PRIVATE_KEY}"
      NON_ROOT: "false"
      SEAHUB_SERVICE_URL: "https://${SEAFILE_SERVER_HOSTNAME}"
      TIME_ZONE: "Etc/UTC"
    volumes:
      - seadoc-data:/shared

volumes:
  seadoc-data:
Step 3: Fill in the Environment Variables
The parser will extract these variables — it's important that you go through each value and replace it with the correct value from your Seafile service settings that you used previously to deploy the main Seafile database and service:
DB_HOST=replace-with-your-mariadb-internal-hostname
# NOT the root password, but the password for the "seafile" database user that you set in the compose file for the main Seafile service
DB_PASSWORD=replace-with-your-mysql-db-password
JWT_PRIVATE_KEY=replace-with-your-secure-jwt-key
SEAHUB_SERVICE_URL=replace-with-your-public-seafile-server-hostname
Make sure DB_HOST matches the internal hostname of the MariaDB service and DB_PASSWORD matches the password you set earlier.
Step 4: Deploy SeaDoc
Click "Add Service", make SeaDoc public, and click Deploy.
To verify it works, go to your Seafile web interface, create a document, and try to edit it in the browser. You should see the SeaDoc editor load with the document ready for editing.
Deploying the Pro Edition
To upgrade to the Pro Edition, you need to swap the Docker image and add your registry credentials.
Step 1: Update the Image
Navigate to the Seafile service settings and replace the image URL with the Pro Edition image:
seafileltd/seafile-pro-mc:13.0-latest
Step 2: Add Registry Credentials
The Pro image is private, so you need to authenticate. Below the image URL field, click Select Credential > Add New. In the dialog:
- Choose "Other" as the registry
- Add a name, username, and password for the Docker registry (you'll get these from Seafile after purchasing the Pro Edition)
- Click "Add Credential" to save the credential
Select the newly created credential and click Save and Redeploy.
Adding Elasticsearch (Pro Edition Only)
Elasticsearch enables full-text search across your files in Seafile Pro. You'll need at least a Medium server (4 GB RAM) for this.
Step 1: Deploy Elasticsearch
Add a new private service using the compose parser with the following config:
services:
  elasticsearch:
    image: elasticsearch:8.15.0
    environment:
      - discovery.type=single-node
      - bootstrap.memory_lock=true
      - "ES_JAVA_OPTS=-Xms2g -Xmx2g"
      - "xpack.security.enabled=false"
    volumes:
      - "seafile-elasticsearch-data:/usr/share/elasticsearch/data"

volumes:
  seafile-elasticsearch-data:
At the time of writing, Elasticsearch 8.15.0 is the latest stable version compatible with Seafile. Check Docker Hub for newer versions.
Step 2: Configure Seafile to Use Elasticsearch
The Seafile container needs to know where Elasticsearch is. This is configured via seafevents.conf, which is persisted in the Seafile volume at /shared/seafile/conf/seafevents.conf.
Once Elasticsearch is running, SSH into your Seafile container and add the following to that file:
[INDEX FILES]
enabled = true
interval = 10m
external_es_server = true
es_host = your-elasticsearch-internal-hostname.internal
es_port = 9200
Replace your-elasticsearch-internal-hostname with the actual internal hostname of the Elasticsearch service, which you can find in the service settings on Sliplane.
After saving the file, click Redeploy on the Seafile service in the Sliplane dashboard.
Extending Your Setup
The same approach — deploying additional services via the compose parser — can be used to add more optional Seafile components:
- Notification Server — real-time notifications for file changes
- AI Server — AI-powered features like smart search and recommendations
Check the official Seafile documentation for configuration details on these components.
FAQ
How much does it cost to run Seafile on Sliplane?
It the depends on the load and edition, but you can get started with the Community Edition on a Base server for €9/month. If you run into resource limits, you can easily upgrade your server without needing to change anything in your setup.
Can I use a custom domain?
Yes! You can add a custom domain in the Seafile service settings on Sliplane. SSL certificates are handled automatically.
Can I connect the Seafile desktop or mobile clients?
Yes. Just point the client to your Sliplane domain (or custom domain) and log in with your admin credentials. The desktop client is available for Windows, macOS, and Linux. Mobile apps are available for iOS and Android.
Summary
You now have a fully functional Seafile instance running on Sliplane. Starting from the Community Edition with MariaDB and Redis, you can extend your setup step by step with SeaDoc for document editing, upgrade to the Pro Edition for advanced features, and add Elasticsearch for full-text search. All without managing servers or writing complex deployment scripts.