Self-hosting Bluesky PDS from Scratch
 Yulei Chen
Bluesky is an open social app, built on top of the philosophy of "formats over apps". You can store your own social data on your own server. No matter what happens to the social app itself, whether it goes evil or simply shuts down, you still own your data. That's very cool.
In this post, I'll walk you through self-hosting a Bluesky PDS (Personal Data Server): setting it up on your own server, creating an account, signing in through Bluesky, and browsing it with PDSls.
Prerequisites
Before we start, make sure you already have a server and a domain name. This tutorial uses an Ubuntu server from Hetzner and the domain sliplane.dev.
Step 1: Update your server
On your server, update the system to ensure it has the latest security patches and updates:
sudo apt update
sudo apt upgrade -y
Once finished, your server is ready for installing the software.
Step 2: Install and configure UFW firewall
Only keep necessary ports open: SSH (22), HTTP (80), HTTPS (443). Install UFW and configure the firewall as follows:
sudo apt install ufw -y
sudo ufw allow 22    # SSH
sudo ufw allow 80    # HTTP
sudo ufw allow 443   # HTTPS
sudo ufw enable
Verify the firewall configuration with sudo ufw status verbose. The output should look like this:
Status: active
Logging: on (low)
Default: deny (incoming), allow (outgoing), deny (routed)
New profiles: skip

To                         Action      From
--                         ------      ----
22                         ALLOW IN    Anywhere
80                         ALLOW IN    Anywhere
443                        ALLOW IN    Anywhere
22 (v6)                    ALLOW IN    Anywhere (v6)
80 (v6)                    ALLOW IN    Anywhere (v6)
443 (v6)                   ALLOW IN    Anywhere (v6)
Step 3: Install Docker
To install Docker, first set up the dependencies and Docker's GPG key:
sudo apt install ca-certificates curl gnupg

sudo install -m 0755 -d /etc/apt/keyrings
curl -fsSL https://download.docker.com/linux/ubuntu/gpg \
| sudo gpg --dearmor -o /etc/apt/keyrings/docker.gpg
sudo chmod a+r /etc/apt/keyrings/docker.gpg
Next, add the Docker repository:
echo \
  "deb [arch=$(dpkg --print-architecture) \
signed-by=/etc/apt/keyrings/docker.gpg] \
https://download.docker.com/linux/ubuntu \
$(. /etc/os-release && echo $VERSION_CODENAME) stable" \
| sudo tee /etc/apt/sources.list.d/docker.list > /dev/null

sudo apt update
Finally, install Docker Engine and the Compose plugin:
sudo apt install docker-ce docker-ce-cli \
containerd.io docker-buildx-plugin docker-compose-plugin -y
Verify the installation with sudo docker run hello-world. You should see Hello from Docker!.
Step 4: Configure DNS for your domain
Follow these steps to configure DNS:
- Log into your domain registrar's dashboard (where you purchased your domain)
- Navigate to the DNS settings or DNS management section
- Add an A record with the following settings:
- Type:
A - Name:
@(for root domain, e.g. "sliplane.dev") - Value/Target: Your server's IPv4 address
- Type:
- Add an A record with the following settings:
- Type:
A - Name:
*(for all subdomains) - Value/Target: Your server's IPv4 address
- Type:
DNS changes can take a few minutes to several hours to propagate. You can check if your DNS is configured correctly using tools like dig or online DNS checkers. Once the DNS record is active, you can proceed with PDS installation.
Step 5: Install PDS
In this step, you'll install the PDS itself. Start by downloading the official install script:
curl https://raw.githubusercontent.com/bluesky-social/pds/main/installer.sh > installer.sh
Then run the installer with bash:
sudo bash installer.sh
The installer runs the official bluesky-pds Docker image with all required environment variables. It also sets up TLS through Caddy. The Caddyfile is located in /pds/caddy/etc/caddy/Caddyfile. Watchtower is configured as well, which keeps your PDS image up to date automatically.
The installer will ask for your domain name. After that, if you see output like the following, your PDS is up and running 🎉🎉:
========================================================================
PDS installation successful!

---

Check service status : sudo systemctl status pds
Watch service logs : sudo docker logs -f pds
Backup service data : /pds
PDS Admin command : docker exec pds goat pds admin

## Required Firewall Ports

Service Direction Port Protocol Source

---

HTTP TLS verification Inbound 80 TCP Any
HTTP Control Panel Inbound 443 TCP Any

## Required DNS entries

Name Type Value

---

sliplane.dev A 138.199.200.187
\*.sliplane.dev A 138.199.200.187

Detected public IP of this server: 138.199.200.187

To see pds admin commands, run "docker exec pds goat pds admin"

========================================================================
Next, the installer will prompt you to create a PDS user account. Let's do it:
Create a PDS user account? (y/N): y
Enter an email address (e.g. alice@sliplane.dev): yulei@sliplane.io
Enter a handle (e.g. alice.sliplane.dev): hello.sliplane.dev

## Account created successfully!

Handle : hello.sliplane.dev
DID : did:plc:kp7v7canit5l5izhspn5i25h
Password :

---

Save this password, it will not be displayed again.
As you can see, we created a PDS account with the handle hello.sliplane.dev. Make sure to save the auto-generated password, since it won't be shown again. You're now ready to sign in to Bluesky.
Step 6: Sign in to Bluesky with Your PDS
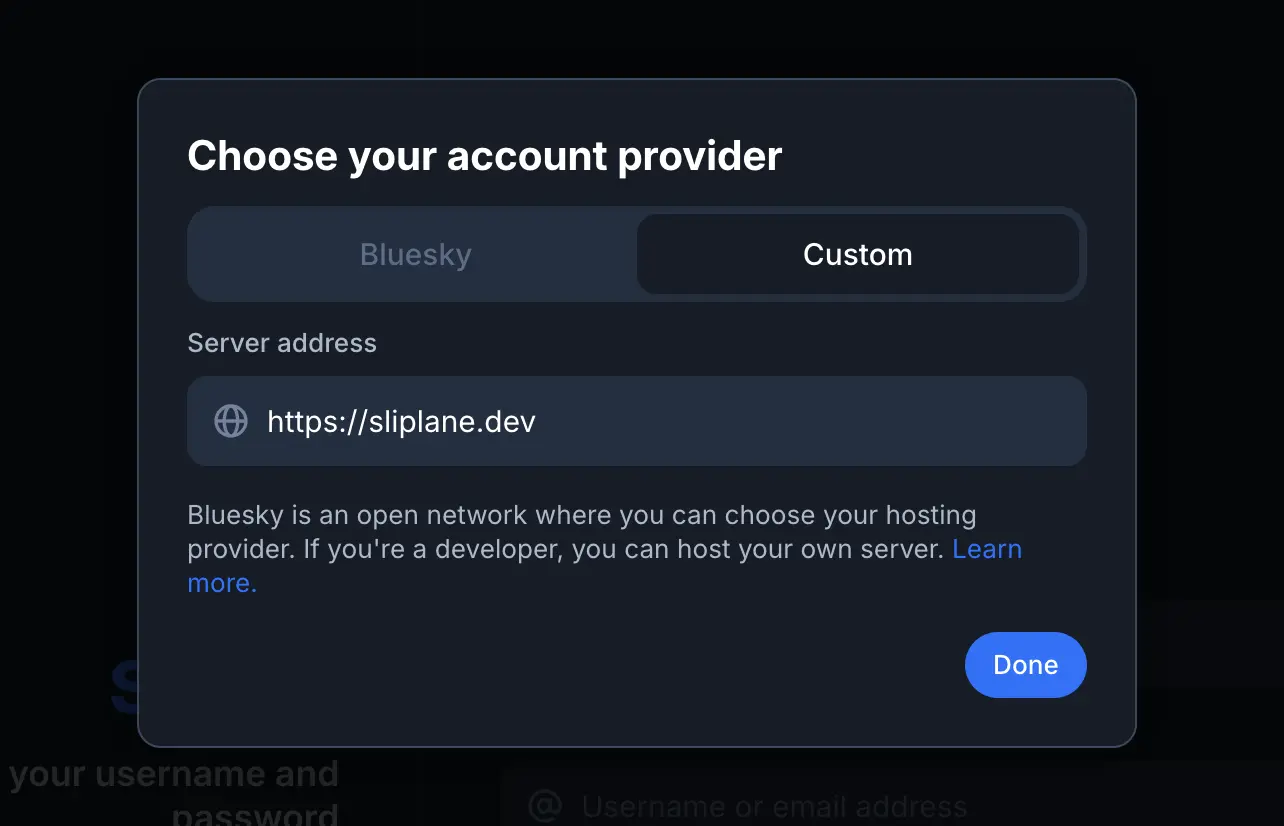
Open Bluesky. Instead of signing in through the default bsky.social server, choose the custom PDS option and enter your domain.
Sign in with the handle and password from the previous step:
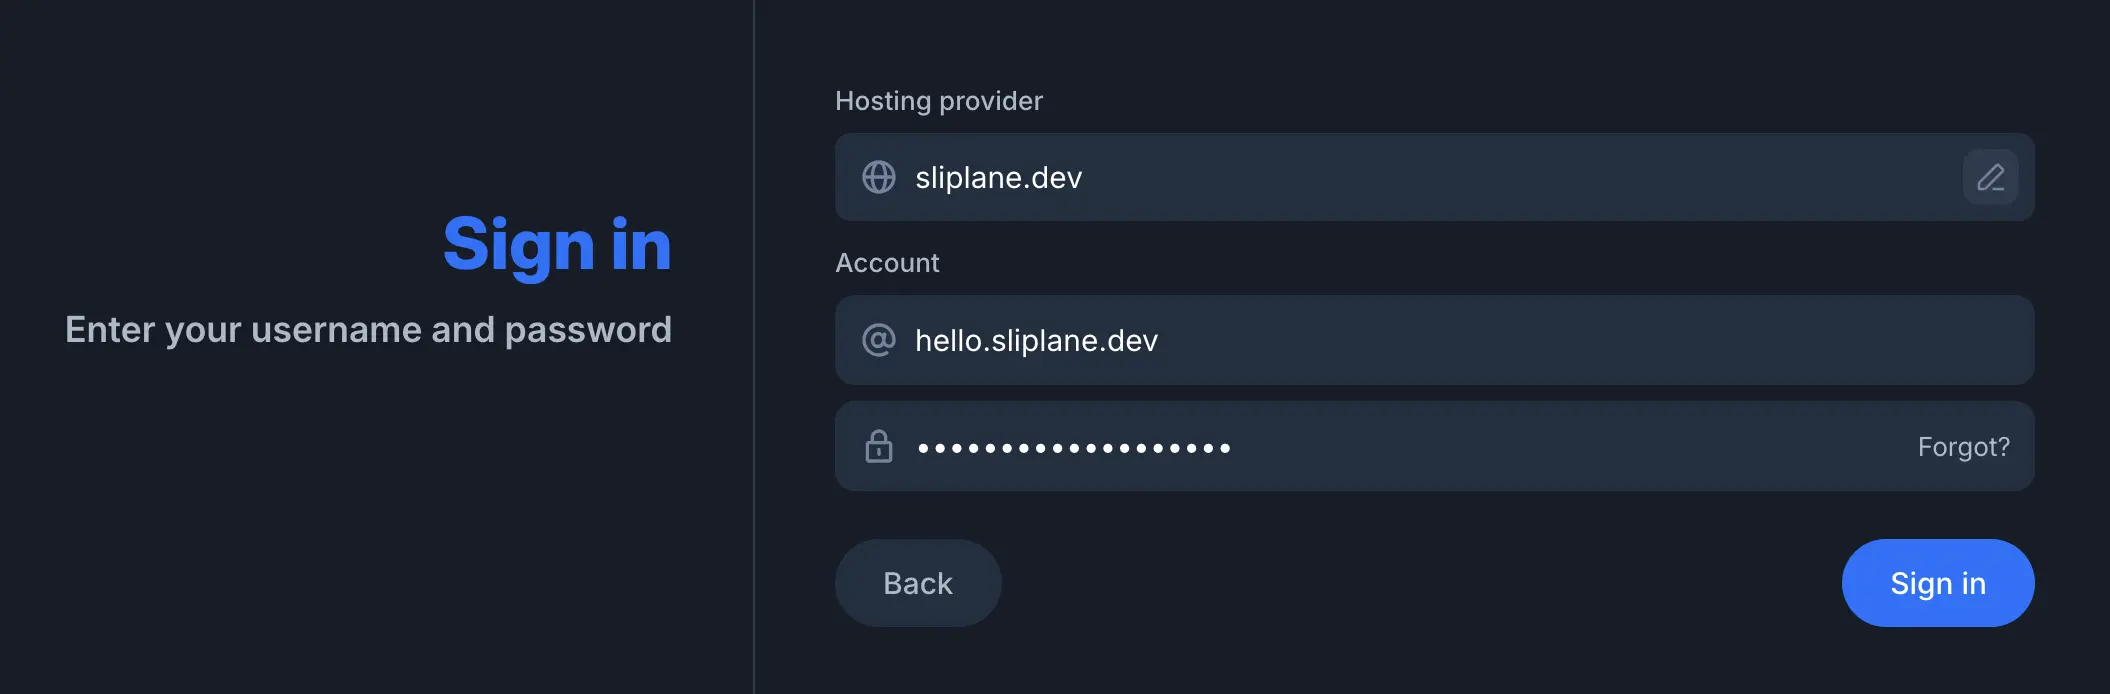
If everything is configured correctly, open your Profile or Settings page, you should see your handle with an @ prefix, e.g. @hello.sliplane.dev.
Step 7 (optional): Browse your PDS with PDSls
PDSls is a browser-based tool for inspecting AT Protocol data. To explore your PDS account:
- Go to pdsls.dev
- Enter your handle (e.g.
hello.sliplane.dev) into the search field
If the endpoint and DID resolve correctly, your self-hosted PDS is live and properly federated with the wider Bluesky network.
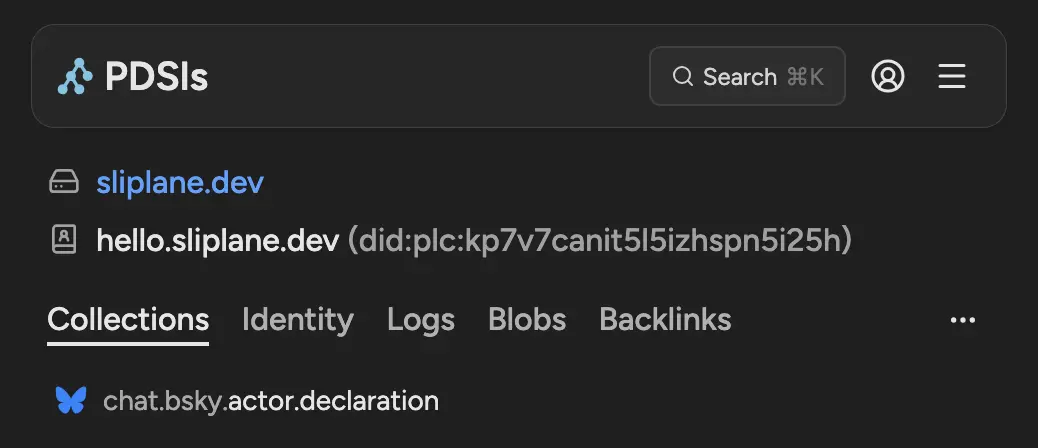
The search results show your PDS domain, handle, DID, and AT Protocol collections where your Bluesky collection lies.
Conclusion
You now have your own Bluesky PDS running on your own server. Your posts, likes, and follows live on infrastructure you control.
Besides of data-level infrastructure like a PDS, you can also self host application-level infrastructure like an AppView or Relay. We may cover these topics in the future, so stay tuned!