Vibe Hosting with VS Code
 Yulei Chen
What if you could list your services, inspect service logs, and even fix failed deployments without leaving VS Code? That's vibe hosting: you stay in the flow, and your AI assistant talks to Sliplane for you via the Sliplane MCP server. Deploy from chat, read logs in chat, and say "fix it" when a build fails. This post walks you through setup and a short showcase so you can try it yourself.
Prerequisites
Before installing the Sliplane MCP server in VS Code, have:
- A Sliplane account (start free trial if you don't have one).
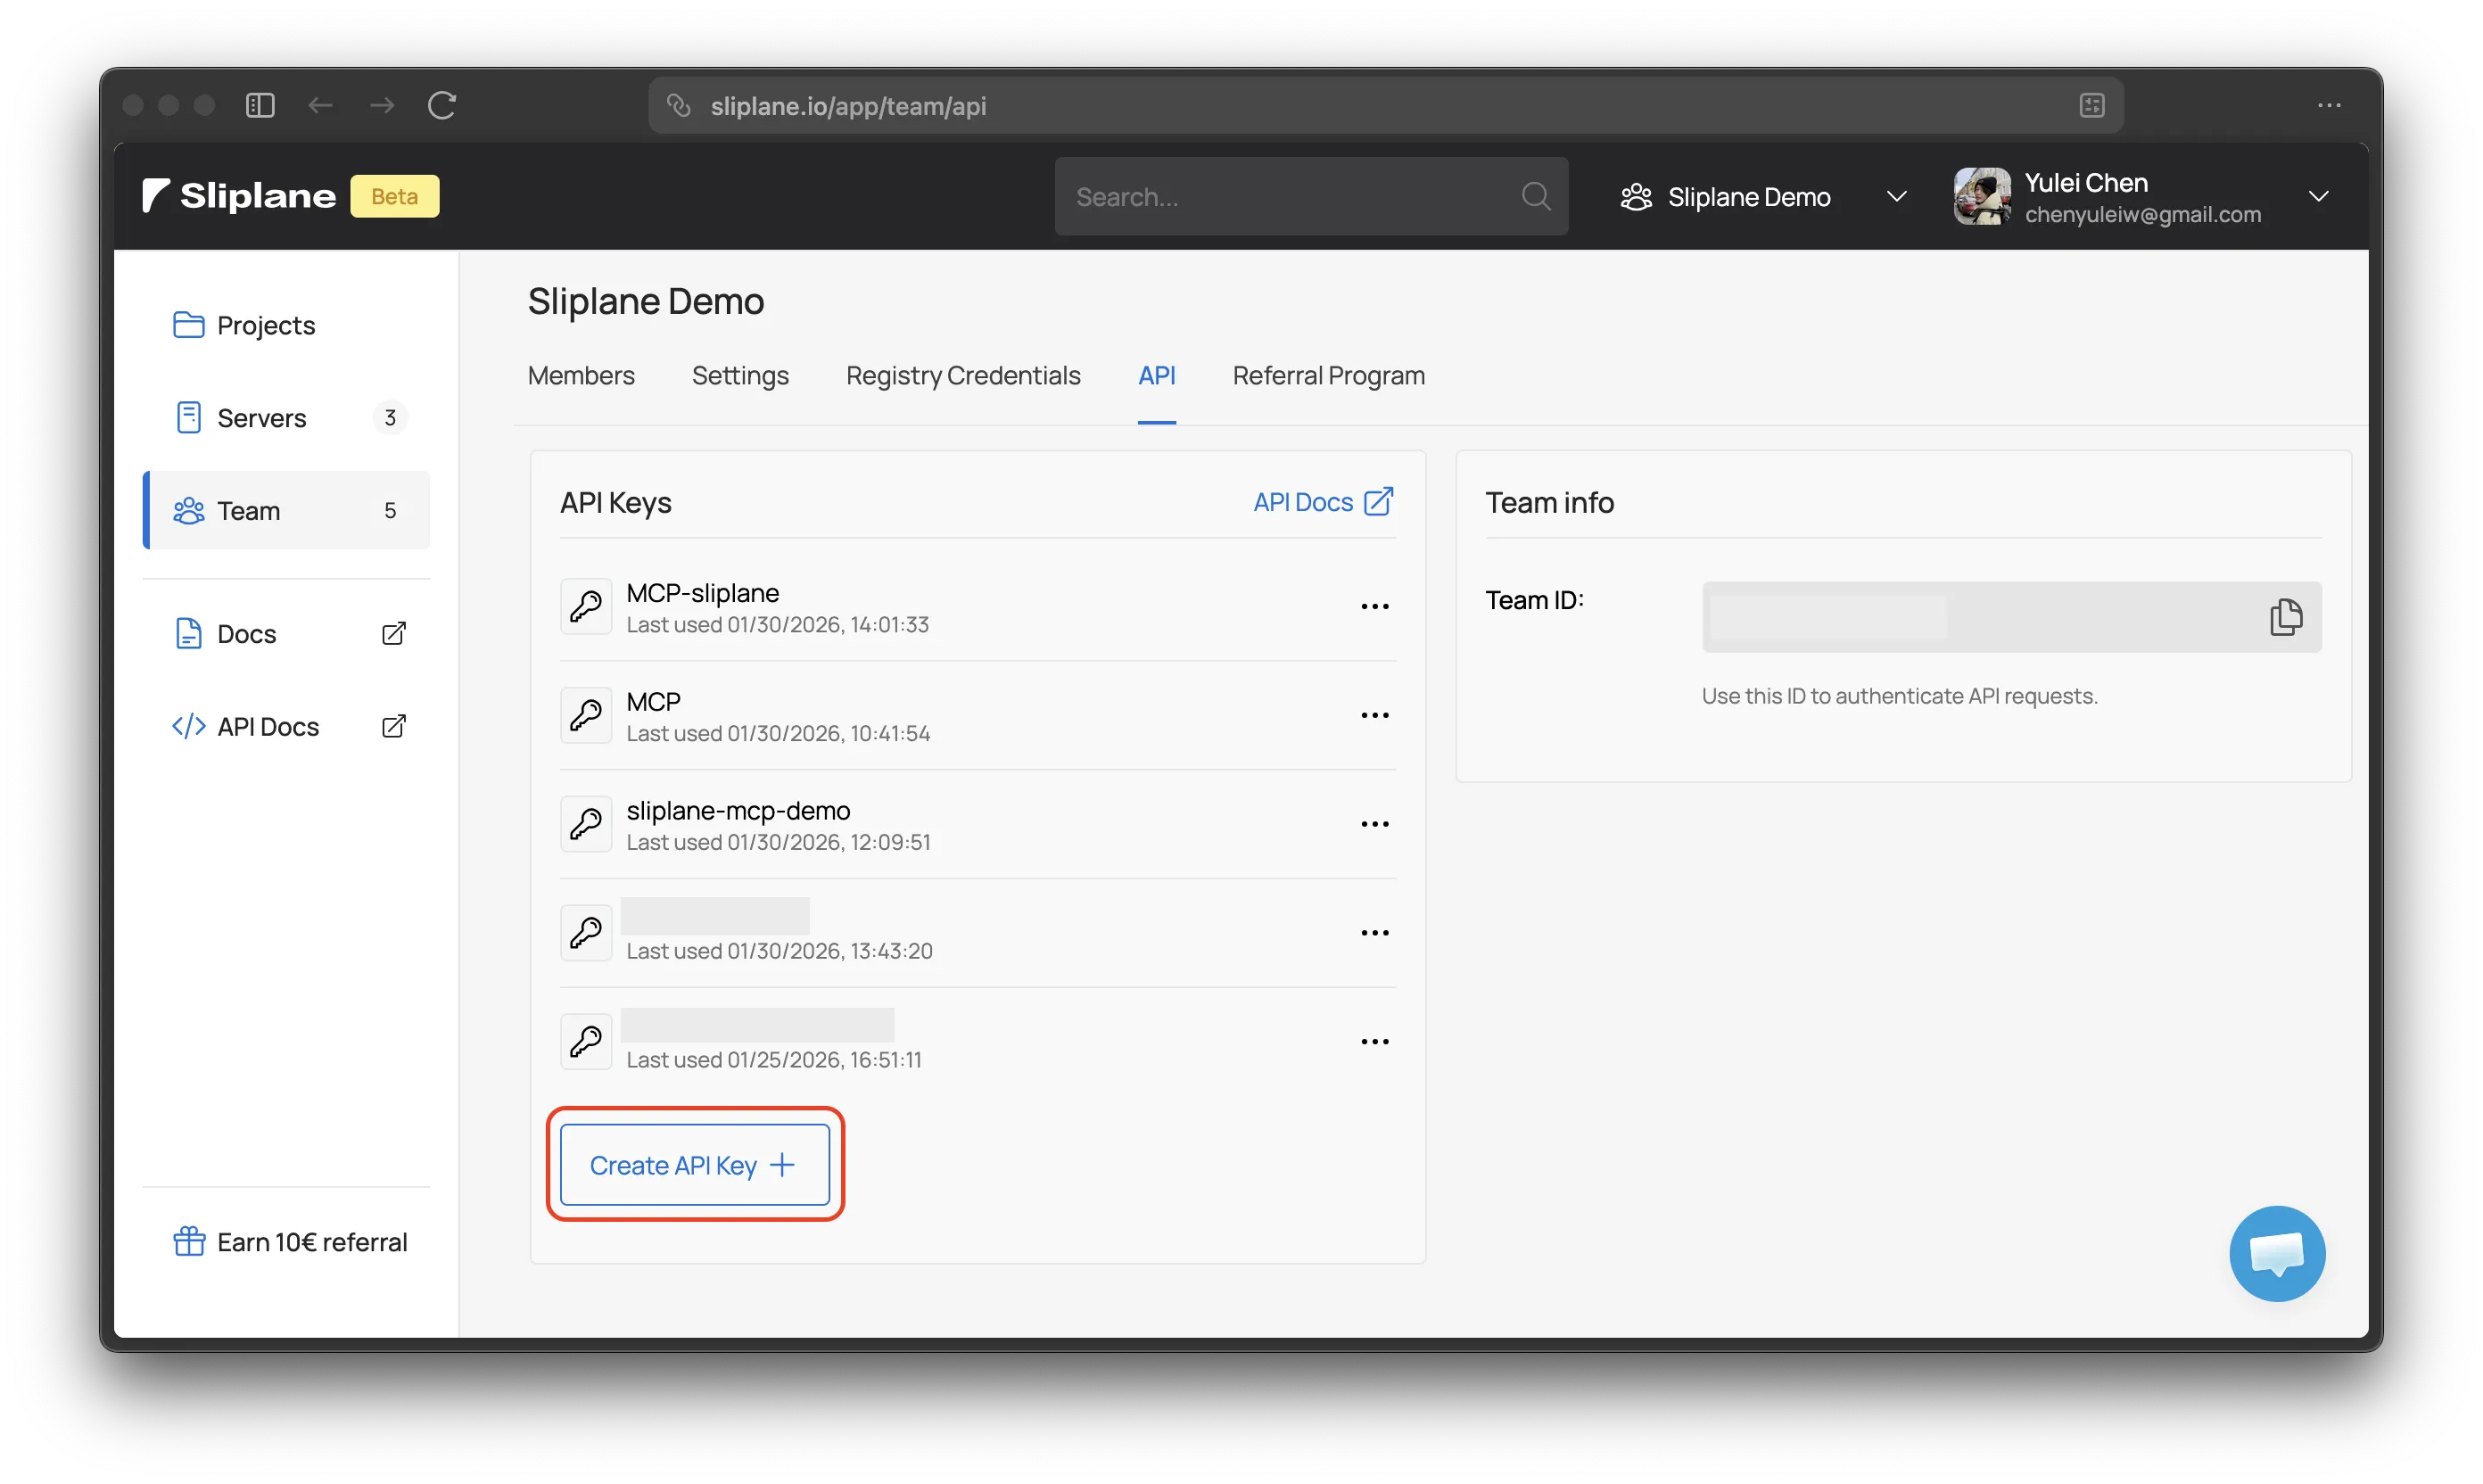
- Your API key from your Team. You'll paste it into VS Code later.
Installation
Click the button below to install Sliplane MCP server to VS Code.
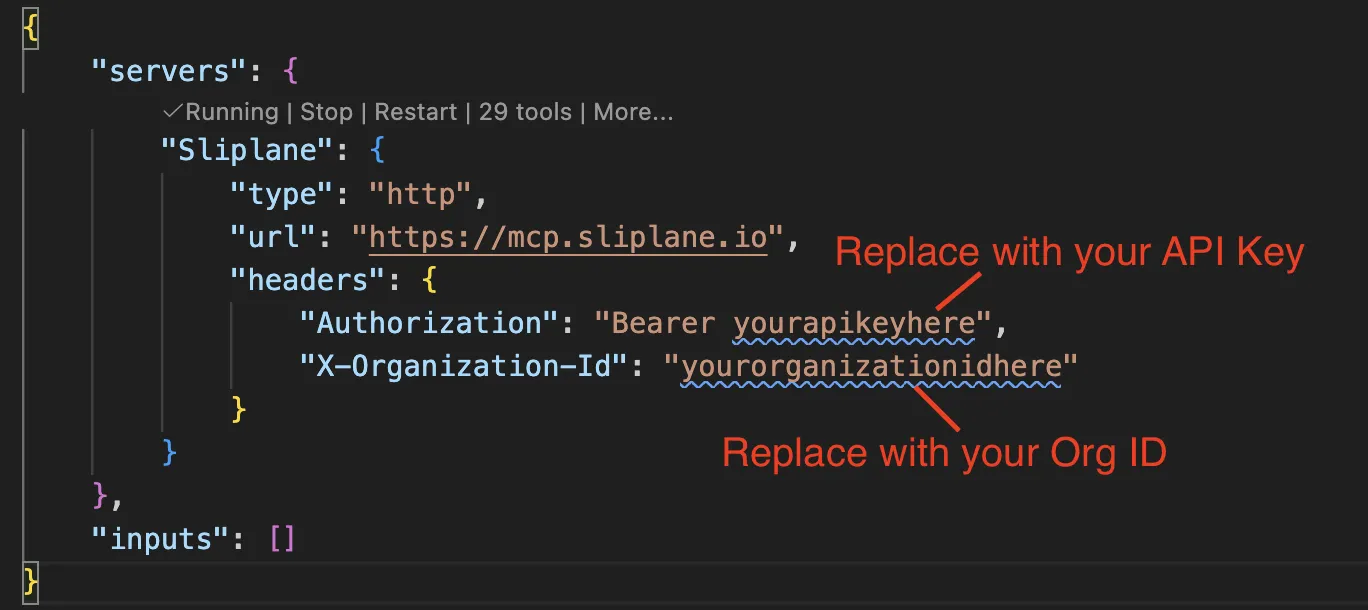
In VS Code, first click "install", then click the setting icon and open configuration(JSON).

Paste your API key in the configuration:
Showcase
Here's a simplified use case from a Git repo to deploying on Sliplane and debugging a failed build with VS Code and the Sliplane MCP server.
LLMs can make mistakes. Always double-check what the agent is doing and verify the plan before approving any actions.
Step 1: Prepare the repo
For this example we use a small Git repo sliplane-mcp-demo with a minimal Docker static deployment.
- Dockerfile – builds a tiny static site and serves it (e.g. with a minimal web server).
FROM nginx:alpine
COPY index.html /usr/share/nginx/html/
EXPOSE 80
CMD ["nginx", "-g", "daemon off;"]
- index.html – a single page that displays "Hello Sliplane" centered on the screen.
<!DOCTYPE html>
<html lang="en">
<head>
    <meta charset="UTF-8">
    <meta name="viewport" content="width=device-width, initial-scale=1.0">
    <title>Hello Sliplane</title>
    <!-- CSS is omitted here -->
</head>
<body>
    <h1>Hello Sliplane</h1>
</body>
</html>
That's it: two files, one container, one page.
Step 2: Deploy the repo on Sliplane
- Open container.new.
- Select project → Select server → Add service → Repository.
- Choose your repo. In our example it's sliplane-mcp-demo. Noted that you may need to configure repo access for the first time.
- Add service and then Deploy. Wait until the service is running.
Step 3: List services in VS Code chat
In VS Code, open the chat and ask something like: "List my Sliplane services". The model will use the MCP server to call the Sliplane API and show your services.
Step 4: Introduce a typo
In your repo:
- In the Dockerfile, change the line that references
index.htmltoindexl.html(typo).
FROM nginx:alpine
COPY index.html /usr/share/nginx/html/
COPY indexl.html /usr/share/nginx/html/
EXPOSE 80
CMD ["nginx", "-g", "daemon off;"]
- Commit and push the change.
The next build will fail because the file doesn't exist.
Step 5: Fix in VS Code chat
In VS Code chat, ask like: "Show me the logs for the service sliplane-mcp-demo." The model will fetch the latest logs and report that the build failed. Then, in the same conversation, say: "Fix it." The model should correct the Dockerfile back to index.html. Again, commit and push your change. Checkout the log, you will find everything works now.
Vibe hosting is exactly this: your services and deployments stay on Sliplane, and VS Code + the Sliplane MCP server give you a single place to check services, read logs, and iterate on fixes. The example above focused on listing services and debugging failed builds from logs, but that's only the beginning. With the Sliplane MCP server, you can also:
- Create new services, e.g. "Add a new service from this repo to my project".
- Deploy databases, e.g. "Deploy a Postgres service".
- Deploy AI workflow automation, e.g "Deploy n8n to my project".
- Inspect events, domains, volumes, and settings without leaving VS Code.
... and more. Enjoy and have fun with vibe hosting!