Self-Hosting ownCloud on a Hetzner Ubuntu Server
 Jonas Scholz
Ever dreamed of having a cloud storage solution that YOU completely control, without relying on Dropbox or Google Drive? Let me introduce you to ownCloud — an excellent open-source platform that enables you to host your own secure file storage system! 🚀 By setting up ownCloud yourself, you regain control over your privacy, and in this guide, I'll walk you through the entire process using Docker on a Linux Ubuntu server.
ownCloud is the original platform that Nextcloud was forked from. If you're interested in Nextcloud instead, check out our complete guide to self-hosting Nextcloud on Ubuntu. You might also want to explore our comparison of 5 awesome Nextcloud alternatives, which includes ownCloud, Seafile, Pydio, and more.
Are you prepared to reclaim ownership of your data and reduce your dependence on big tech companies?
Watch the video tutorial instead:
Step 1: Prepare Your Linux Server
For this tutorial, we'll be utilizing a cost-effective server from Hetzner, which has become one of my preferred providers for personal projects and small-scale self-hosting environments. Start by creating a Linux server instance. Ubuntu is a simple and reliable choice. Log into your server via SSH.
Once connected, ensure your system is current:
sudo apt-get update
sudo apt-get upgrade -y
Step 2: Setup a Firewall for Security
It is important to restrict the ports your server accepts connections on. Only the essential services (SSH on port 22, HTTP on port 80, and HTTPS on port 443) should be open:
sudo apt install ufw -y
sudo ufw allow 22    # SSH access
sudo ufw allow 80    # HTTP
sudo ufw allow 443   # HTTPS
sudo ufw enable
You can verify your rules are correct:
sudo ufw status verbose
Make sure that you also use the Firewall provided by your hosting provider, as Docker likes to circumvent UFW rules. Alternatively you can follow these steps from StackOverflow.
Skip the Manual Setup with Sliplane
Want to get ownCloud running without the manual configuration? Sliplane provides:
- One-click deployment - Get ownCloud running in minutes
- Automatic SSL - HTTPS certificates configured automatically
- Managed backups - Never lose your data
- Easy scaling - Upgrade resources with a click
Step 3: Install Docker on Ubuntu Server
Docker is an easy tool to run applications inside isolated containers. Install Docker on Ubuntu by following these steps.
First, install the required packages and Docker's official GPG key so your system trusts Docker's packages:
sudo apt-get update
sudo apt-get install ca-certificates curl gnupg

sudo install -m 0755 -d /etc/apt/keyrings
curl -fsSL https://download.docker.com/linux/ubuntu/gpg | sudo gpg --dearmor -o /etc/apt/keyrings/docker.gpg
sudo chmod a+r /etc/apt/keyrings/docker.gpg
Then add Docker's official repository to your server:
echo \
  "deb [arch=$(dpkg --print-architecture) signed-by=/etc/apt/keyrings/docker.gpg] https://download.docker.com/linux/ubuntu \
  $(. /etc/os-release && echo $VERSION_CODENAME) stable" | \
  sudo tee /etc/apt/sources.list.d/docker.list > /dev/null

sudo apt-get update
Now install Docker and Docker Compose Plugin:
sudo apt-get install docker-ce docker-ce-cli containerd.io docker-buildx-plugin docker-compose-plugin -y
Check that the Docker installation succeeded:
sudo docker run hello-world
Step 4: Setup Caddy Web Server to manage HTTPS
Caddy serves ownCloud securely by providing automatic HTTPS certificates. Install Caddy with these commands:
sudo apt install -y debian-keyring debian-archive-keyring apt-transport-https curl

curl -1sLf 'https://dl.cloudsmith.io/public/caddy/stable/gpg.key' | sudo gpg --dearmor -o /usr/share/keyrings/caddy-stable-archive-keyring.gpg

curl -1sLf 'https://dl.cloudsmith.io/public/caddy/stable/debian.deb.txt' \
| sudo tee /etc/apt/sources.list.d/caddy-stable.list

sudo apt update
sudo apt install caddy -y
Once installed, configure Caddy using a config file called Caddyfile:
sudo nano /etc/caddy/Caddyfile
Enter the following simple configuration in the file (use your registered domain name):
yourdomain.com {
    reverse_proxy localhost:8000
}
If you haven't got a domain yet, temporarily use:
:80 {
    reverse_proxy localhost:8000
}
Save the Caddyfile and restart Caddy:
sudo systemctl restart caddy
Step 5: Deploy Owncloud using Docker Compose
Create a directory for your ownCloud deployment and enter that directory:
mkdir ~/owncloud
cd ~/owncloud
Create docker-compose.yml with the following content (but make sure to actually use a strong password):
services:
  owncloud:
    image: owncloud/server
    restart: always
    ports:
      - 8000:8080
    depends_on:
      - mariadb
      - redis
    environment:
      - OWNCLOUD_DOMAIN=localhost:8080
      - OWNCLOUD_TRUSTED_DOMAINS=localhost
      - OWNCLOUD_DB_TYPE=mysql
      - OWNCLOUD_DB_NAME=owncloud
      - OWNCLOUD_DB_USERNAME=owncloud
      - OWNCLOUD_DB_PASSWORD=owncloud
      - OWNCLOUD_DB_HOST=mariadb
      - OWNCLOUD_ADMIN_USERNAME=admin
      - OWNCLOUD_ADMIN_PASSWORD=supersecurepassword
      - OWNCLOUD_MYSQL_UTF8MB4=true
      - OWNCLOUD_REDIS_ENABLED=true
      - OWNCLOUD_REDIS_HOST=redis
    volumes:
      - files:/mnt/data
  mariadb:
    image: mariadb:10.11
    restart: always
    environment:
      - MYSQL_ROOT_PASSWORD=owncloud
      - MYSQL_USER=owncloud
      - MYSQL_PASSWORD=owncloud
      - MYSQL_DATABASE=owncloud
      - MARIADB_AUTO_UPGRADE=1
    volumes:
      - mysql:/var/lib/mysql
  redis:
    image: redis:6
    restart: always
    volumes:
      - redis:/data
volumes:
  files:
  mysql:
  redis:
Start ownCloud and PostgreSQL with Docker Compose:
sudo docker compose up -d
Docker will pull images automatically and start the containers in the background:

Step 6: Accessing ownCloud
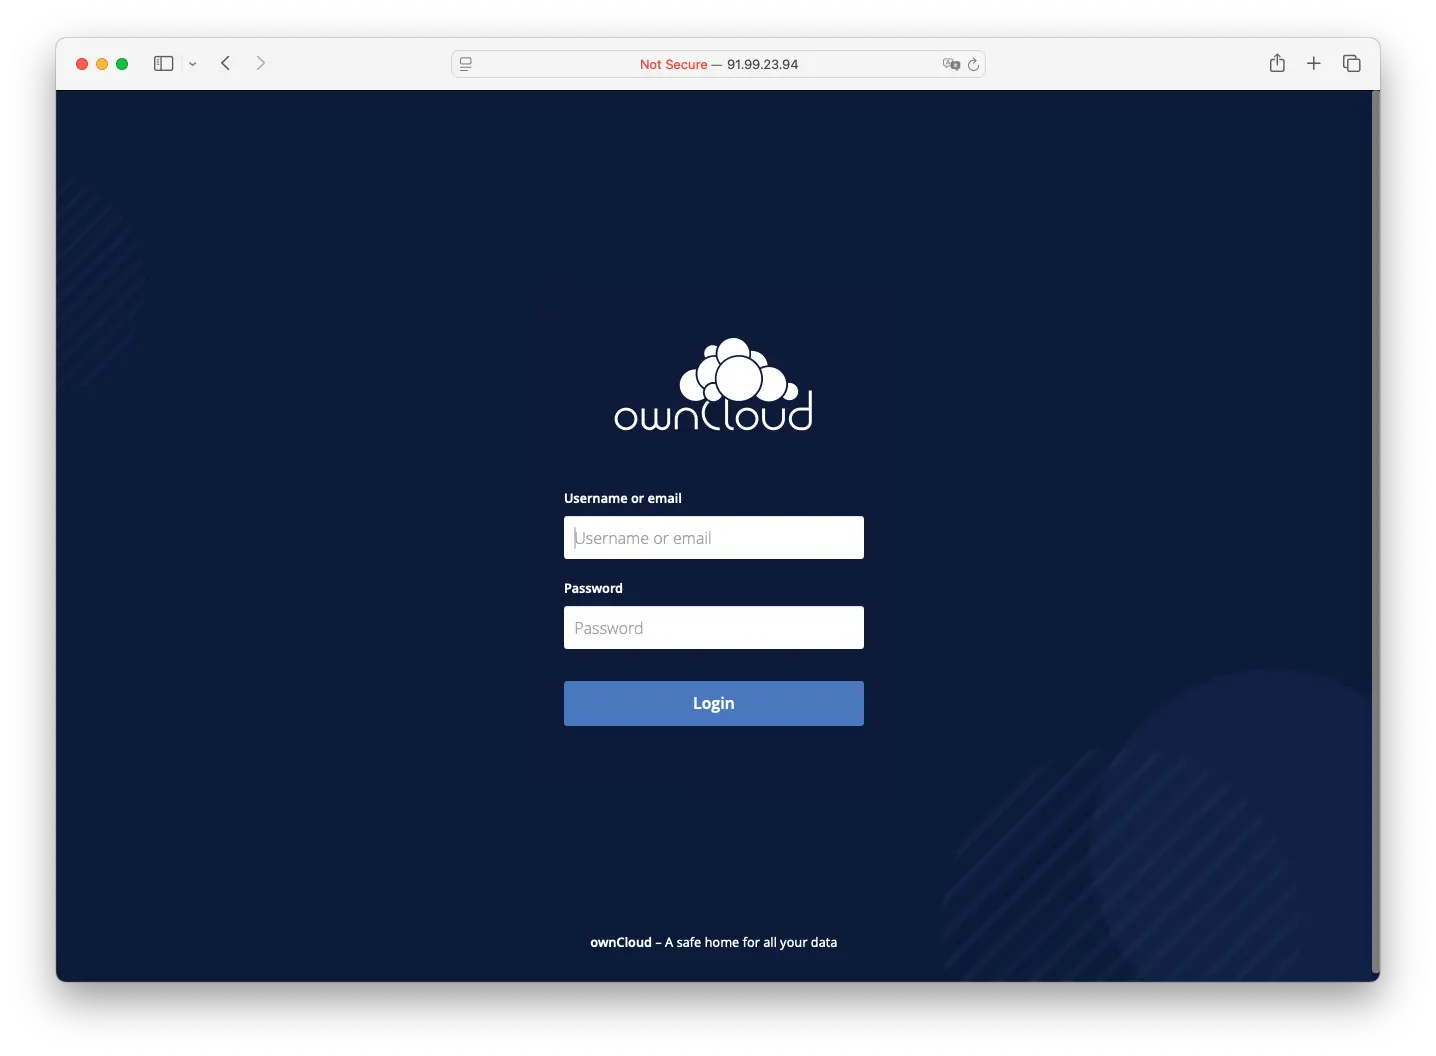
Once the docker containers start successfully, open your web browser and go to your domain (https://yourdomain.com) or use your IP. You will land on ownCloud's login page:
Then after the login with your admin account (the one you set in the docker-compose.yml) you get redirected to the dashboard:
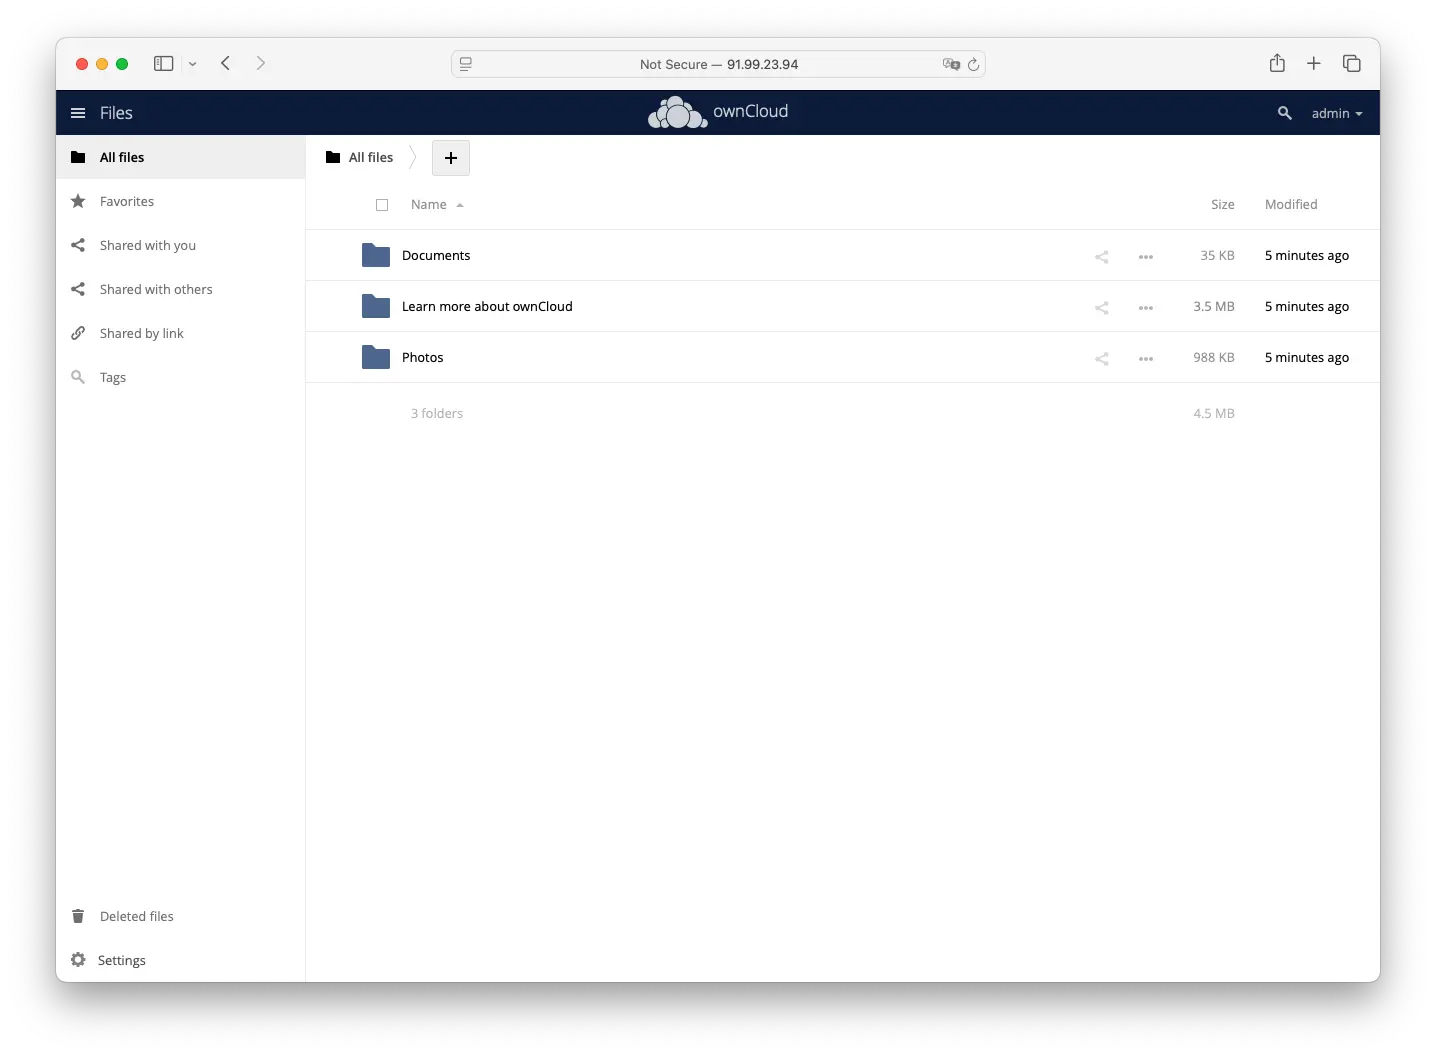
You're done! You can now use your public ownCloud instance. You can also use the ownCloud app on your phone or desktop to sync files :)
Security Considerations
Running containers publicly means securing your server carefully. Consider adding:
- Regular updates & security patches
- Fail2ban for SSH protection
- Strong passwords and access controls
- Regular server and data backups
An Easier Alternative to Manual Self-Hosting
While this manual setup gives you full control, it requires ongoing maintenance, security updates, and technical knowledge. For a hassle-free experience, Sliplane offers:
- 2-minute deployment - Get ownCloud running instantly
- Automatic updates - Security patches applied automatically
- Built-in monitoring - Know when something needs attention
- Professional support - Get help when you need it
- Affordable pricing - Starting at just €9/month
With Sliplane, you can focus on using ownCloud instead of maintaining servers. Here's how easy it is to deploy: