Self-hosting DocuSeal on a Hetzner Ubuntu Server
 Atakan Öztarak
Want to sign documents using DocuSeal but prefer to fully control your infrastructure? By self-hosting DocuSeal on a Linux Ubuntu server, you can cut down costs, keep your sensitive documents private, and avoid per-signature fees!
Looking for something simpler? If you'd rather skip server management and deploy DocuSeal in just 25 seconds for €9/month, check out our guide on self-hosting DocuSeal the easy way using Sliplane.
Follow along this easy-to-understand guide to learn how you can deploy your own DocuSeal instance using Docker and Caddy Web server for automatic HTTPS.
Before we start, make sure you have:
- A Hetzner account (or any other cloud provider)
- Basic SSH experience
- An SSH key pair on your local machine
Step 0: Create a Server on Hetzner
First, we need to create an Ubuntu server. Log into your Hetzner Cloud Console and click the Create Resource button in the top right corner.
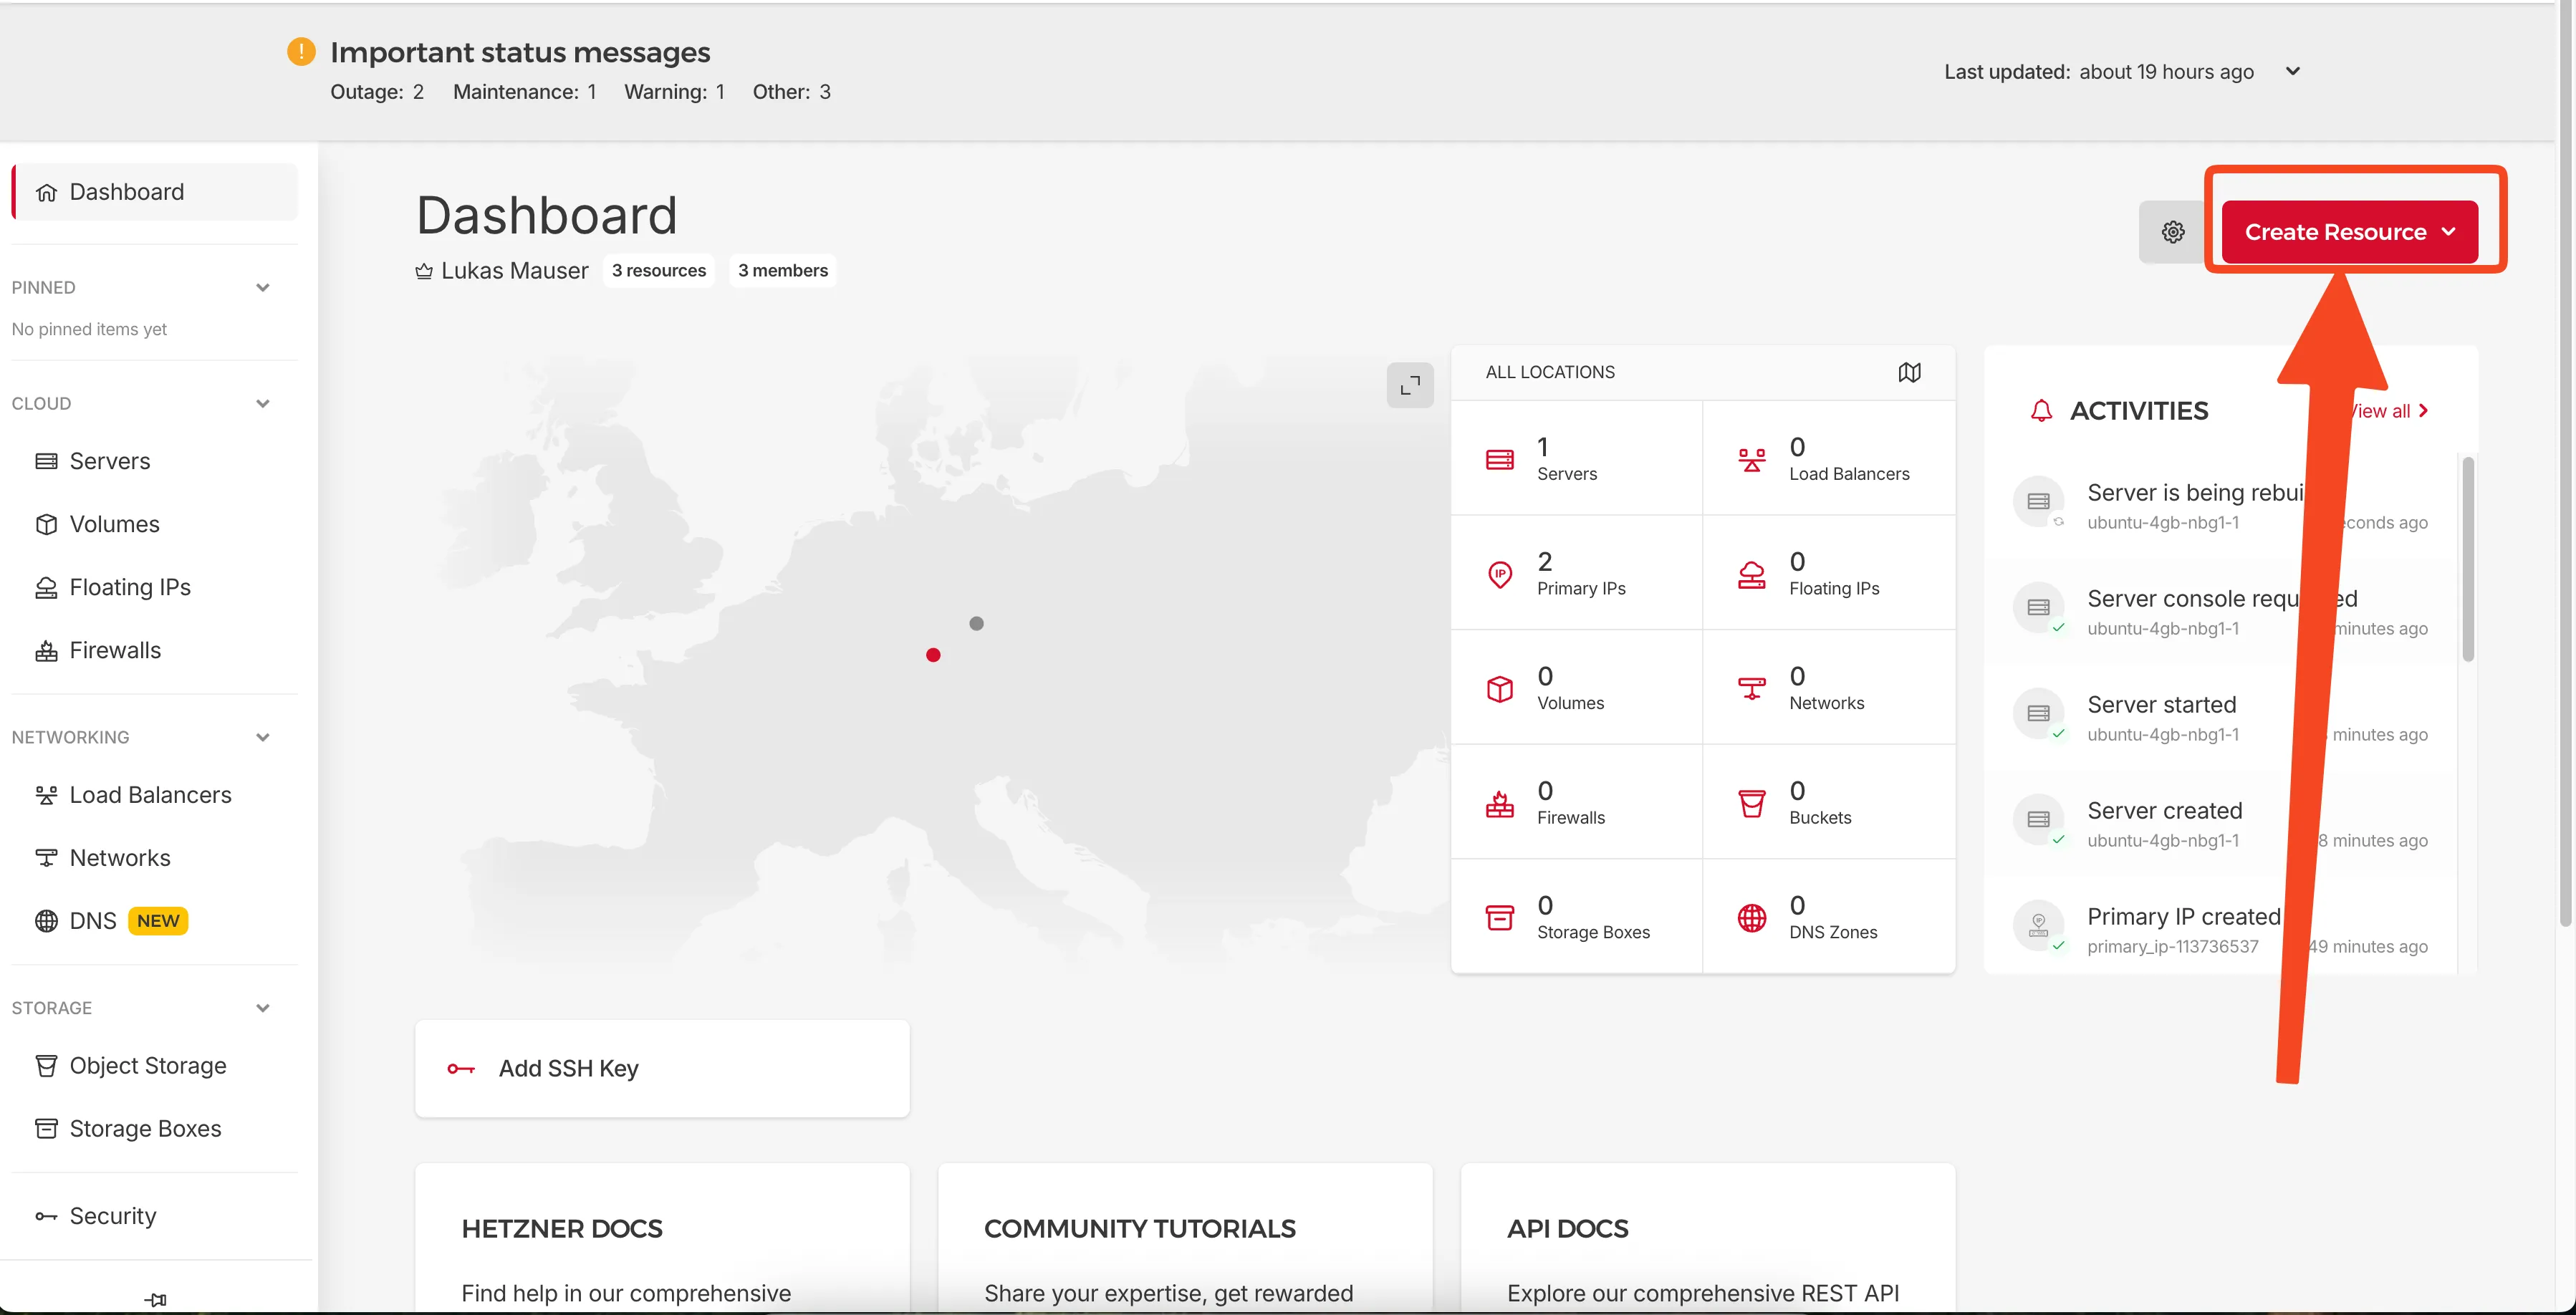 Click "Create Resource" to start creating your server
Select Server Type
Choose Shared Resources and select Cost-Optimized. For DocuSeal, the CX23 server (2 vCPU, 4GB RAM, 40GB SSD) is a great choice at just €2.99/month.
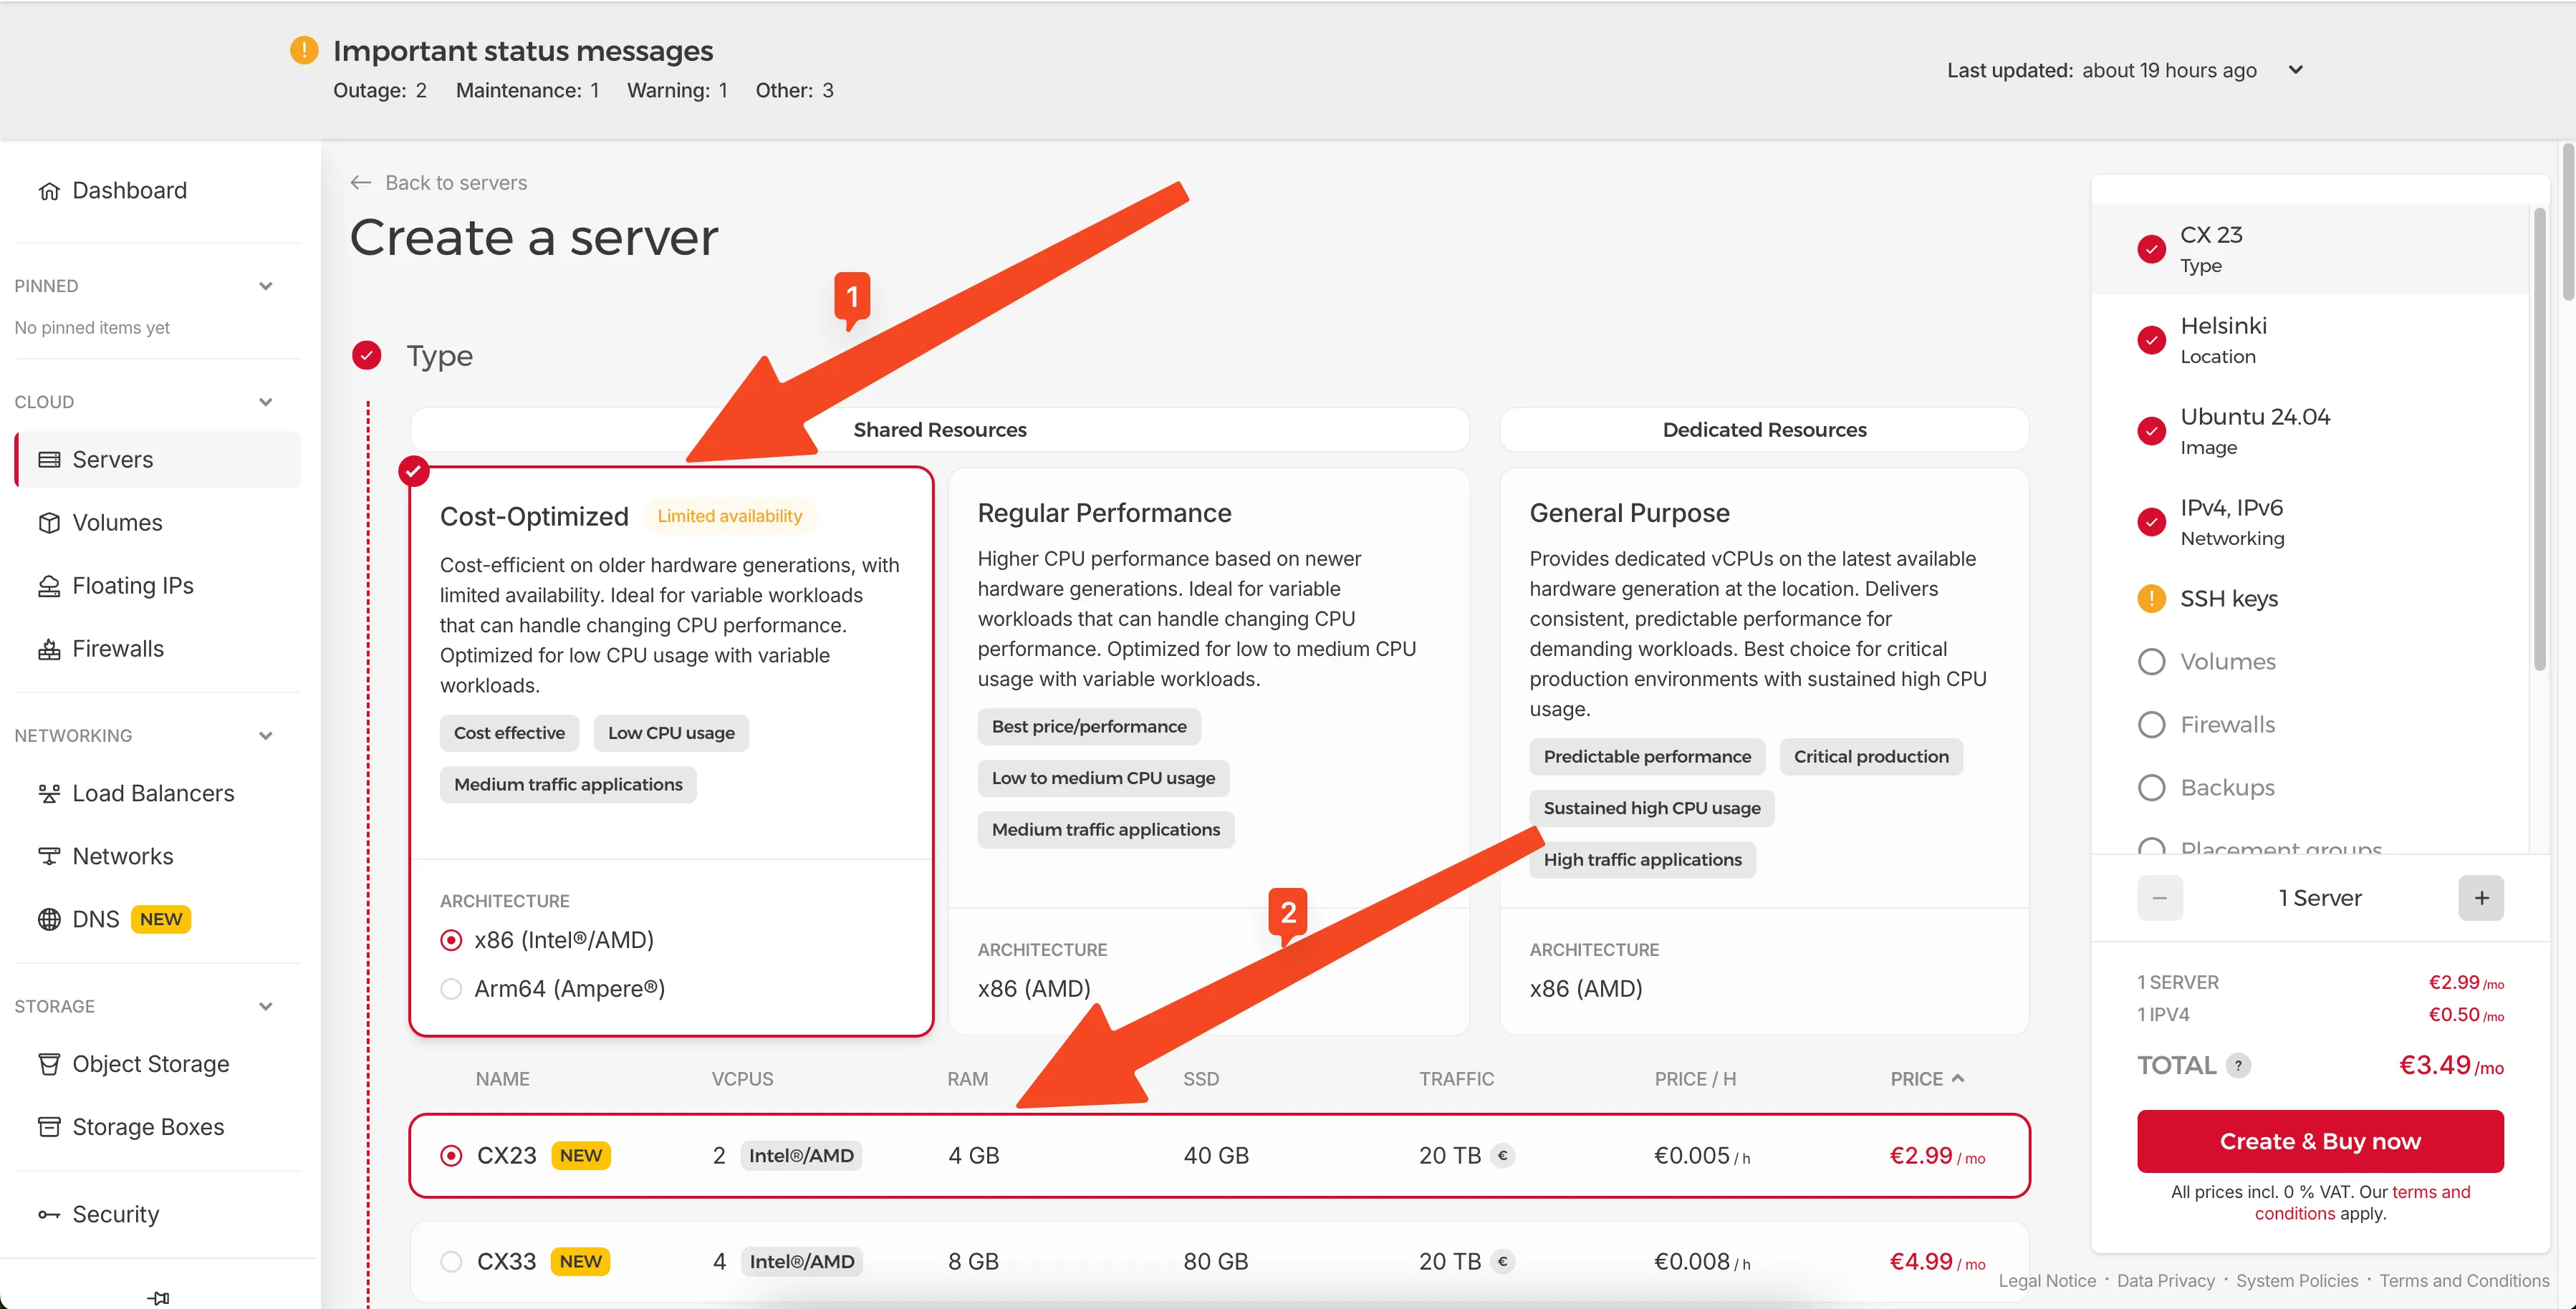 Select Cost-Optimized and CX23 server type
Select Location and OS
Choose a location close to your users (e.g., Nuremberg for EU) and select Ubuntu 24.04 as the operating system.
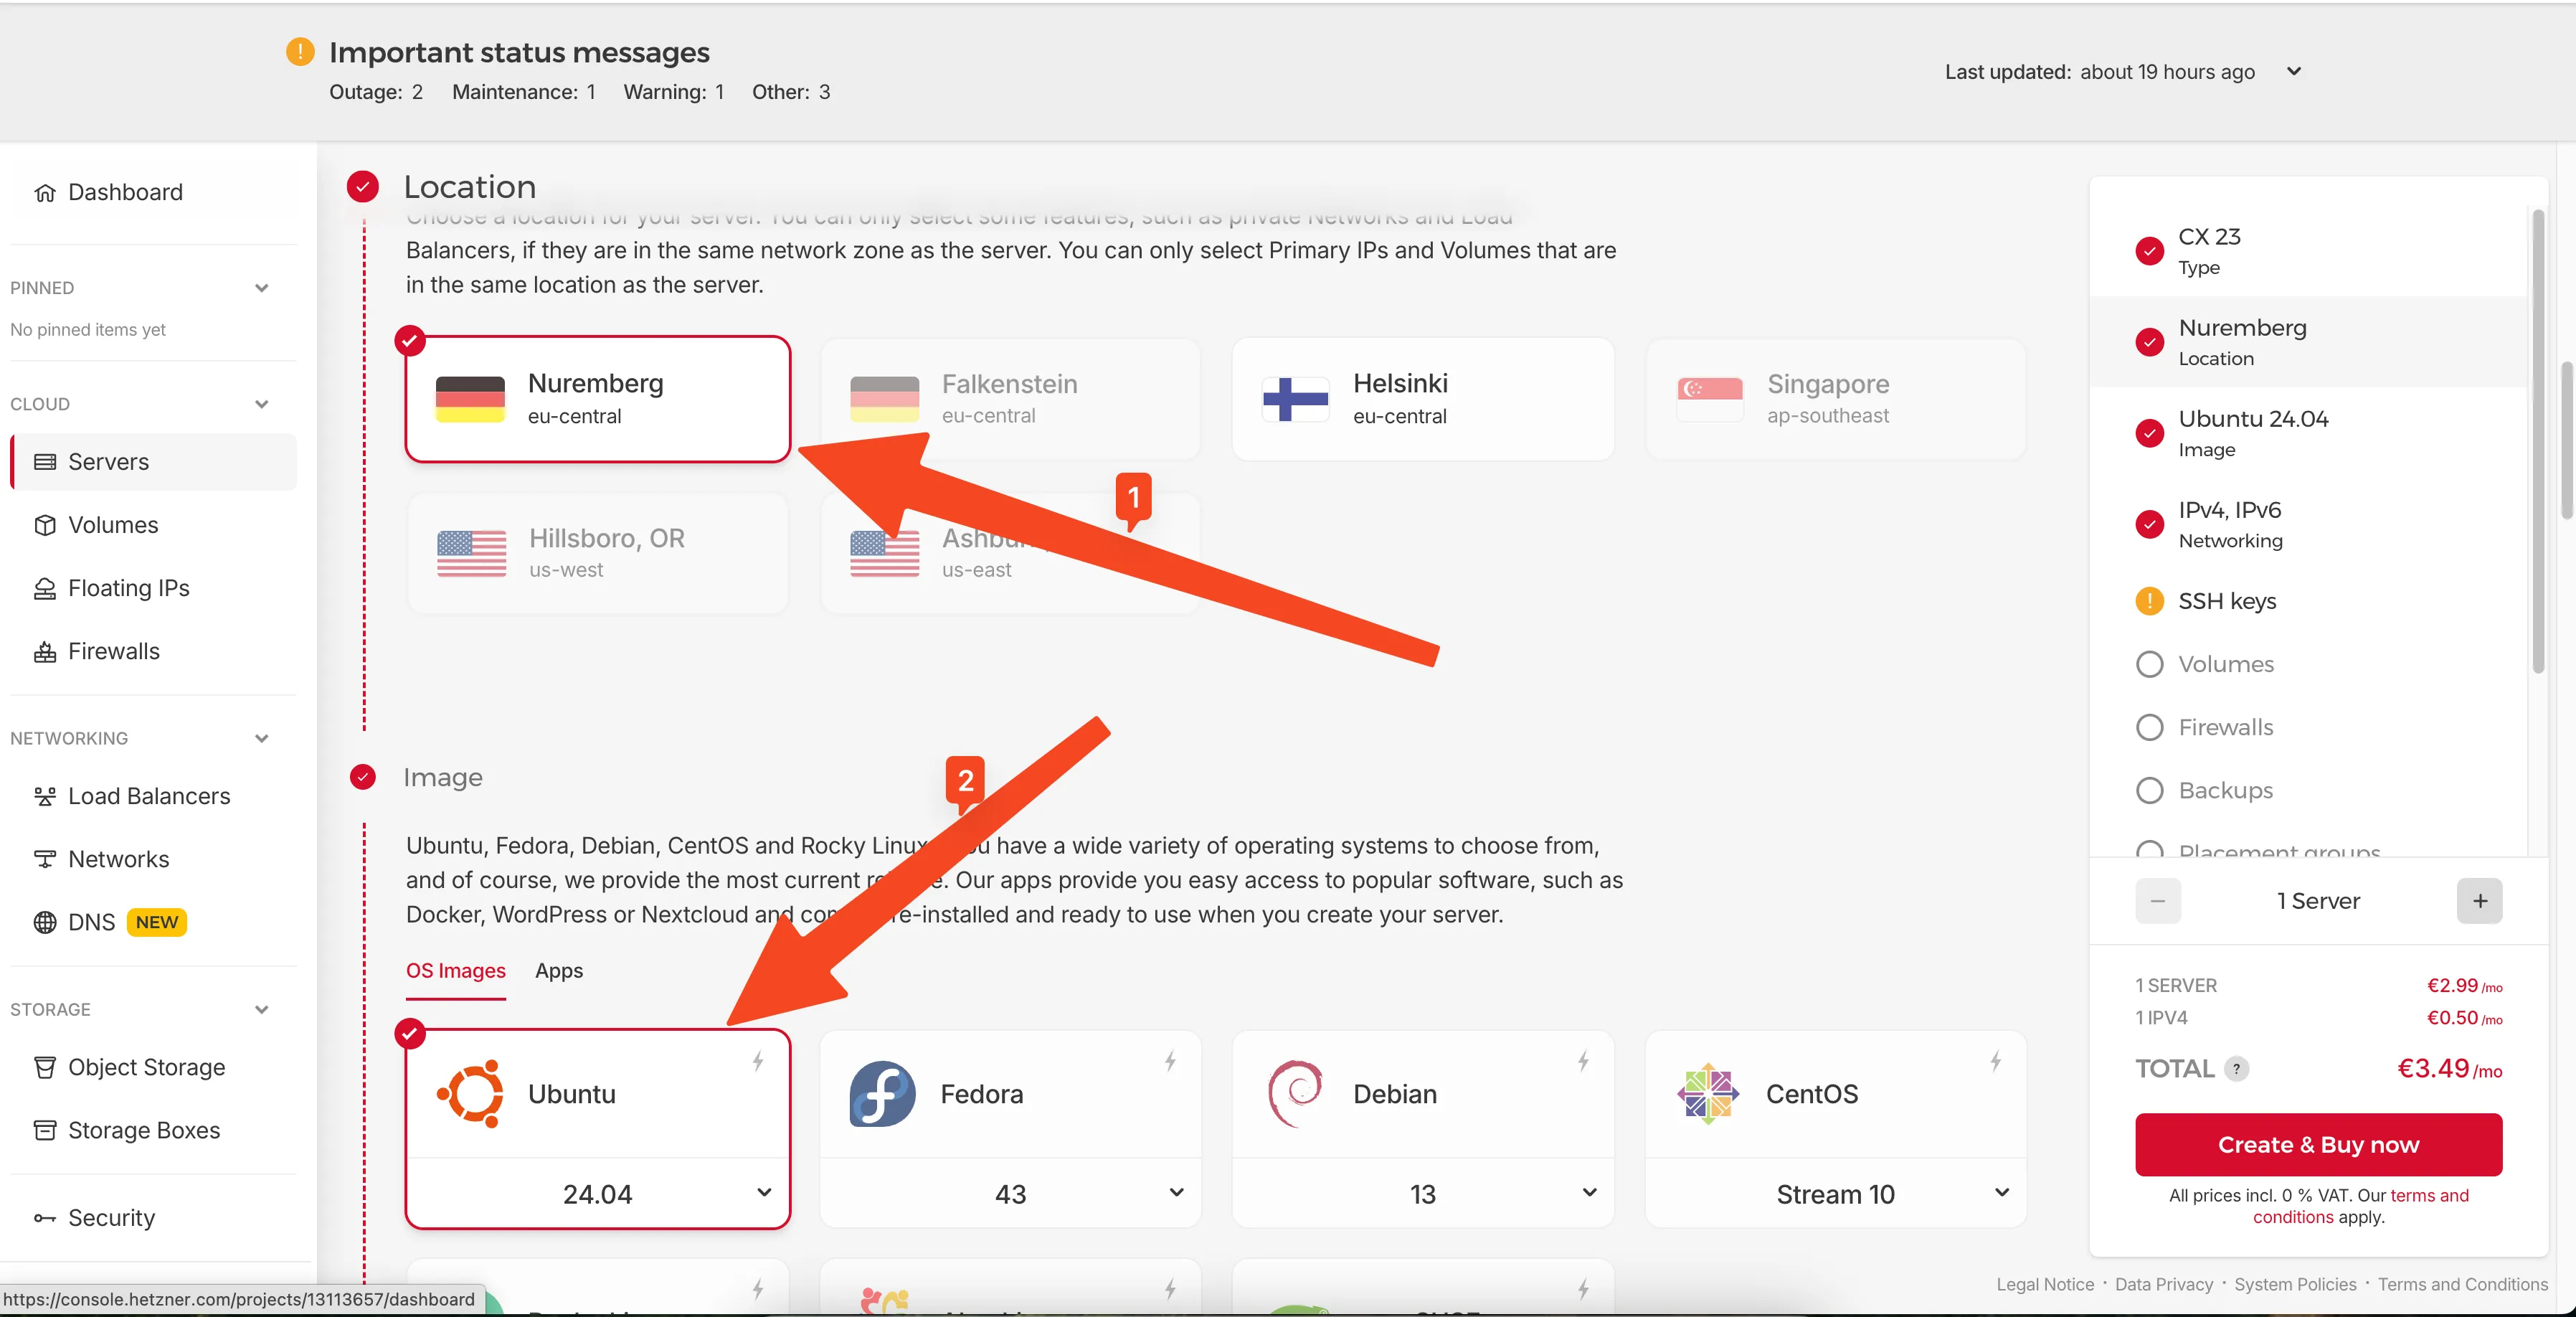 Choose your preferred location and Ubuntu 24.04
Add Your SSH Key
You'll need to add your SSH public key to access the server. On your local machine, copy your public key to clipboard:
# On macOS
pbcopy < ~/.ssh/id_ed25519.pub

# On Linux
cat ~/.ssh/id_ed25519.pub
# Then copy the output
 Copy your SSH public key from terminal
In the Hetzner console, click Add SSH Key and paste your public key. Give it a recognizable name.
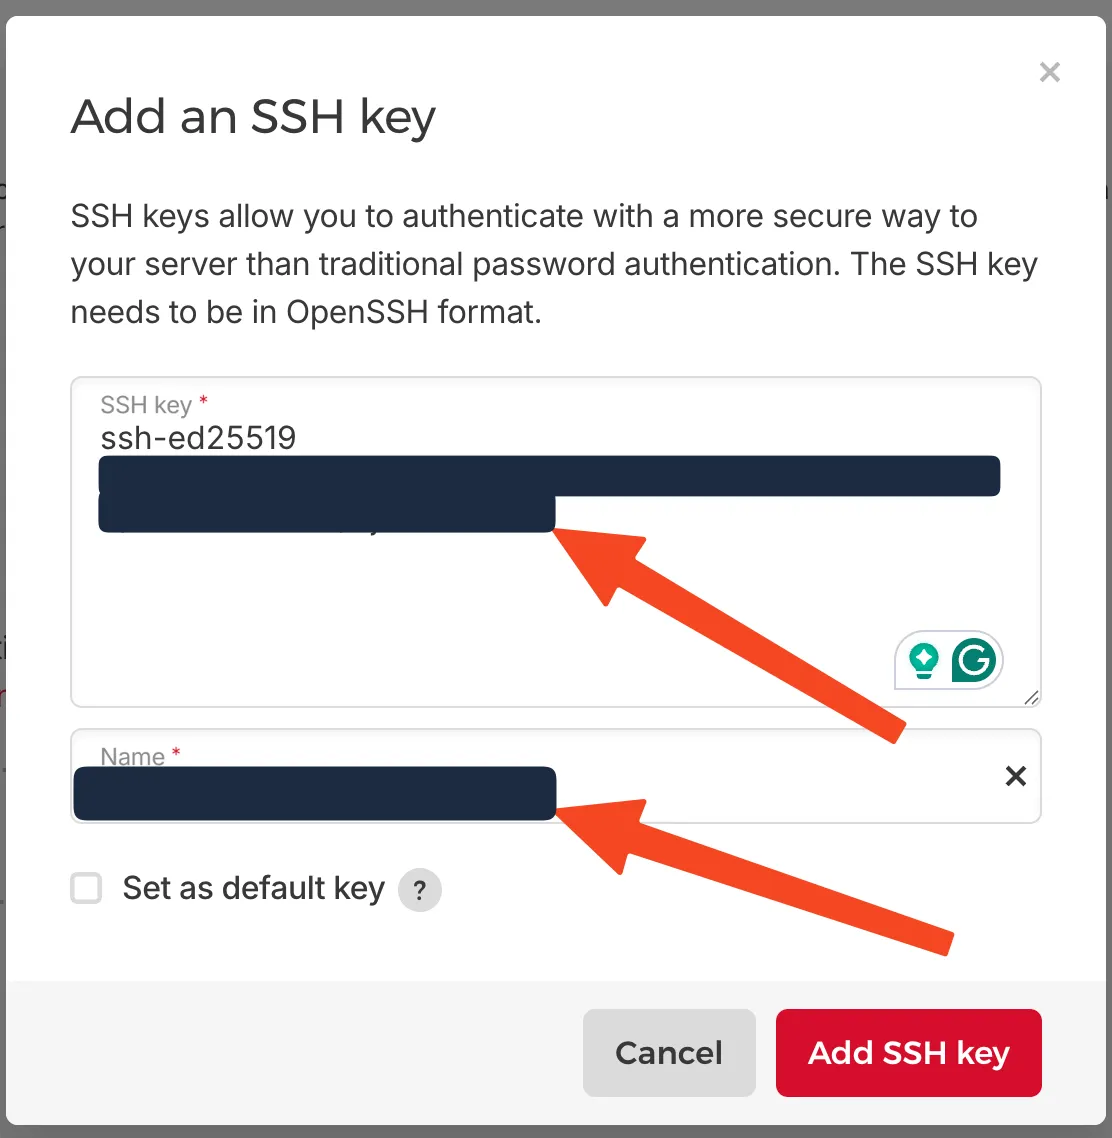 Paste your SSH key and give it a name
Create the Server
Give your server a name and click Create & Buy now.
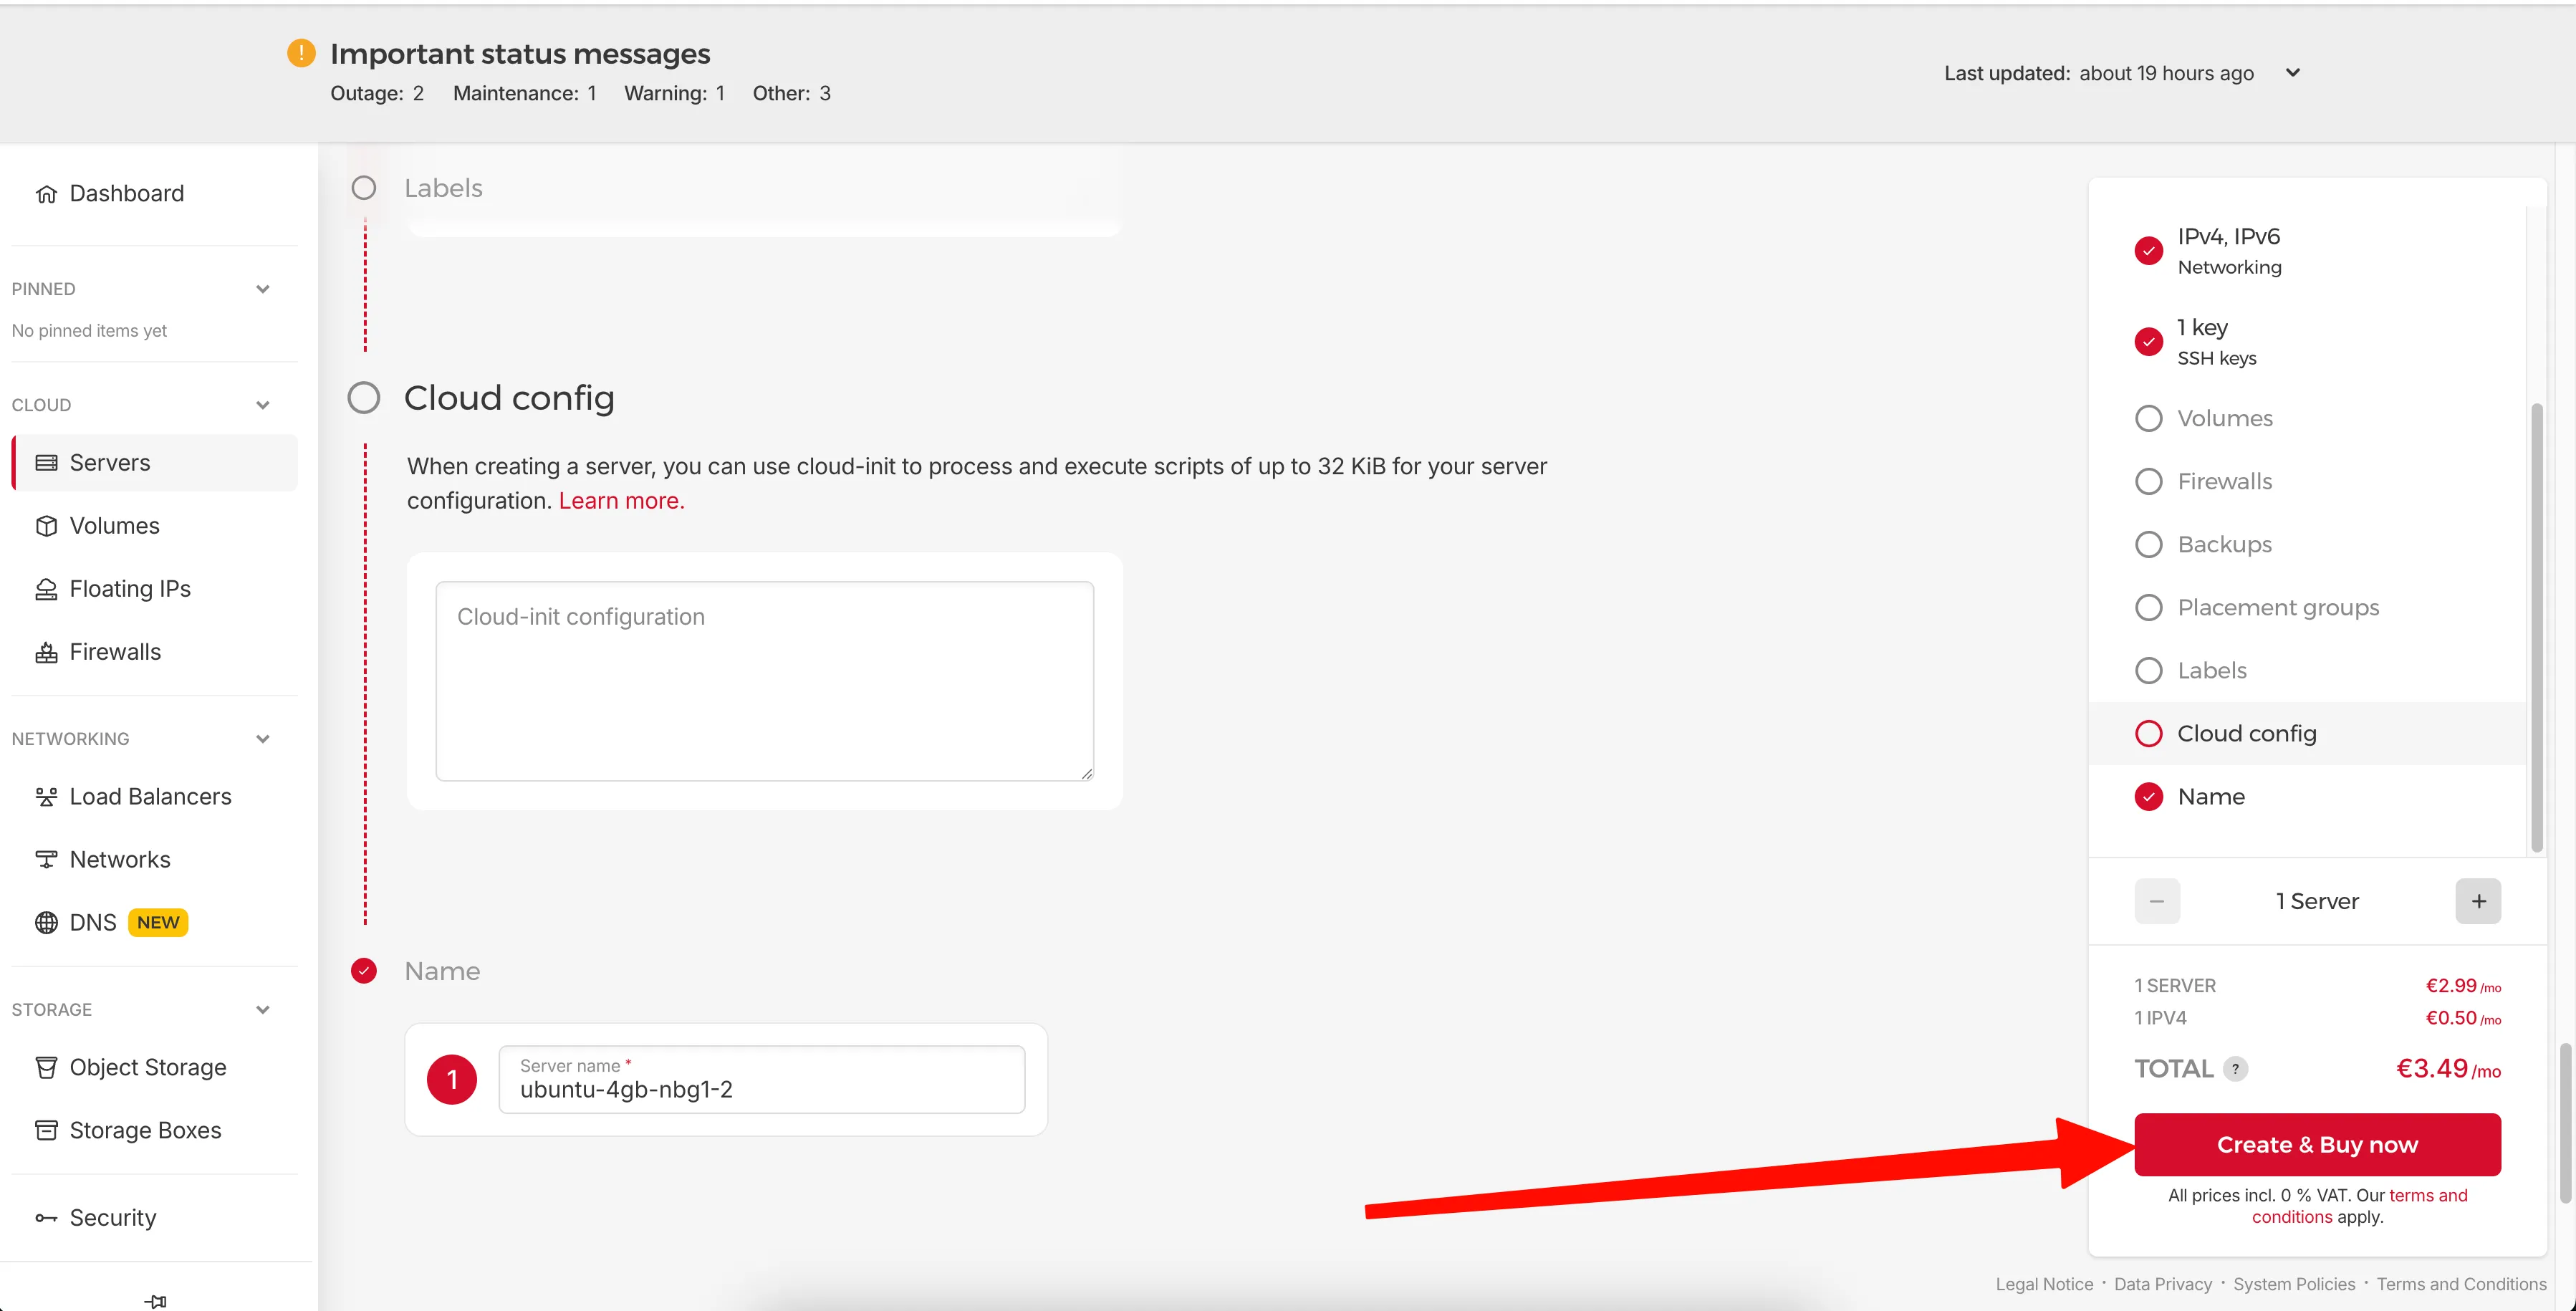 Name your server and click Create & Buy now
Get Your Server IP
Once created, you'll see your server's IP address in the overview. Copy this IP - you'll need it to connect via SSH.
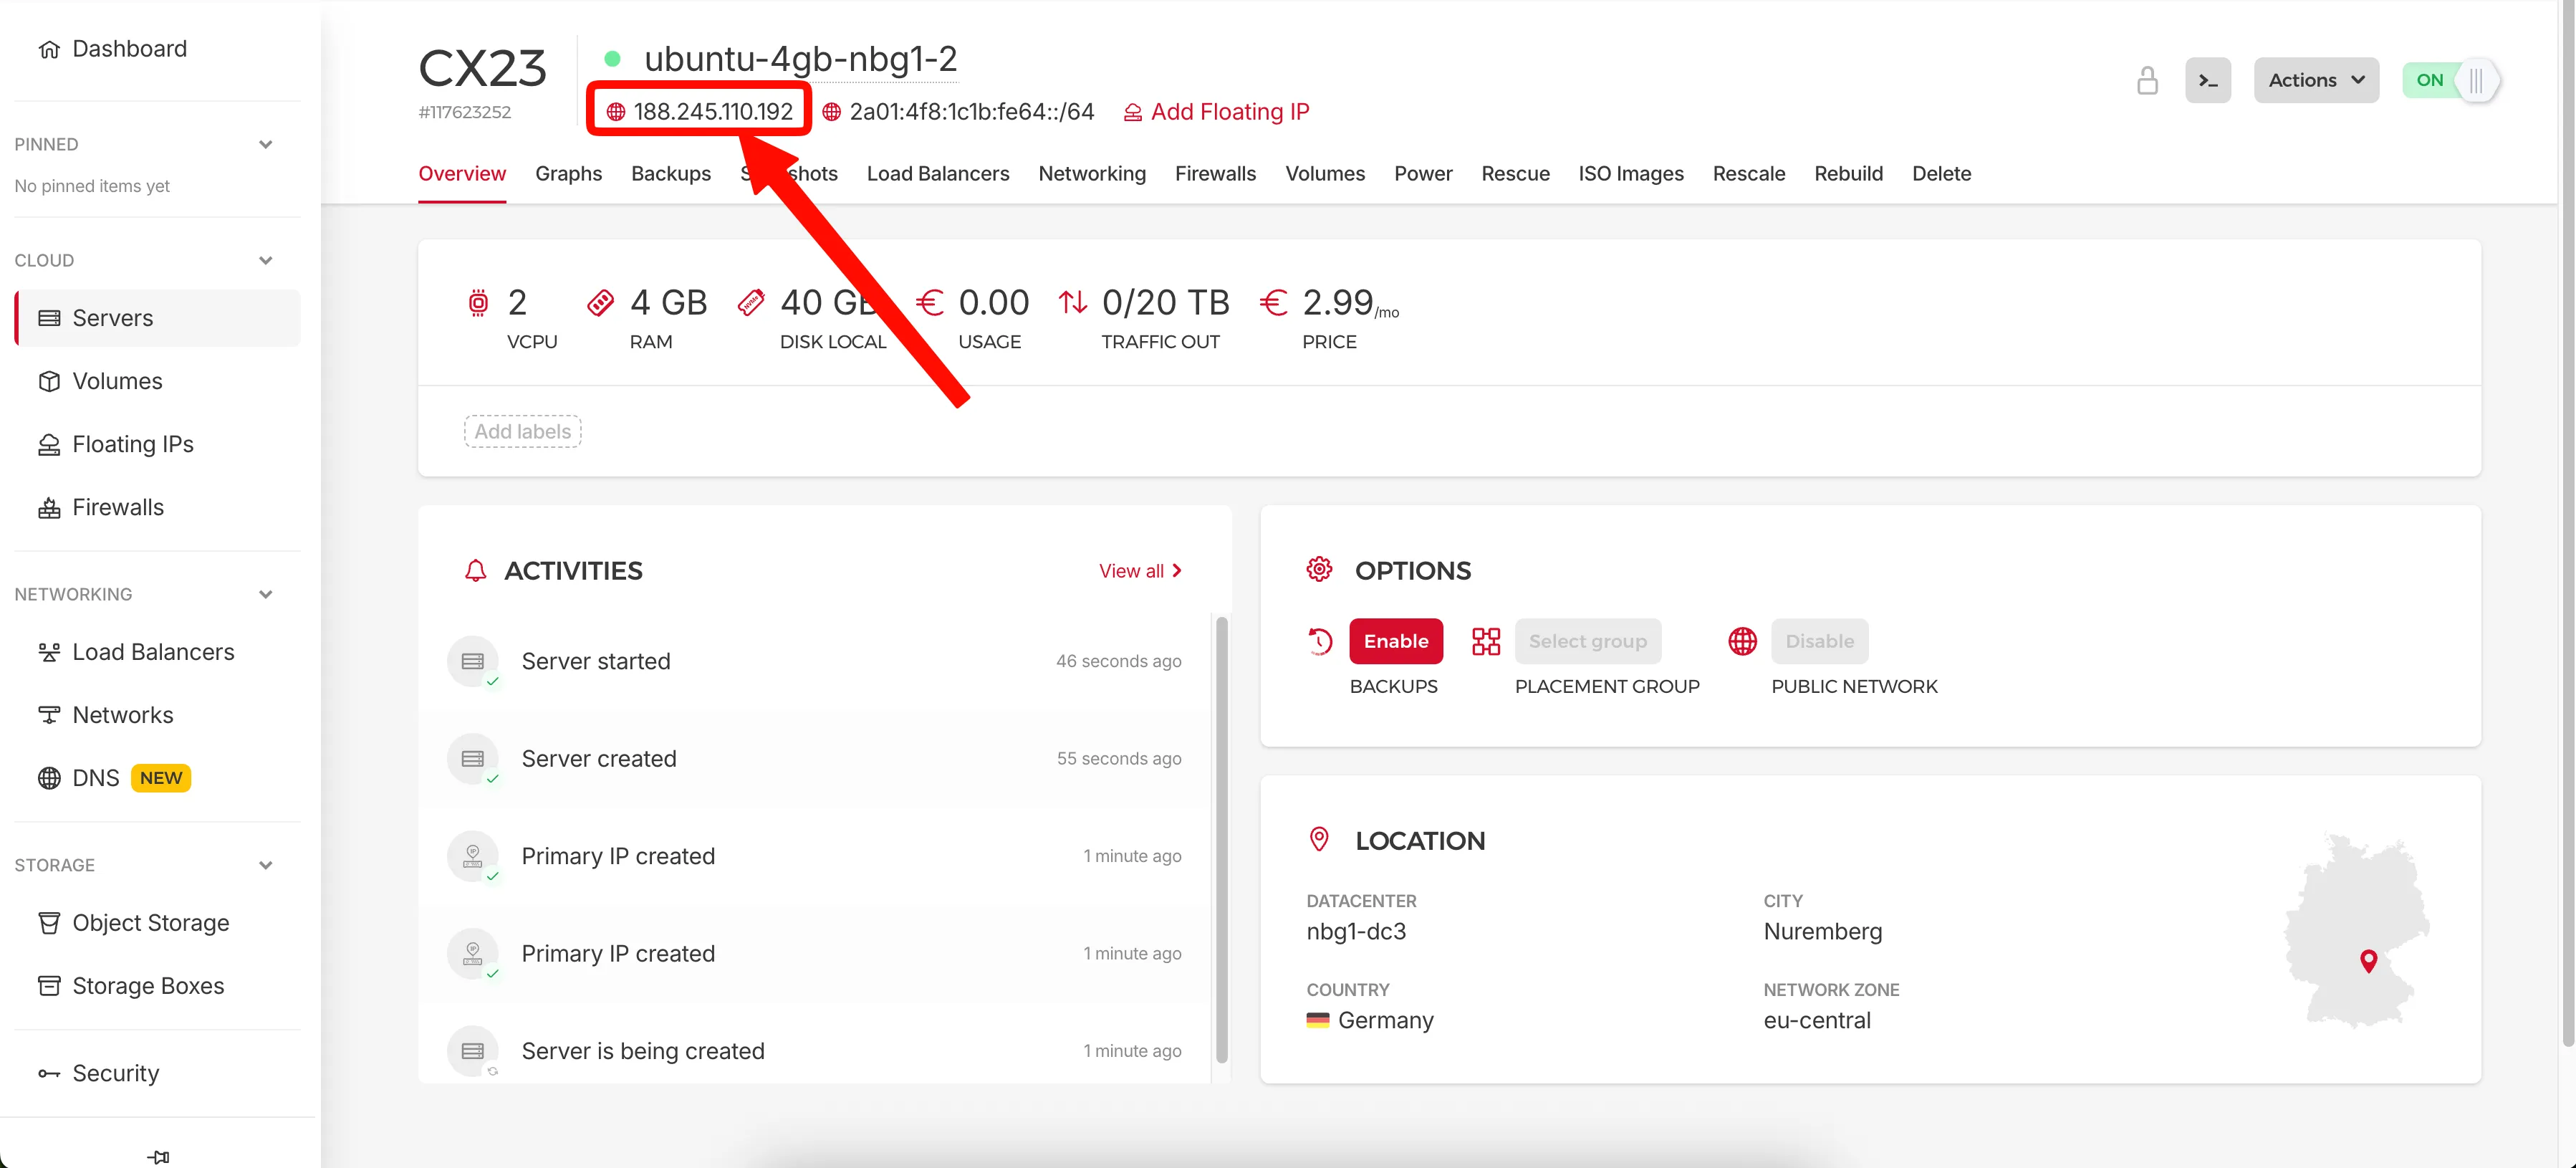 Copy your server's IP address
Connect via SSH
Now connect to your server using SSH:
ssh root@YOUR_SERVER_IP
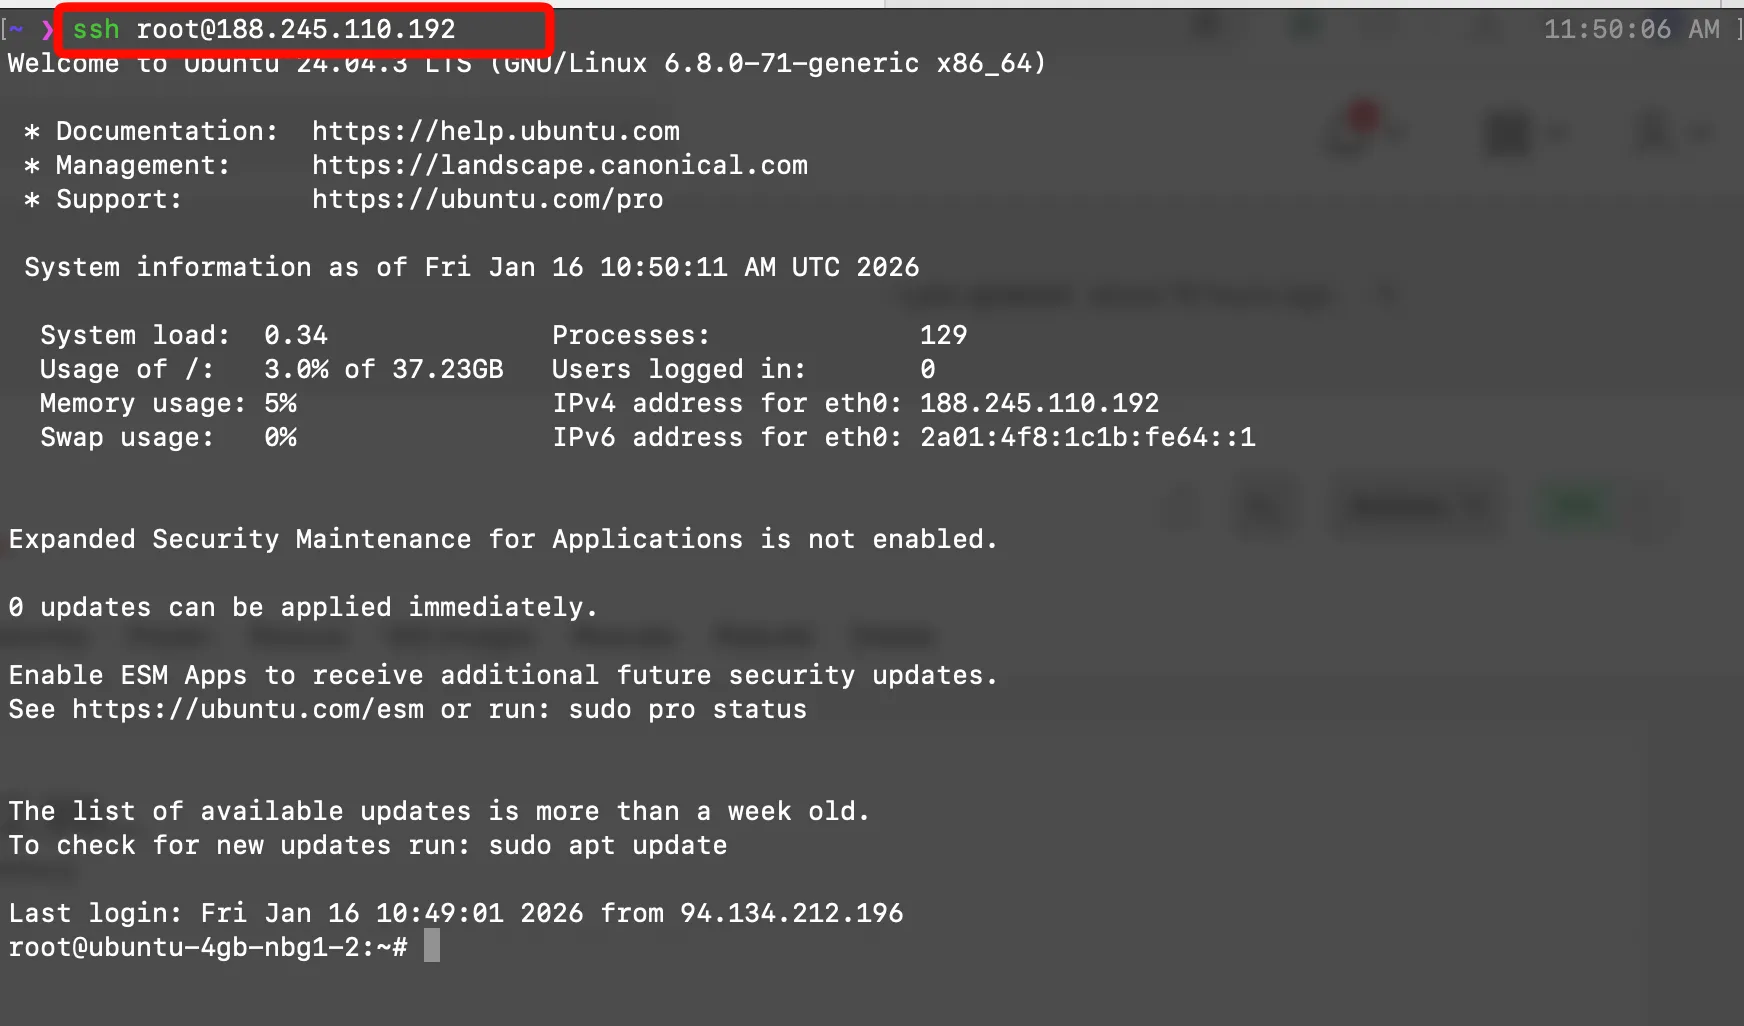 Successfully connected to your Ubuntu server
Step 1: Update Your Server
Once logged in, update the system to ensure it has the latest security patches and updates.
sudo apt-get update
sudo apt-get upgrade -y
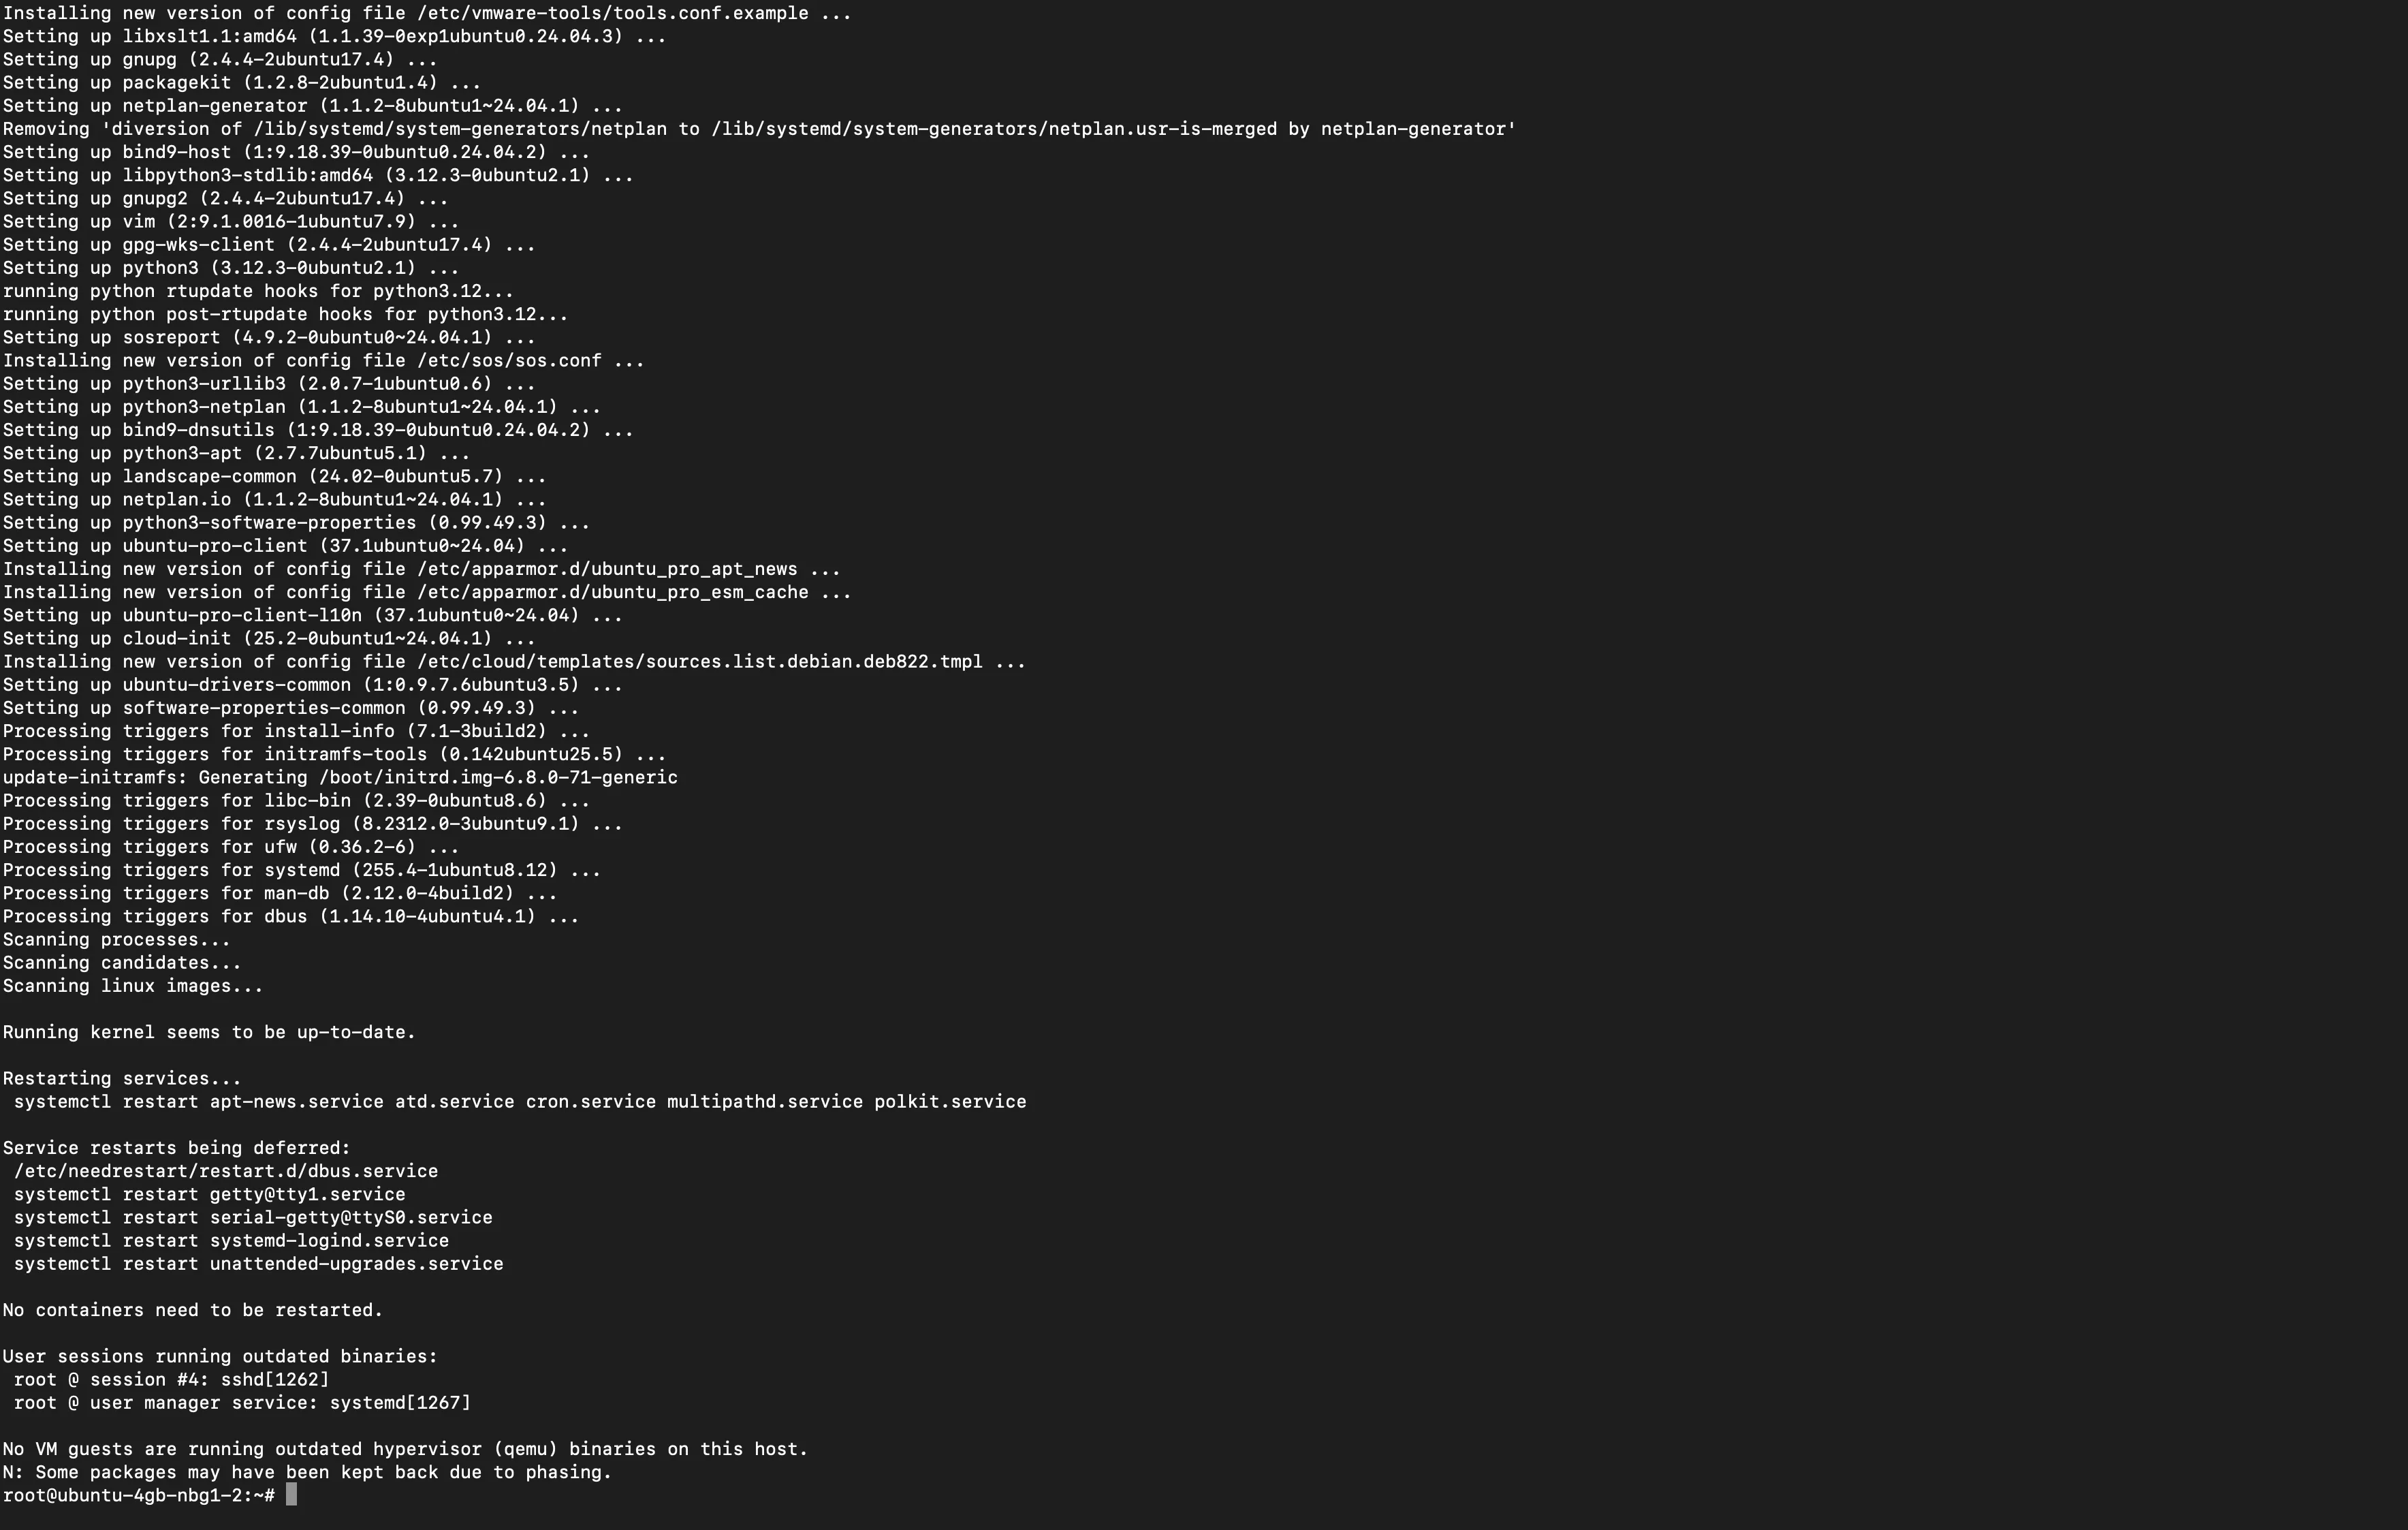 Server update completed
Once finished, your server is ready for installing the software.
Step 2: Install and Configure UFW Firewall
Only keep necessary ports open: SSH (22), HTTP (80), HTTPS (443).
Install UFW and configure the firewall as follows:
sudo apt install ufw -y
sudo ufw allow 22    # SSH
sudo ufw allow 80    # HTTP
sudo ufw allow 443   # HTTPS
sudo ufw enable
Check your firewall configuration:
sudo ufw status verbose
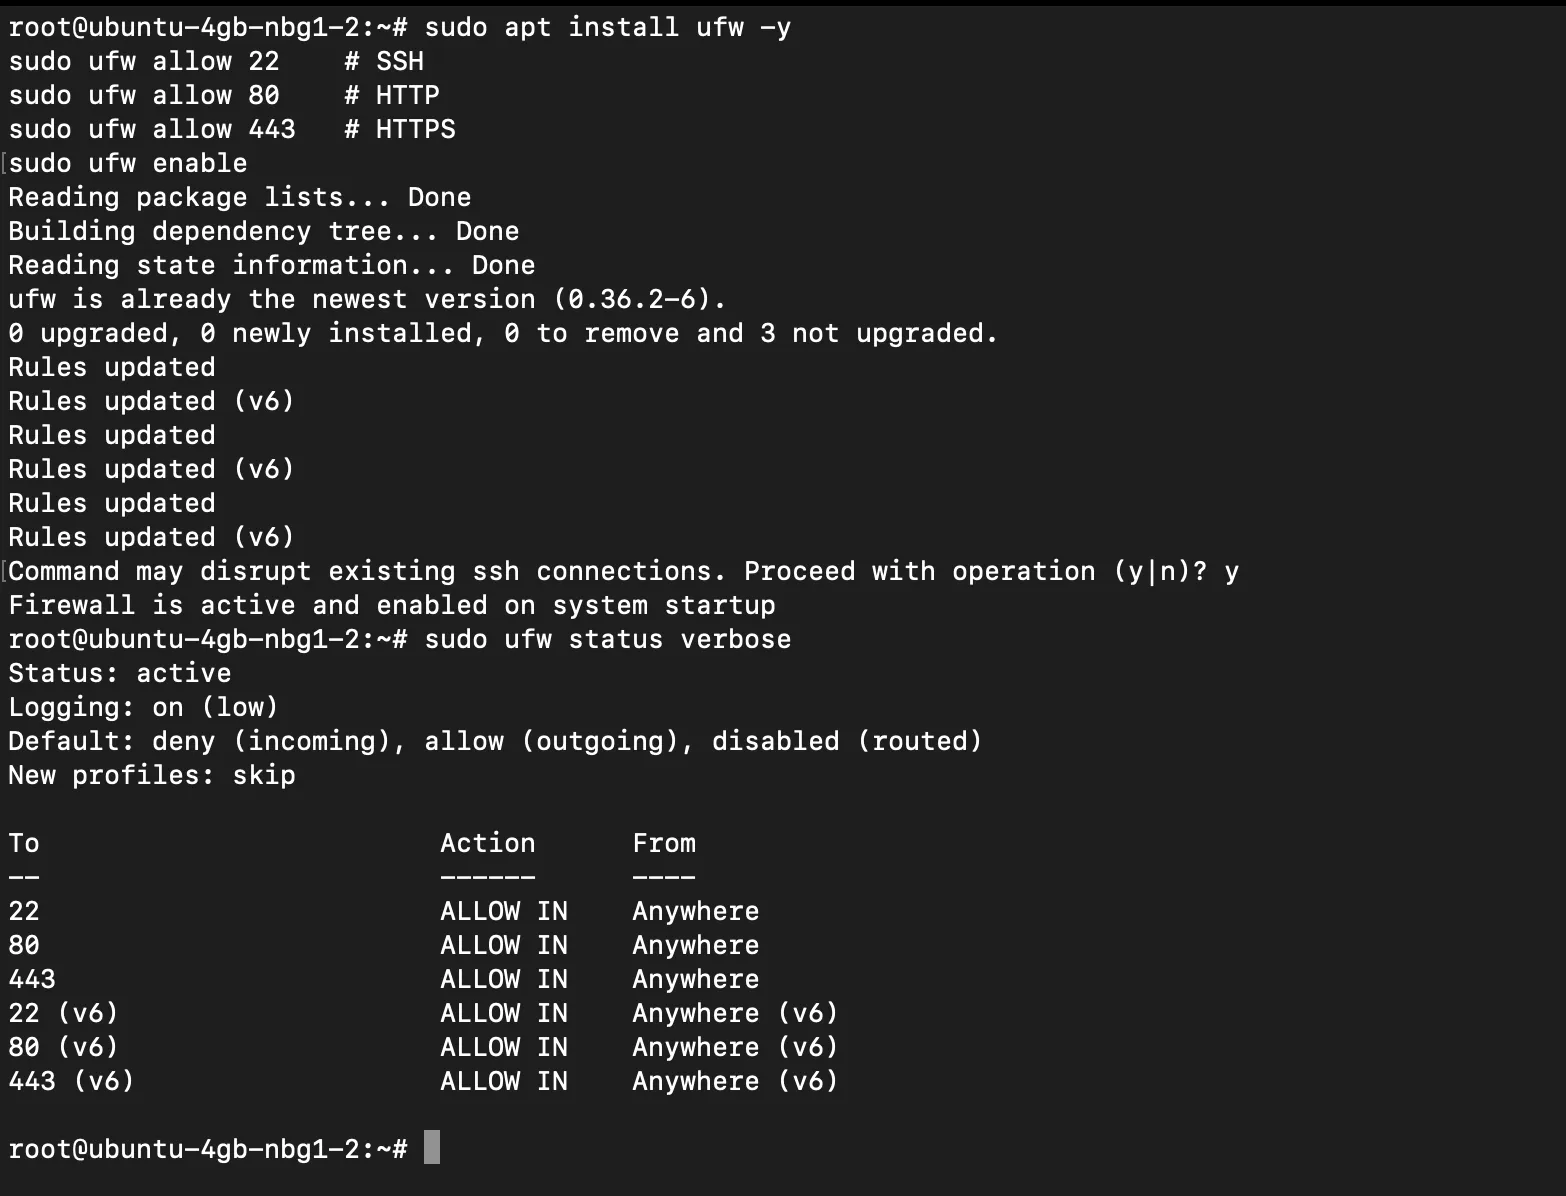 Firewall is active with ports 22, 80, and 443 open
Note: Docker can sometimes ignore UFW rules. To tackle this, verify extra settings as explained here.
Step 3: Docker Installation
Docker will be the container system running DocuSeal. Install Docker by running these commands:
Setup dependencies and Docker's GPG key:
sudo apt-get update
sudo apt-get install ca-certificates curl gnupg

sudo install -m 0755 -d /etc/apt/keyrings
curl -fsSL https://download.docker.com/linux/ubuntu/gpg \
| sudo gpg --dearmor -o /etc/apt/keyrings/docker.gpg
sudo chmod a+r /etc/apt/keyrings/docker.gpg
Add Docker repository:
echo \
  "deb [arch=$(dpkg --print-architecture) \
signed-by=/etc/apt/keyrings/docker.gpg] \
https://download.docker.com/linux/ubuntu \
$(. /etc/os-release && echo $VERSION_CODENAME) stable" \
| sudo tee /etc/apt/sources.list.d/docker.list > /dev/null

sudo apt-get update
Install Docker Engine and compose-plugin:
sudo apt-get install docker-ce docker-ce-cli \
containerd.io docker-buildx-plugin docker-compose-plugin -y
Check installation:
sudo docker run hello-world
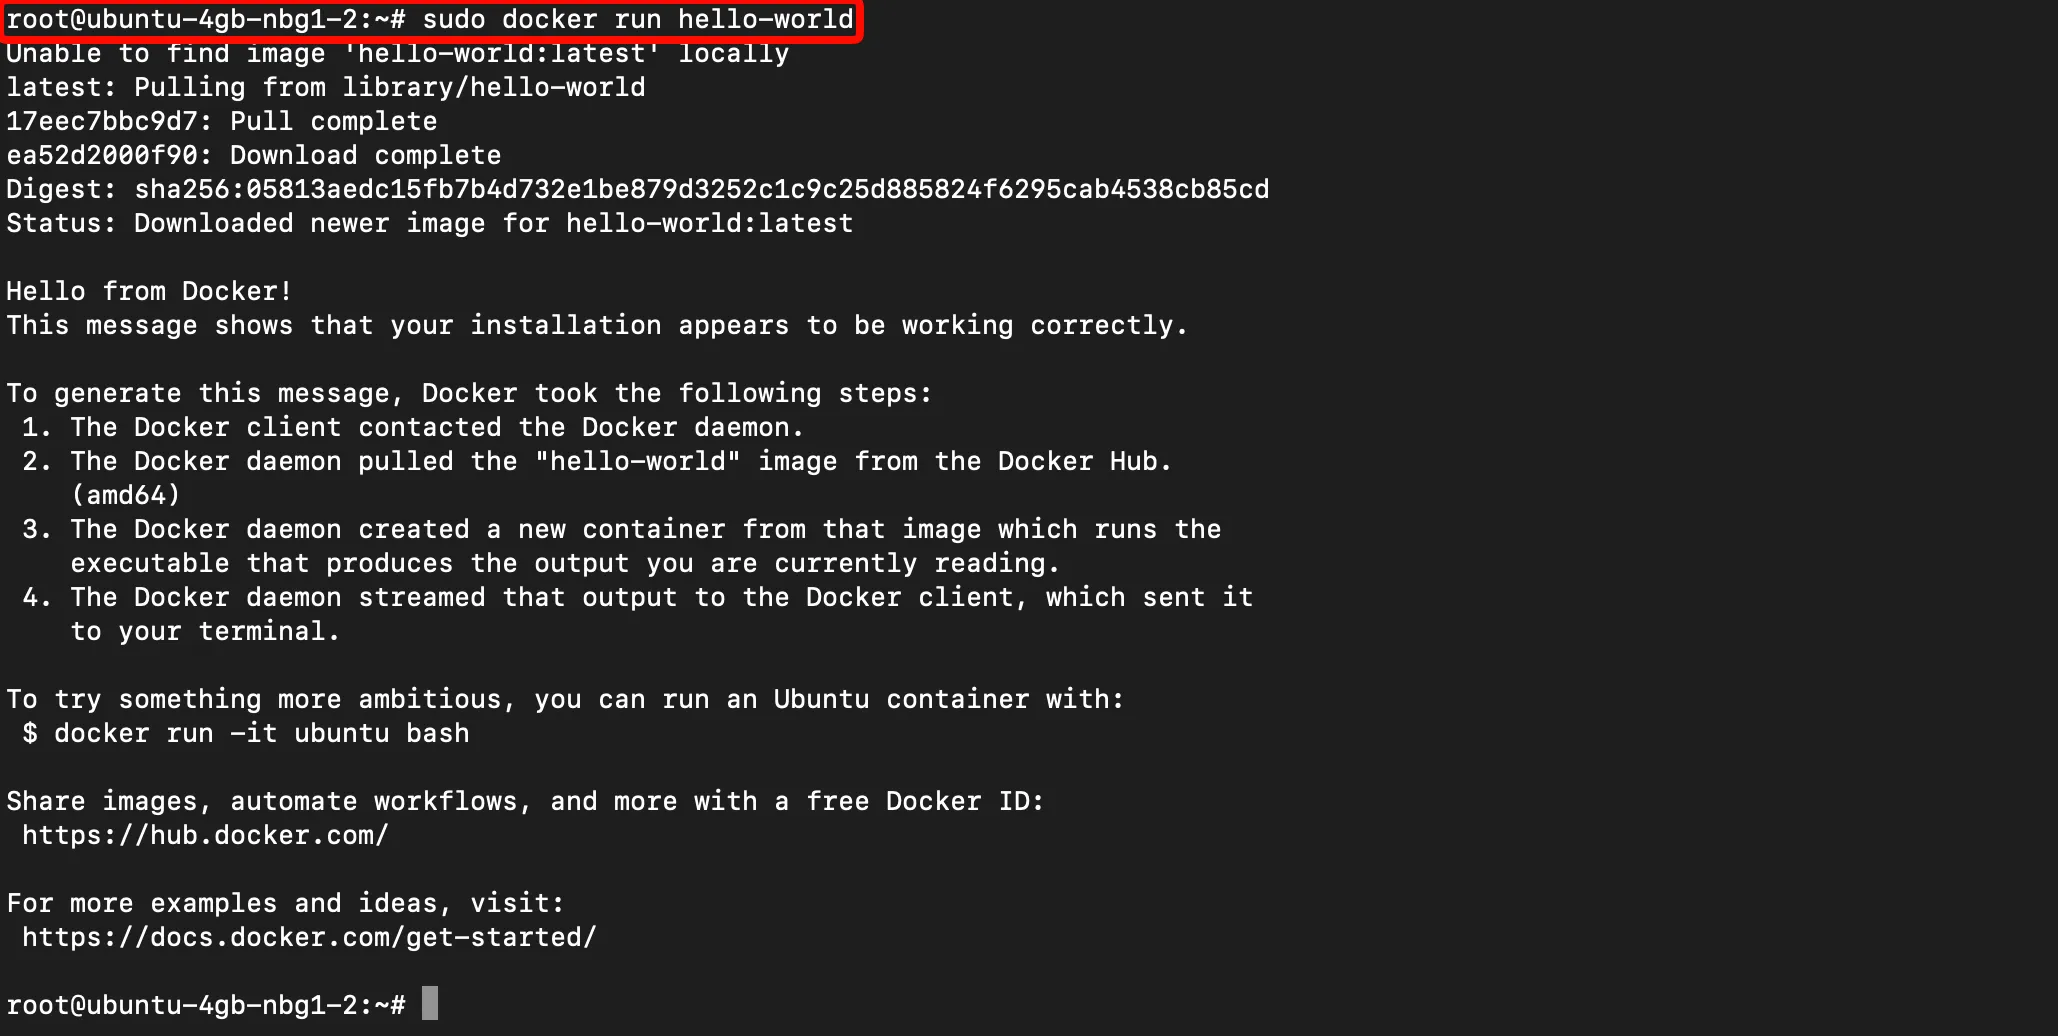 Docker is installed and working correctly
If you see the "Hello from Docker!" message, Docker is ready.
Step 4: Installing Caddy for Automatic HTTPS
Caddy simplifies HTTPS configuration since it handles SSL certificates automatically from Let's Encrypt.
Important: Before configuring Caddy with your domain, make sure you have pointed your domain's A record (for IPv4) and AAAA record (for IPv6) to your server's IP addresses. Without proper DNS configuration, Caddy won't be able to issue SSL certificates.
Install Caddy:
sudo apt install -y debian-keyring debian-archive-keyring apt-transport-https curl

curl -1sLf 'https://dl.cloudsmith.io/public/caddy/stable/gpg.key' \
| sudo gpg --dearmor -o /usr/share/keyrings/caddy-stable-archive-keyring.gpg

curl -1sLf 'https://dl.cloudsmith.io/public/caddy/stable/debian.deb.txt' \
| sudo tee /etc/apt/sources.list.d/caddy-stable.list

sudo apt update
sudo apt install caddy -y
Edit the Caddyfile configuration file:
sudo nano /etc/caddy/Caddyfile
Replace the contents with your domain name for automatic HTTPS:
yourdomain.com {
    reverse_proxy localhost:3000
}
Save the file (Ctrl+O, Enter, Ctrl+X) and restart Caddy:
sudo systemctl restart caddy
Step 5: Running DocuSeal with Docker Compose
We're going to use Docker Compose for easier setup. First create a directory for DocuSeal and navigate to it:
mkdir ~/docuseal
cd ~/docuseal
Create compose.yml:
nano compose.yml
Add the following content:
services:
  docuseal:
    image: docuseal/docuseal:2.2.9
    restart: always
    ports:
      - "3000:3000"
    volumes:
      - docuseal_data:/data

volumes:
  docuseal_data:
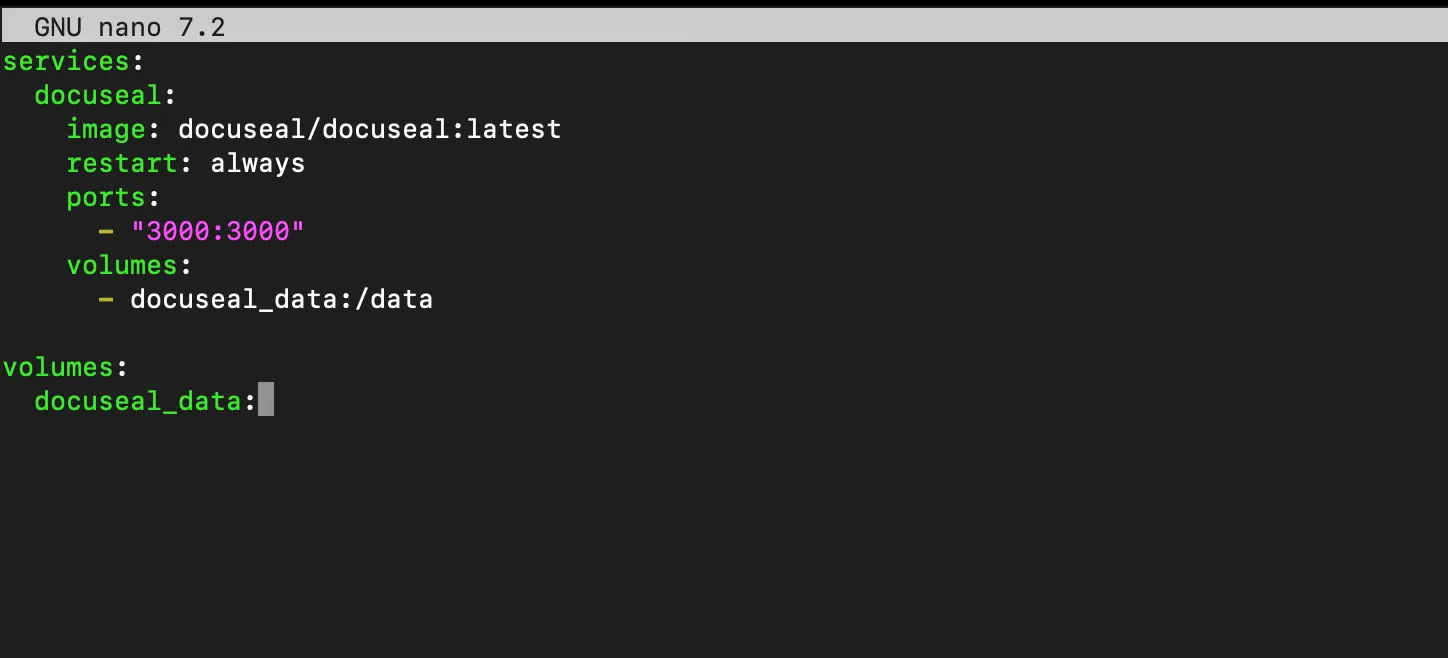 compose.yml for DocuSeal
Save the file and deploy DocuSeal:
sudo docker compose up -d
Docker pulls the DocuSeal image and runs it in background mode using port 3000.
Step 6: Accessing Your Self-Hosted DocuSeal Instance
Visit your server's IP address (or domain) in any web browser. Your DocuSeal instance should now load successfully. Follow the setup steps in the interface to create your admin account.
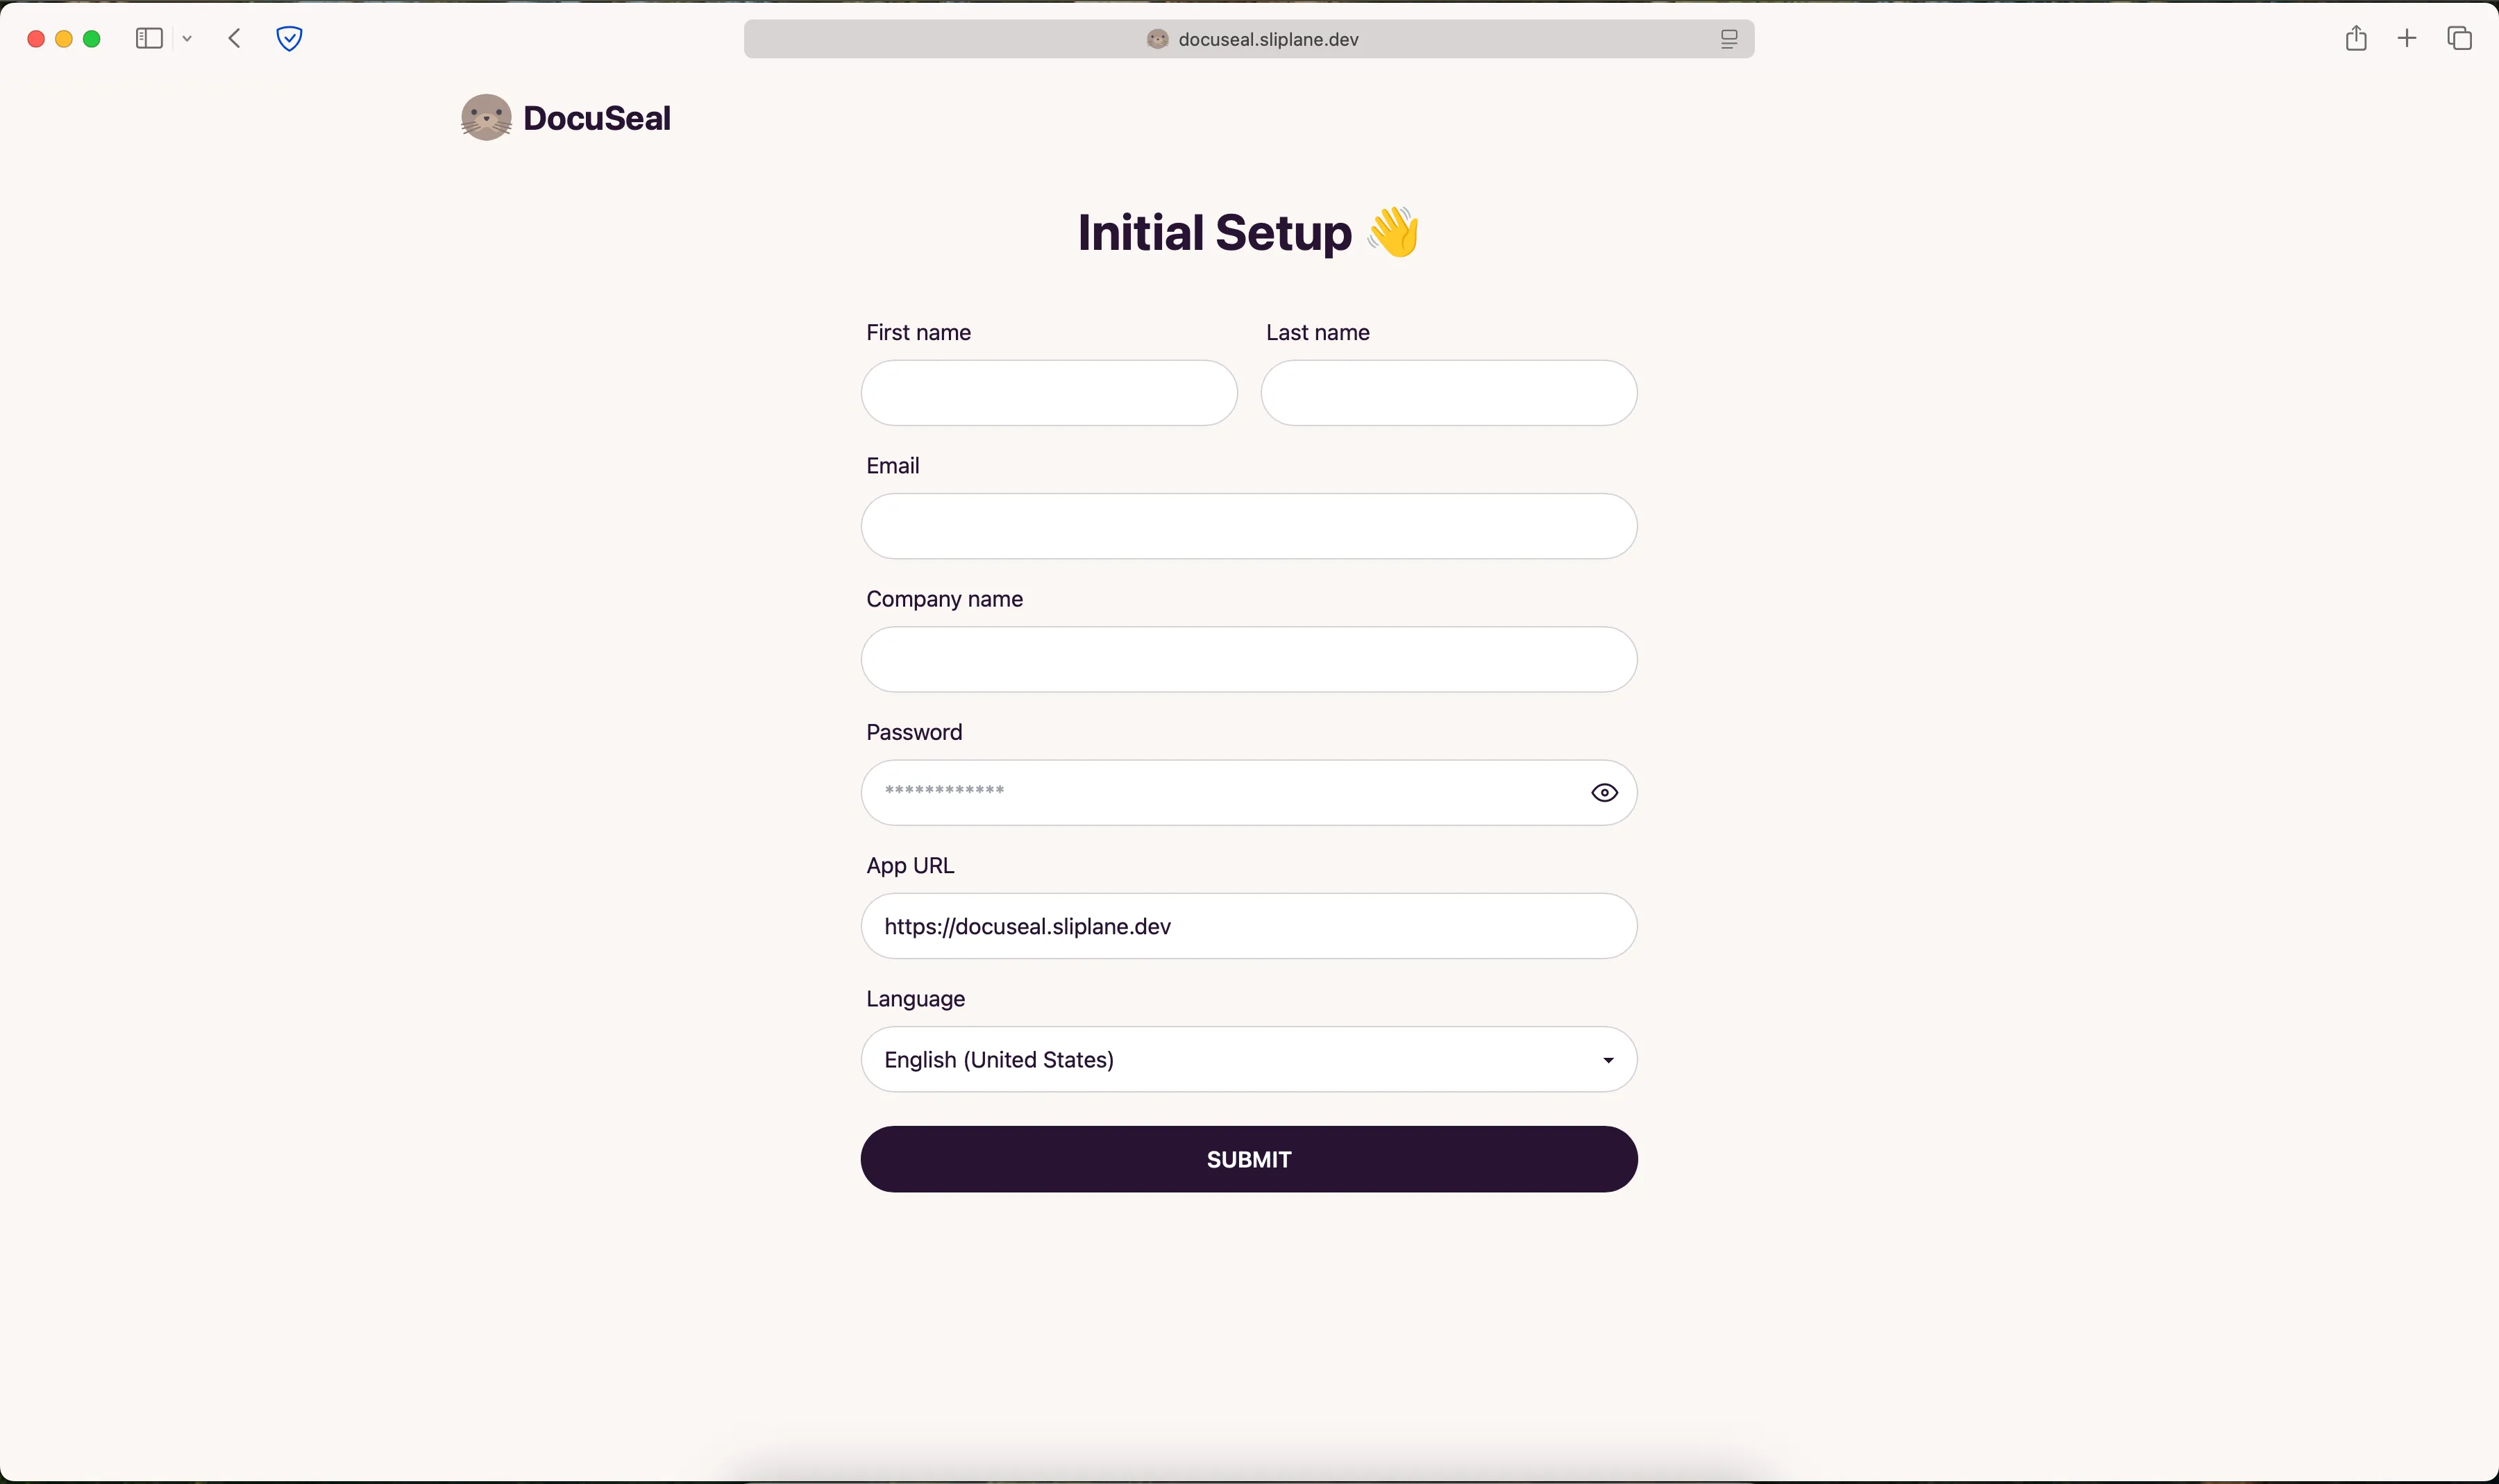 DocuSeal Initial Setup - Create your admin account
After completing the setup, you'll be taken to the Document Templates page where you can start creating and managing your documents!
 DocuSeal is ready to use! Start uploading documents
🎉 Congratulations! You now have your own self-hosted DocuSeal instance running on Ubuntu!
Using PostgreSQL Instead of SQLite (Optional)
By default, DocuSeal uses SQLite which is perfect for small to medium deployments. For production environments or larger scale usage, you can configure DocuSeal to use PostgreSQL.
First, update your compose.yml to include PostgreSQL:
services:
  docuseal:
    image: docuseal/docuseal:2.2.9
    restart: always
    depends_on:
      - postgres
    ports:
      - "3000:3000"
    volumes:
      - docuseal_data:/data
    environment:
      - DATABASE_URL=postgres://docuseal:your_secure_password@postgres:5432/docuseal

  postgres:
    image: postgres:16
    restart: always
    volumes:
      - postgres_data:/var/lib/postgresql/data
    environment:
      - POSTGRES_USER=docuseal
      - POSTGRES_PASSWORD=your_secure_password
      - POSTGRES_DB=docuseal

volumes:
  docuseal_data:
  postgres_data:
Make sure to replace your_secure_password with a strong password.
Then restart the services:
sudo docker compose down
sudo docker compose up -d
Configuring Email Notifications (Optional)
DocuSeal can send email notifications for document signing events. Add SMTP settings to your compose.yml:
services:
  docuseal:
    image: docuseal/docuseal:2.2.9
    restart: always
    ports:
      - "3000:3000"
    volumes:
      - docuseal_data:/data
    environment:
      - SMTP_ADDRESS=smtp.example.com
      - SMTP_PORT=587
      - SMTP_USERNAME=your-email@example.com
      - SMTP_PASSWORD=your-password
      - SMTP_DOMAIN=your-domain.com

volumes:
  docuseal_data:
Security Recommendations
Public servers should always be secure. The following practices are recommended:
- Regularly apply updates and security patches.
- Set strong passwords and control user access.
- Monitor server logs for suspicious activity.
- Install tools like Fail2ban for extra security.
- Keep your Docker images updated.
- Set up regular backups of your
/datavolume. Check out our guide on 4 Easy Ways to Backup Docker Volumes for backup strategies.
Updating your DocuSeal Installation
Since we're using a specific version tag (2.2.9), you'll need to manually update the tag when a new version is released.
- Check for new versions on DocuSeal's DockerHub page
- Update the image tag in your
compose.ymlfile (e.g., change2.2.9to the new version) - Pull and restart:
cd ~/docuseal
sudo docker compose pull
sudo docker compose up -d
Docker will download the new version and replace your current container.
Tip: If you prefer automatic updates and don't mind potential breaking changes, you can use the
latesttag instead of a specific version. However, using specific version tags is recommended for production environments as it gives you more control over updates.
Cost Comparison with SaaS Alternatives
Self-hosting DocuSeal typically results in massive savings compared to SaaS document signing services:
| Service | Monthly Cost | Documents/Month | Custom Branding | Data Location |
|---|---|---|---|---|
| DocuSign | €45–€65+ | Limited | Paid plans only | US servers |
| HelloSign | €25–€65+ | Limited | Paid plans only | US servers |
| PandaDoc | €35–€65+ | Limited | Paid plans only | US servers |
| Hetzner (self-hosted) | ~€3–5 | Unlimited | Free | Your servers |
Cost Comparison with Managed Hosting Platforms
If you prefer managed hosting over self-hosting, here's how the costs compare:
| Provider | vCPU Cores | RAM | Disk | Estimated Monthly Cost |
|---|---|---|---|---|
| Render.com | 1 | 2 GB | 40 GB | ~€35–€45 |
| Fly.io | 2 | 2 GB | 40 GB | ~€20–€25 |
| Railway | 2 | 2 GB | 40 GB | ~€15–€66* |
| sliplane.io | 2 | 2 GB | 40 GB | ~€9/month flat |
*Note: Railway charges for actually used memory and CPU time. €66 is the max price, actual price might vary.
With self-hosting on Hetzner (as shown in this guide), you can get similar specs for just ~€3/month — but you're responsible for all the setup and maintenance. Managed platforms handle that for you at a higher price point.
Troubleshooting
DocuSeal container won't start
Check the logs for errors:
sudo docker compose logs docuseal
Can't access DocuSeal from browser
- Make sure your firewall allows ports 80 and 443
- Verify Caddy is running:
sudo systemctl status caddy - Check if DocuSeal is running:
sudo docker compose ps - Ensure your DNS is pointing to your server's IP address
SSL certificate issues
Caddy automatically handles SSL certificates, but if you're having issues:
- Make sure your domain DNS is properly configured
- Check Caddy logs:
sudo journalctl -u caddy - Ensure ports 80 and 443 are open and not blocked by your hosting provider
Now you have your own self-hosted DocuSeal instance running on Ubuntu! Start creating document templates and sending them for signatures.
If managing and securing your own server is a bit too much for you, check out how easy it is to deploy a managed instance of DocuSeal on Sliplane - it takes just 25 seconds!
Cheers, Atakan