How to Deploy Flowise
 Yulei Chen
Flowise is a powerful open-source platform that enables you to build AI agents visually. Depending on your infrastructure and usage requirements, Flowise can be deployed in multiple ways. This guide will introduce two ways to deploy Flowise:
- Locally, using Docker Compose
- In the cloud, using Sliplane (the easy / production-ready way)
If you want to try Flowise on your machine, go local. If you need a public URL with less setup, skip to the cloud section.
Deploy locally
In this section, we’ll deploy Flowise locally with Docker Compose. We’ll provide a minimal, working compose file and walk through a few common Docker Compose commands. By the end, you’ll have a running local setup.
Prerequisites
Before we get started, make sure you have Docker Desktop installed and running.
Step 1: Create the Docker Compose file
Create a file named compose.yml, then copy the following code into your file:
services:
    flowise:
        image: flowiseai/flowise:3.0.12
        ports:
            - 3000:3000
This is the minimum setup needed to get Flowise running.
Step 2: Start the service
Run the following command in the same directory as your compose.yml:
docker compose up -d
The -d indicates that the service is running in the background, so if you want to check if it's running:
docker compose ps
You should see the flowise service marked as Up, then you can open your browser and go to http://localhost:3000.
Logs can be checked with:
docker compose logs -f
The -f flag streams the logs in real time, just like tail -f, so you can watch new log output as it happens.
To stop and remove the service:
docker compose down
Further steps (recommended)
By default, Flowise stores data inside the container. This means all data will be lost if the container is removed. To persist data across deploys and restarts, mount a volume and set the required environment variables:
services:
    flowise:
        image: flowiseai/flowise:3.0.12
        ports:
            - 3000:3000
        volumes:
            - ~/.flowise:/root/.flowise
        environment:
            - DATABASE_PATH=/root/.flowise
            - SECRETKEY_PATH=/root/.flowise
            - LOG_PATH=/root/.flowise/logs
            - BLOB_STORAGE_PATH=/root/.flowise/storage
This setup ensures:
- Your database persists
- Secrets don’t reset
- Logs and file uploads are kept between restarts
Deploy with Sliplane
Sliplane is a fully managed Container-as-a-Service platform that makes hosting Docker containers ridiculously simple.
Sliplane supports one-click deployment for Flowise. All you need to do is:
- Go to container.new/flowise
- Select a project
- Select a server
- Click Deploy!
The deployment will start immediately and you’ll be redirected to your project page, where you can see the deployment status.

Once it changes to "Successful", you can visit the domain

and your Flowise is right there! 🎉
Further steps
From the Sliplane project settings,
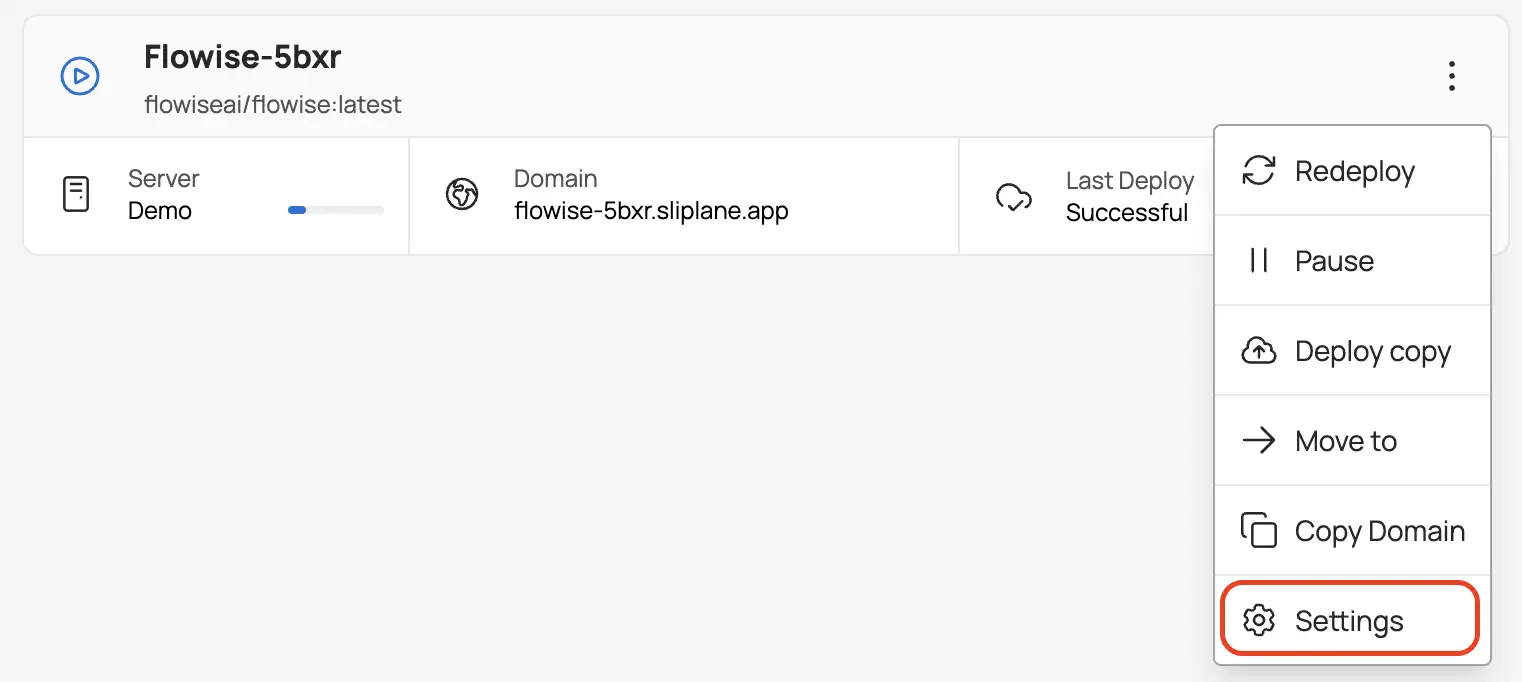
you can:
- Add, remove, or edit environment variables
- Add healthchecks
- View container logs
... and more.
FAQ
Q: Is Flowise free? A: Flowise is open-source and free to self-host. If you self-host Flowise on Sliplane, there is no Flowise license cost.
Q: What is Sliplane pricing like? A: Sliplane uses simple, server-based pricing. You pay for the server you run, and you can deploy unlimited containers on that server at no extra cost. The monthly cost of Sliplane is €9. You can try Sliplane for free for 2 days.
Q: What is the difference between Flowise and n8n? A: Flowise is AI-first and designed for building LLM-based apps like chatbots and agents, while n8n is a general-purpose automation tool focused on integrating services and orchestrating workflows. By the way, just like Flowise, n8n can also be deployed seamlessly on Sliplane. Check out here to deploy your n8n workflows with Sliplane preset in just 1 click.